Have you ever stared at a beautiful flounder fillet at the seafood counter, only to walk away because you weren’t quite sure how to cook it? I certainly have. For years, I avoided preparing flounder at home, worried I’d ruin such a delicate fish. But after countless attempts (and yes, a few failures), I’ve mastered what I believe is the absolute perfect pan-fried flounder recipe.
Flounder is a mild, sweet-tasting flatfish with a tender texture that deserves to be showcased, not masked. This recipe celebrates its delicate flavor with a simple lemon butter sauce that enhances without overpowering. The quick cooking method preserves the fish’s moisture while creating a beautiful golden crust that adds just the right texture contrast.
Why You’ll Love This Recipe
What makes this pan-fried flounder recipe special? Let me count the ways:
- Quick preparation: From start to finish in under 20 minutes
- Simple ingredients: Pantry staples combine to create extraordinary flavor
- Foolproof technique: Even novice fish-cookers will succeed
- Versatile serving options: Pairs with countless side dishes
- Restaurant-quality results: Impress family and friends with minimal effort
I’ve refined this recipe through years of testing, and I’m excited to share my tips and tricks so you can avoid the mistakes I made along the way. Let’s dive into everything you need to know to prepare the most delicious flounder you’ve ever tasted.
What Is Flounder?
Before we get cooking, let’s talk about our star ingredient. Flounder is a flatfish with both eyes on one side of its body—a quirky evolutionary adaptation that allows it to lie flat on the ocean floor. This distinctive appearance doesn’t impact its culinary appeal, though.
Flounder definitions to know: Summer flounder : Also known as fluke, primarily found along the Atlantic coast from North Carolina to Massachusetts.
Southern flounder : Commonly found in the Gulf of Mexico and along the South Atlantic states.
Pacific flounder : Several species are found along the Pacific coast, including California flounder and arrowtooth flounder.
All varieties share these characteristics that make them ideal for pan-frying:
- Delicate, mild flavor
- Lean white flesh
- Thin fillets that cook quickly
- Tender texture that flakes easily when cooked
Flounder’s mild flavor makes it an excellent canvas for various seasonings, but I find the classic lemon-butter combination truly showcases its natural sweetness.
Ingredients You’ll Need
For this recipe, I’ve kept the ingredient list intentionally simple. Quality matters more than quantity here, especially with the flounder itself.
For the fish:
- 4 flounder fillets (about 1.5 pounds total)
- 1/2 cup all-purpose flour
- 1 teaspoon kosher salt
- 1/2 teaspoon freshly ground black pepper
- 1/4 teaspoon paprika (sweet or smoked)
- 2 tablespoons olive oil
- 2 tablespoons unsalted butter
For the lemon butter sauce:
- 4 tablespoons unsalted butter
- Juice of 1 large lemon (about 3 tablespoons)
- 2 tablespoons fresh parsley, finely chopped
- 1 clove garlic, minced
- 1/4 teaspoon red pepper flakes (optional)
- Salt and pepper to taste
For garnish:
- Lemon wedges
- Additional fresh parsley
- Capers (optional but highly recommended)
Choosing the Best Flounder
When purchasing flounder, freshness is paramount. Here’s what to look for:
- Appearance: The flesh should be translucent and shiny, not dull or opaque
- Smell: Fresh flounder has a mild, clean ocean scent—never fishy
- Texture: The flesh should be firm and spring back when touched
- Source: If possible, purchase from a reputable fishmonger who can tell you when and where the fish was caught
I prefer buying flounder fillets with the skin removed, which simplifies preparation. However, if you can only find skin-on fillets, don’t worry—I’ll explain how to handle those as well.
If fresh flounder isn’t available, frozen is a perfectly acceptable alternative. Just ensure it’s properly thawed in the refrigerator overnight before cooking.
Essential Equipment
One of the beauties of this recipe is its simplicity—you don’t need specialized equipment. Here’s what I use:
- Large non-stick skillet: A 12-inch skillet provides enough space to cook multiple fillets without crowding
- Fish spatula: The thin, flexible edge makes flipping delicate fillets easier
- Small saucepan: For preparing the lemon butter sauce
- Instant-read thermometer: Optional but useful for ensuring perfect doneness
- Paper towels: For patting the fish dry
- Shallow dishes: For the flour dredging mixture
If you don’t have a fish spatula, any wide, thin spatula will work—just be gentle when flipping the fillets.
Preparation Steps
Step 1: Prepare the Fish
The first step is crucial for achieving that perfect golden crust:
- Remove the flounder fillets from the refrigerator 15-20 minutes before cooking to take the chill off
- Pat the fillets very dry with paper towels (moisture is the enemy of crispy fish)
- Inspect for any remaining bones and remove them with fish tweezers or clean needle-nose pliers
- If using skin-on fillets, use a sharp knife to score the skin side in a crosshatch pattern (this prevents curling)
Step 2: Season and Dredge
In a shallow dish, combine:
- 1/2 cup all-purpose flour
- 1 teaspoon kosher salt
- 1/2 teaspoon freshly ground black pepper
- 1/4 teaspoon paprika
Mix these ingredients thoroughly with a fork. Then:
- Season both sides of the fish fillets lightly with additional salt and pepper
- One at a time, place each fillet in the flour mixture
- Coat completely, shaking off any excess flour
- Set dredged fillets on a clean plate
This light coating creates a protective barrier that helps seal in moisture while creating a beautiful golden exterior. The key is a thin, even coating—shake off any excess flour to prevent a gummy texture.
Step 3: Heat the Pan
Proper pan temperature is essential for perfect flounder:
- Place a large non-stick skillet over medium-high heat
- Add 2 tablespoons olive oil and 2 tablespoons butter
- Heat until the butter is melted and the mixture is hot but not smoking
- Test the temperature by sprinkling a tiny bit of flour into the pan—it should sizzle immediately
The combination of oil and butter gives us the best of both worlds—the higher smoke point of olive oil prevents the butter from burning, while the butter provides rich flavor and promotes browning.
Cooking Process
Now for the main event—cooking the fish to perfection:
- Carefully place the dredged fillets in the hot pan, presentation side down first (usually the side that was facing up on the fish)
- Cook for 2-3 minutes until golden brown (cooking time depends on thickness)
- Using a fish spatula, gently flip each fillet
- Cook for an additional 2 minutes on the second side
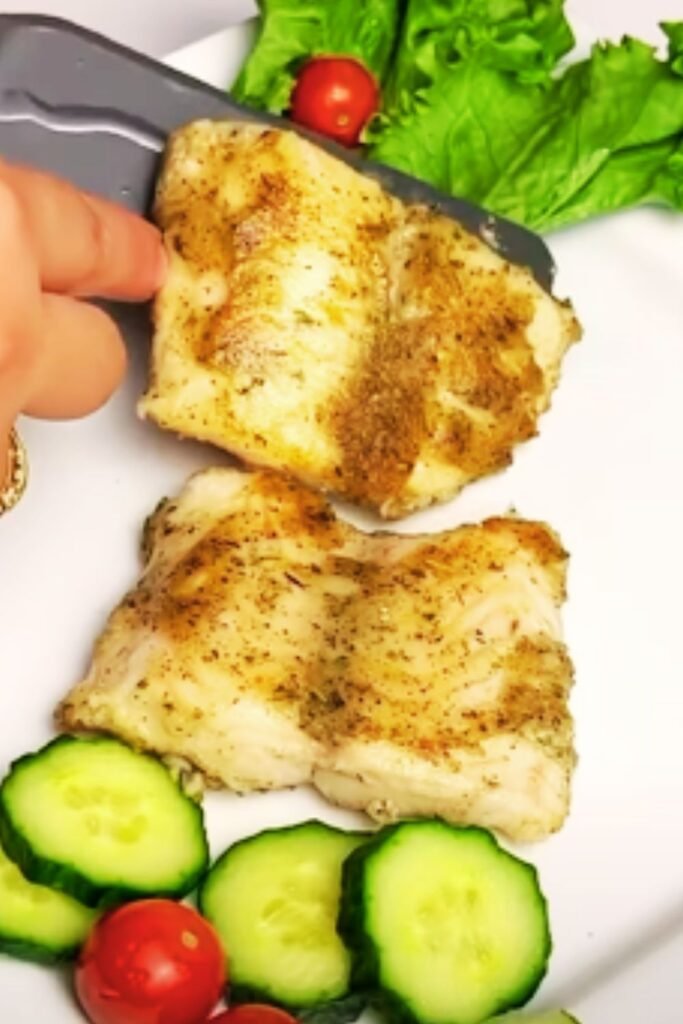
- The fish is done when it’s opaque and flakes easily with a fork
- The internal temperature should reach 140°F (60°C)
- Transfer cooked fillets to a warm plate and cover loosely with foil
Crucial tip: Don’t overcrowd the pan. Cook in batches if necessary to ensure each fillet has plenty of space. Overcrowding leads to steaming rather than frying, preventing that perfect golden crust from forming.
Watch for These Visual Cues
You’ll know the flounder is nearly ready to flip when:
- The edges begin to turn opaque
- The bottom third of the fillet changes from translucent to opaque
- Small bubbles form around the edges of the fish
And you’ll know it’s fully cooked when:
- The entire fillet is opaque
- It flakes easily when gently prodded with a fork
- The thickest part reaches 140°F
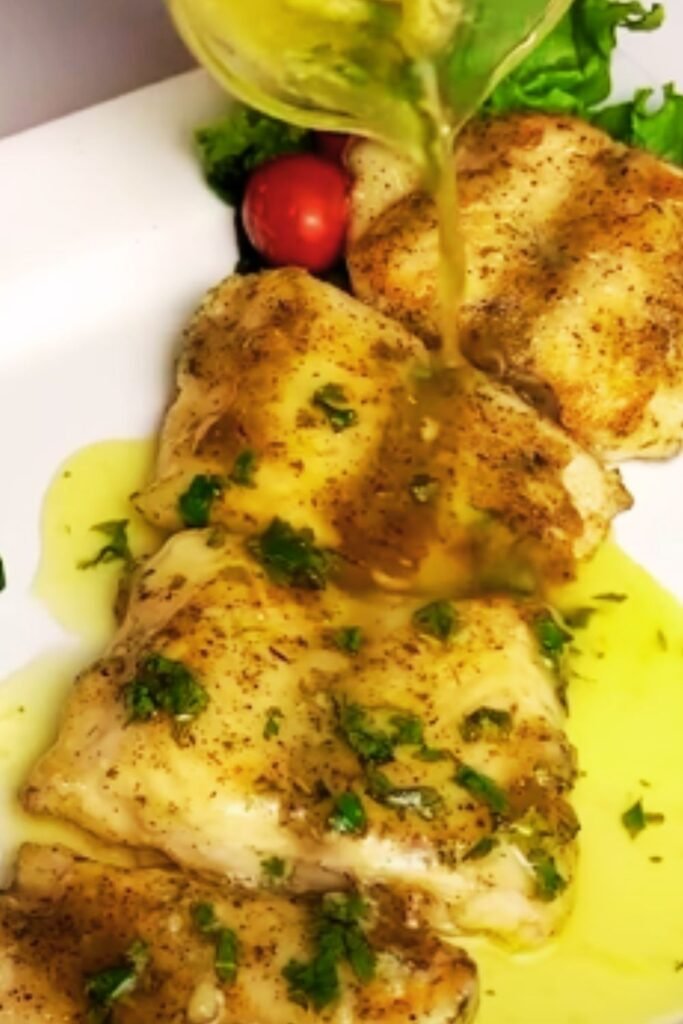
Creating the Lemon Butter Sauce
While the fish rests, prepare the sauce:
- In a small saucepan over medium-low heat, melt 4 tablespoons butter
- Add minced garlic and cook for 30 seconds until fragrant
- Pour in fresh lemon juice and add red pepper flakes (if using)
- Simmer for 1-2 minutes to meld flavors
- Remove from heat and stir in chopped parsley
- Season with salt and pepper to taste
The sauce should be silky and emulsified. If it separates, whisk vigorously off the heat until recombined.
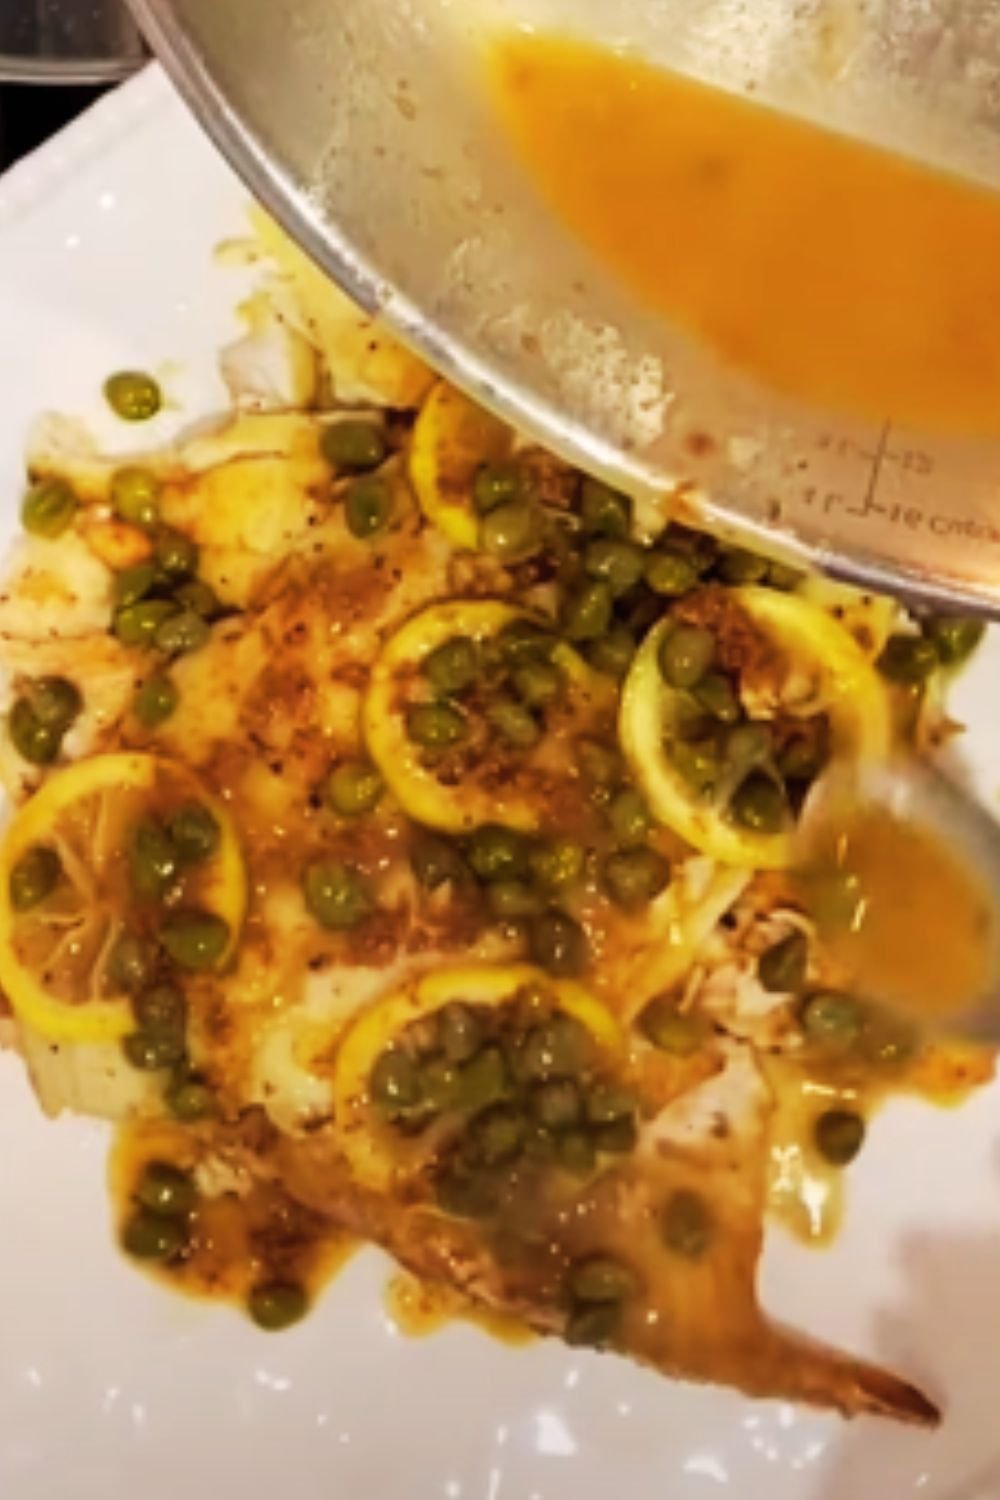
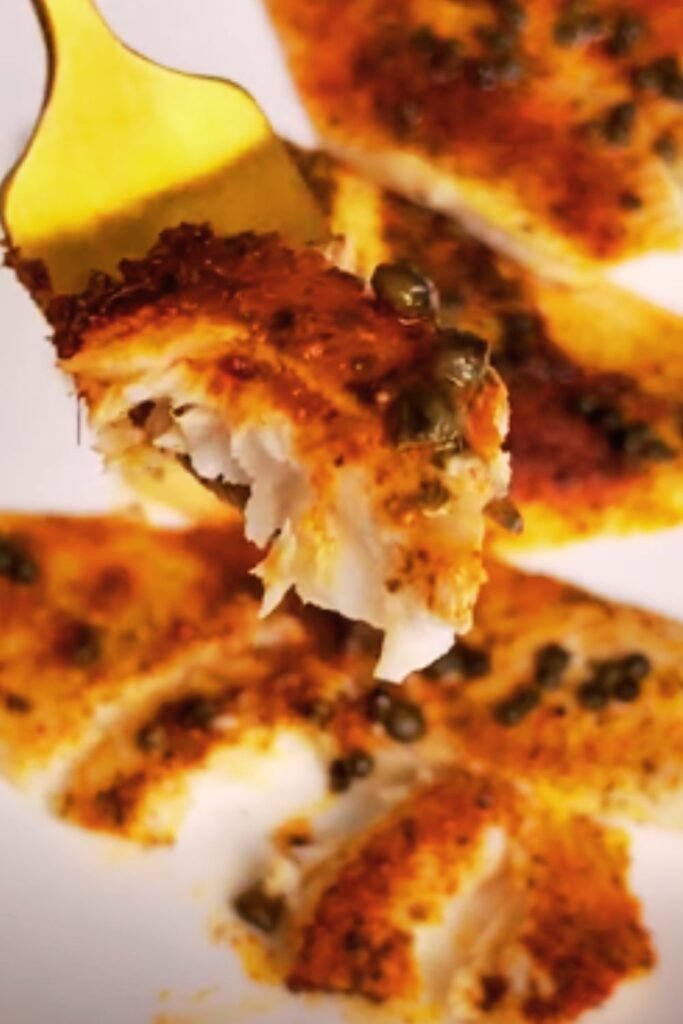
Plating and Serving
To serve this dish like a professional:
- Place one or two fillets on each warmed plate
- Spoon the lemon butter sauce generously over the fish
- Garnish with fresh lemon wedges, additional parsley, and capers if desired
- Serve immediately while hot
This dish deserves to be enjoyed right away—the contrast between the crispy exterior and tender interior is at its peak when freshly prepared.
Nutritional Information
For those tracking their nutrition, here’s the approximate nutritional profile per serving (one fillet with sauce):
| Nutrient | Amount per Serving |
|---|---|
| Calories | 320 |
| Protein | 24g |
| Total Fat | 21g |
| Saturated Fat | 11g |
| Cholesterol | 105mg |
| Carbohydrates | 8g |
| Fiber | <1g |
| Sugars | <1g |
| Sodium | 450mg |
| Vitamin A | 12% DV |
| Vitamin C | 15% DV |
| Calcium | 2% DV |
| Iron | 6% DV |
*Values are approximate and may vary based on specific ingredients used.
Perfect Side Dish Pairings
What completes this elegant fish dish? I have several favorite accompaniments:
Vegetable Sides
- Roasted asparagus with lemon zest
- Steamed green beans with slivered almonds
- Sautéed spinach with garlic
- Ratatouille for a Mediterranean flair
Starchy Sides
- Herb-roasted baby potatoes
- Creamy risotto with peas
- Wild rice pilaf
- Crusty artisan bread for soaking up that delicious sauce
Salad Options
- Simple mixed greens with champagne vinaigrette
- Cucumber and tomato salad with fresh dill
- Fennel and orange salad with olives
- Classic Caesar salad (hold the anchovies to avoid competing with the fish)
Make-Ahead and Storage Tips
While this dish is best enjoyed fresh, you can prepare elements ahead of time:
- Dredging mixture: Can be prepared up to a day in advance and stored in an airtight container
- Herb preparation: Chop parsley and mince garlic up to 6 hours ahead, storing covered in the refrigerator
- Cooked flounder: Best eaten immediately, but can be refrigerated for up to 2 days
- Lemon butter sauce: Can be made up to an hour ahead and gently reheated before serving
To reheat leftover flounder:
- Preheat oven to 275°F (135°C)
- Place fillets on a lined baking sheet
- Cover loosely with foil
- Heat for 7-10 minutes until just warmed through
Note that reheated fish won’t have the same crispy texture as freshly cooked, but the flavor will still be delicious.
Common Pitfalls and How to Avoid Them
In my journey to perfect flounder, I’ve encountered several challenges. Here’s how to avoid them:
| Problem | Cause | Solution |
|---|---|---|
| Fish sticks to the pan | Pan not hot enough or fish too moist | Ensure pan is properly preheated and pat fish very dry |
| Fillets fall apart when flipping | Handled too roughly or cooked too long | Use a proper fish spatula and wait for proper browning before flipping |
| Burnt exterior, raw interior | Heat too high | Maintain medium-high heat and adjust as needed |
| Soggy coating | Too much flour or overcrowded pan | Shake off excess flour and cook in batches |
| Fishy smell or taste | Fish not fresh | Purchase from reputable sources and use fresh lemon to brighten flavor |
| Butter sauce separates | Overheated or ingredients not properly emulsified | Keep heat low and whisk continuously |
| Rubbery texture | Overcooked | Remove from heat when fish just flakes with a fork |
Recipe Variations
Once you’ve mastered the basic technique, try these delicious variations:
Herb-Crusted Flounder
Add 2 tablespoons of finely chopped fresh herbs (parsley, dill, and chives work beautifully) to the flour mixture before dredging.
Mediterranean Flounder
Replace the lemon butter sauce with a mixture of diced tomatoes, olives, capers, and a splash of white wine, simmered until slightly reduced.
Almond-Crusted Flounder
Add 1/4 cup finely chopped almonds to the flour mixture for a delightful nutty crunch.
Cajun Flounder
Add 1-2 teaspoons of Cajun seasoning to the flour mixture for a spicy kick.
Asian-Inspired Flounder
Skip the lemon butter sauce and instead finish with a drizzle of soy sauce, sesame oil, and a sprinkle of sliced scallions.
Serving Suggestions
Beyond side dishes, consider these serving ideas:
- Flounder tacos: Flake the cooked fish and serve in warm tortillas with slaw and avocado
- Fish sandwiches: Place a fillet on a toasted brioche bun with lettuce, tomato, and tartar sauce
- Protein addition: Top salads or grain bowls with a flounder fillet for a protein boost
- Elegant appetizer: Cut smaller fillets into individual portions and serve as a sophisticated starter
Seasonal Considerations
While flounder is available year-round, its flavor profile pairs beautifully with seasonal ingredients:
- Spring: Serve with fresh peas, asparagus, and mint
- Summer: Accompany with corn, tomato, and basil salad
- Fall: Pair with roasted root vegetables and sage
- Winter: Serve alongside braised fennel and citrus segments
Questions & Answers
Q: Can I use frozen flounder for this recipe? Absolutely! Just ensure it’s completely thawed in the refrigerator overnight and patted very dry before cooking. Frozen flounder can work wonderfully, especially if it was flash-frozen shortly after being caught.
Q: Is flounder sustainable? It depends on the variety and where it’s harvested. Look for MSC (Marine Stewardship Council) certification or check the Seafood Watch app for current recommendations specific to your region. Pacific flounder tends to be more sustainable than some Atlantic varieties.
Q: My flounder always curls up when cooking. How can I prevent this? This happens because the skin side contracts more quickly than the flesh side. For skin-on fillets, making shallow crosshatch cuts on the skin side helps prevent curling. For skinless fillets, pressing gently with a spatula for the first 30 seconds of cooking can help.
Q: Can I substitute another white fish if flounder isn’t available? Yes! Sole, tilapia, and haddock are excellent alternatives with similar cooking properties. Adjust cooking times slightly based on the thickness of the fillets.
Q: How do I know if my fish is done without cutting into it? Use an instant-read thermometer inserted into the thickest part—it should read 140°F (60°C). Alternatively, press the fish gently with a fork; it should flake easily and be opaque throughout.
Q: Can I make this dish gluten-free? Certainly! Replace the all-purpose flour with rice flour or a gluten-free flour blend. The results will be just as delicious.
Q: What can I use instead of butter for dairy-free preparation? Olive oil works well for the initial frying. For the sauce, use a high-quality olive oil with the lemon juice and herbs, or try a plant-based butter alternative.
Q: My sauce separated. Can it be saved? Yes! Remove it from heat immediately and whisk vigorously. If that doesn’t work, try adding a teaspoon of warm water while whisking continuously.
Final Thoughts
Pan-fried flounder with lemon butter sauce represents simplicity and elegance on a plate. The delicate, sweet flavor of the fish, the golden crispy exterior, and the bright, rich sauce combine to create a dish that feels special yet requires minimal effort.
I hope this recipe inspires you to experiment with cooking flounder at home. Remember, the key elements are quality ingredients, proper preparation, and careful cooking. Master these, and you’ll have a versatile, impressive dish in your culinary repertoire.
Whether you’re preparing a quick weeknight dinner or hosting a sophisticated dinner party, this flounder recipe deserves a place at your table. It’s proof that sometimes the simplest preparations yield the most extraordinary results.