There’s something magical about the marriage of sourdough tang and brioche richness that creates what I consider the perfect bread. After years of baking experiments and countless loaves later, I’ve perfected my sourdough brioche recipe that I’m thrilled to share with you today.
This isn’t just any bread. It’s a beautiful harmony of wild yeast fermentation and buttery indulgence that results in a tender, fluffy interior with a gorgeously bronzed crust. The lengthy fermentation process not only develops complex flavor but also makes this brioche more digestible than standard versions.
What Makes This Sourdough Brioche Special
Traditional brioche is already a step above ordinary bread with its high butter and egg content. But when you introduce sourdough culture to the mix, something truly extraordinary happens. The natural fermentation:
- Develops a subtle tanginess that balances the richness
- Creates a more complex flavor profile with nutty, sweet notes
- Improves digestibility through partial breakdown of gluten and phytic acid
- Extends shelf life naturally without preservatives
- Produces a lighter, airier texture despite being enriched dough
I’ve been working on this recipe for nearly three years, tweaking the hydration, fermentation times, and butter incorporation techniques. The result is a foolproof method that delivers consistently excellent results, even for those new to sourdough baking.
Essential Ingredients
The quality of your ingredients truly matters in a recipe with so few components:
Active Sourdough Starter : A mature, bubbly starter at peak activity is crucial. I feed mine 8-12 hours before making the dough, ensuring it’s at its most vigorous state. For this recipe, you’ll want your starter at 100% hydration (equal parts flour and water by weight).
Bread Flour : The higher protein content (typically 12-14%) provides the necessary structure to support the enriched dough. I’ve found that a combination of bread flour with a touch of all-purpose creates the perfect texture.
Eggs : Use room temperature, large eggs for best results. The eggs provide richness, color, and help with the structure of the loaf.
Butter : I only use unsalted, high-quality butter with at least 82% fat content. European-style cultured butter takes this bread to another level with its slight tanginess complementing the sourdough flavor.
Sugar : I prefer organic cane sugar, which adds just enough sweetness without overpowering the subtle sourdough notes.
Salt : Fine sea salt is my preference, as it distributes evenly throughout the dough and enhances all other flavors.
Milk : Whole milk creates the most tender crumb, though 2% works in a pinch. The milk should be lukewarm to help activate the sourdough starter.
Full Recipe
Ingredients
| Ingredient | Amount | Notes |
|---|---|---|
| Active sourdough starter | 150g | Fed 8-12 hours before, at peak activity |
| Bread flour | 350g | Approximately 12-14% protein content |
| All-purpose flour | 100g | Creates balanced texture |
| Eggs | 3 large | Room temperature |
| Unsalted butter | 150g | Room temperature, cut into 1/2 inch cubes |
| Granulated sugar | 50g | Adds slight sweetness |
| Fine sea salt | 10g | Enhances flavor |
| Whole milk | 100g | Lukewarm (about 85°F/30°C) |
| Egg (for wash) | 1 | Beaten with 1 tbsp water |
Equipment Needed
| Equipment | Purpose |
|---|---|
| Stand mixer with dough hook | Makes incorporating butter much easier |
| Digital kitchen scale | For accurate measurements |
| 9×5 inch loaf pan | Creates perfect shape |
| Mixing bowls | For preparation |
| Bench scraper | Helpful for handling dough |
| Plastic wrap or damp cloth | For covering dough during rises |
| Pastry brush | For applying egg wash |
Step-by-Step Method
Day 1: Building the Dough
- Prepare your starter: Ensure your sourdough starter is active and bubbly, having been fed about 8-12 hours before beginning the recipe.
- Mix dry ingredients: In the bowl of your stand mixer, whisk together the bread flour, all-purpose flour, sugar, and salt.
- Add wet ingredients: Add the active starter, lukewarm milk, and eggs to the dry ingredients.
- Initial mix: Using the dough hook attachment, mix on low speed (I use speed 2 on my mixer) for about 5 minutes until the dough starts coming together.
- Develop the gluten: Increase to medium-low speed (about 3-4) and continue mixing for another 5-7 minutes until the dough becomes smooth and begins to pull away from the sides of the bowl. The dough will still be quite sticky at this point—that’s normal!
- Butter incorporation: With the mixer running on low speed, add the room temperature butter one cube at a time, waiting until each piece is fully incorporated before adding the next. This process takes patience—about 10-15 minutes total.
- Final mixing: Once all butter is incorporated, increase speed to medium and mix for another 5-8 minutes. The dough should become glossy, smooth, and pass the windowpane test (when stretched gently, you should be able to stretch it thin enough to see light through without tearing).
- First bulk fermentation: Transfer the dough to a lightly greased bowl, cover with plastic wrap or a damp cloth, and let sit at room temperature (about 70-75°F/21-24°C) for 2 hours. The dough won’t rise dramatically during this time due to the high fat content.
- Cold fermentation: Place the covered dough in the refrigerator for 12-16 hours (overnight). This slow fermentation develops flavor and makes the dough easier to handle.
Day 2: Shaping and Baking
- Remove from refrigerator: Take the dough out and let it sit at room temperature for about 1 hour to take the chill off.
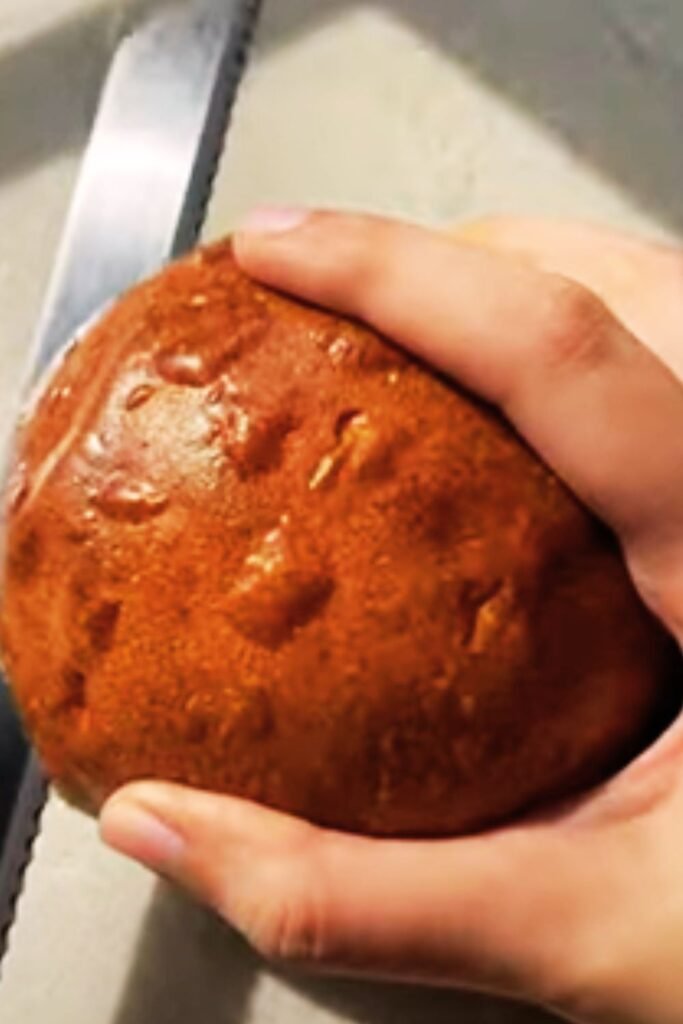
- Divide and pre-shape: On a lightly floured surface, divide the dough into 3 equal portions (about 290g each). Shape each portion into a ball by pulling the edges toward the center and turning the dough to create tension on the surface.
- Rest: Let the dough balls rest for 15 minutes, covered with a cloth to prevent drying.
- Final shaping: Roll each ball into a log about 8 inches long. Place the three logs side by side in a greased 9×5 inch loaf pan.
- Final proof: Cover the pan with plastic wrap or a damp cloth and let the dough rise at room temperature until noticeably puffy and nearly doubled in size. This can take 4-6 hours, depending on your ambient temperature. Be patient—this step cannot be rushed!
- Preheat: About 45 minutes before baking, preheat your oven to 375°F (190°C).
- Egg wash: When the dough is ready, gently brush the top with the beaten egg mixed with 1 tablespoon of water, taking care not to deflate the risen dough.
- Bake: Place the loaf in the preheated oven and immediately reduce the temperature to 350°F (175°C). Bake for 40-45 minutes, or until the bread is deep golden brown and registers an internal temperature of at least 190°F (88°C). If the top browns too quickly, tent with aluminum foil after about 25-30 minutes.
- Cool: Allow the bread to cool in the pan for 10 minutes, then remove and let cool completely on a wire rack for at least 2 hours before slicing. This cooling period is crucial for the crumb structure to set properly.
Troubleshooting Common Issues
| Problem | Likely Cause | Solution |
|---|---|---|
| Dough too sticky after mixing | Too much hydration or butter added too quickly | Add flour 1 tablespoon at a time; ensure butter is room temp but not melting; incorporate more slowly |
| Dough not rising much during final proof | Inactive starter or too cold environment | Use starter at peak activity; create warmer environment (75-80°F) |
| Dense or heavy texture | Insufficient proofing or overproofing | Watch dough, not the clock—it should be noticeably puffy and slowly spring back when gently poked |
| Crust darkening too quickly | Oven too hot or too much sugar | Lower temperature by 25°F; tent with foil; reduce sugar slightly |
| Butter leaking during baking | Dough too warm during shaping | Return dough to refrigerator for 20-30 minutes if it becomes too soft during shaping |
Storage and Serving Suggestions
This sourdough brioche stays fresh longer than commercial bread due to the natural preservative qualities of sourdough. Store it:
- At room temperature: Wrapped in a clean cloth inside a bread bag for 3-4 days
- Refrigerated: Up to a week, though the texture will become slightly firmer
- Frozen: Pre-slice and freeze for up to 3 months, thawing slices as needed
My favorite ways to enjoy this bread include:
- Toasted with a spread of high-quality butter and honey
- As the base for an elevated French toast with fresh berries and maple syrup
- For the most luxurious grilled cheese sandwich you’ll ever taste
- As a delightful accompaniment to homemade jam or preserves
- Transformed into heavenly bread pudding when it’s a few days old
The slight sourdough tang complements both sweet and savory applications beautifully, making this bread incredibly versatile for any meal of the day.
Adapting the Recipe
While I’ve crafted this recipe to be as foolproof as possible, you can make some adaptations:
Adding Mix-ins:
- Fold in up to 1/2 cup dried fruit (like cranberries or apricots) during final shaping
- Incorporate 2 tablespoons of fresh herbs for a savory variation
- Add 1-2 tablespoons of citrus zest for a bright flavor profile
Alternative Shapes:
- Divide into 8-12 portions for dinner rolls
- Braid three long strands for a beautiful presentation
- Create small knots for pull-apart dinner rolls
Dietary Adjustments:
- Substitute plant-based butter and milk for a dairy-free version (though the texture will differ slightly)
- Use honey or maple syrup instead of sugar for different flavor notes

Frequently Asked Questions
Why is my dough too sticky to handle?
A slightly sticky dough is normal for enriched sourdough breads. The high fat content from butter and eggs contributes to this stickiness. Instead of adding more flour, which can make your bread dense, try these techniques:
- Use wet hands when handling the dough
- Chill the dough for 30 minutes before shaping
- Use a bench scraper to manipulate the dough
- Employ the “slap and fold” technique on a clean, unfloured surface
How can I tell when my brioche is perfectly proofed?
The final proof is critical for achieving the perfect texture. Your dough is ready for baking when:
- It has noticeably increased in volume (though it won’t double like a lean dough)
- When gently pressed with a finger, the indentation slowly springs back partway
- The dough feels light and aerated
- The surface appears smooth and slightly domed
Can I make this without a stand mixer?
Yes, though it requires patience and arm strength! Here’s how:
- Mix all ingredients except butter with a wooden spoon until combined
- Turn onto a clean surface and knead by hand for 10-15 minutes until smooth
- Flatten the dough, add a portion of the butter in the center
- Fold dough over butter and continue kneading
- Repeat adding butter in small amounts until fully incorporated
- Continue kneading until the dough becomes smooth and elastic (about 15-20 minutes total)
Why does my brioche collapse after baking?
Collapsing typically indicates one of these issues:
- Overproofing: The dough fermented too long and exhausted its strength
- Too much hydration: Reduce milk by 10-15g in your next attempt
- Opening the oven door too early: Avoid opening during the first 25 minutes of baking
- Underbaking: Ensure the internal temperature reaches at least 190°F (88°C)
How do I know if my sourdough starter is active enough?
An active starter ready for brioche should:
- Double or triple in volume within 6-8 hours after feeding
- Show plenty of bubbles throughout, not just on the surface
- Have a pleasant, tangy aroma without any off smells
- Float when a small portion is dropped in water (though this test isn’t foolproof)
Can I make a gluten-free version of this recipe?
While traditional brioche relies heavily on gluten development for its structure, you can attempt a gluten-free version by:
- Using a high-quality 1:1 gluten-free flour blend with xanthan gum
- Adding 1-2 tablespoons of psyllium husk powder for improved structure
- Expecting a denser final product with a different texture
- Reducing the liquid slightly as gluten-free flours often absorb moisture differently
Note that developing a gluten-free sourdough starter requires different techniques than a wheat-based starter.
How can I achieve an even softer crumb?
For an even more tender result:
- Substitute 50g of bread flour with an equal amount of cake flour
- Add 2 tablespoons of dry milk powder to the dry ingredients
- Use room temperature ingredients exclusively
- Consider the tangzhong method: cook 20g of flour with 100g of milk until thick, cool, then incorporate into your dough
Why You’ll Love This Recipe
What truly sets this sourdough brioche apart is the extraordinary depth of flavor achieved through the slow fermentation process. Unlike conventional brioche that relies heavily on commercial yeast, this version develops naturally over time, creating nuanced buttery, nutty, and slightly tangy notes that simply can’t be rushed.
I’ve found that people who typically experience digestive discomfort with traditional bread often have an easier time with properly fermented sourdough, even in enriched form like this brioche. The lengthy fermentation partially breaks down the complex carbohydrates and gluten proteins, potentially making them easier to digest.
Beyond the health benefits, there’s the incomparable satisfaction of slicing into a loaf you’ve nurtured from simple ingredients through a transformation that borders on alchemy. The aroma that fills your kitchen as it bakes is worth the effort alone—buttery, yeasty, and completely irresistible.
This recipe has become my signature bread, requested by family and friends for special occasions. Once you master it, I guarantee it will become one of your favorite baking achievements as well. The techniques you’ll learn—from proper sourdough management to handling enriched dough—will serve you well in countless other baking adventures.
Remember that sourdough baking is as much art as science. Don’t be discouraged if your first attempt isn’t perfect. Each loaf teaches you something about the process, and before long, you’ll develop the intuition that guides all great bakers. Your hands will know when the dough feels right, your eyes will recognize the perfect proof, and your kitchen will be filled with the incomparable scent of freshly baked sourdough brioche.
Happy baking!