Have you ever found yourself staring into your fridge at lunchtime, hungry but short on time? I’ve been there more times than I can count. Between work deadlines, family obligations, and the general chaos of daily life, preparing a nutritious meal often feels impossible when you’re racing against the clock. That’s why I’ve perfected this 5-minute spicy tuna wrap recipe that has become my go-to lunch solution.
What I love about this recipe is that it combines convenience with nutrition. Canned tuna is an affordable protein powerhouse that sits in my pantry ready for moments like these. When jazzed up with the right ingredients, it transforms from a basic pantry staple into a crave-worthy meal that feels anything but rushed.
This isn’t just any tuna wrap—the kick of spice wakes up your taste buds while the creamy elements balance the heat perfectly. The best part? You’ll have it ready in less time than it takes to order takeout. Let me show you how to make this game-changing quick meal that might just become your new lunchtime favorite.
Why You’ll Love This Recipe
There’s a special satisfaction that comes from creating something delicious in mere minutes. As someone who values both flavor and efficiency, I’ve come to appreciate this spicy tuna wrap for numerous reasons:
- Ultra-fast preparation: True to its name, this wrap genuinely takes just 5 minutes from start to finish
- Nutrient-dense ingredients: Packed with protein, healthy fats, and vegetables
- Customizable heat level: Easily adjust the spiciness to suit your preference
- Portable convenience: Perfect for lunch boxes, picnics, or eating on-the-go
- Budget-friendly: Uses pantry staples and affordable ingredients
- No cooking required: Zero stove time means no kitchen heat and minimal cleanup
- Satisfying texture combination: Creamy, crunchy, and soft elements in every bite
I’ve served this to skeptical friends who couldn’t believe something so quick could taste so good. The flavors meld beautifully, with each ingredient playing an important role in the final experience. Let’s dive into what you’ll need to make it happen.
Ingredients: Simple Pantry Staples with Big Flavor
The beauty of this recipe lies in its simplicity. I always keep these ingredients on hand for those days when time is scarce but hunger is real:
| Ingredient | Amount | Notes |
|---|---|---|
| Canned tuna | 1 can (5 oz) | Packed in water, drained thoroughly |
| Mayonnaise | 1½ tablespoons | Full-fat provides the best flavor |
| Greek yogurt | 1 tablespoon | Adds protein and tanginess |
| Sriracha sauce | 1-2 teaspoons | Adjust according to heat preference |
| Lime juice | 1 teaspoon | Fresh is best, but bottled works too |
| Garlic powder | ¼ teaspoon | Provides flavor without raw garlic intensity |
| Red onion | 2 tablespoons | Finely diced for even distribution |
| Celery | 2 tablespoons | Finely diced for crunch |
| Cilantro | 1 tablespoon | Chopped (optional but recommended) |
| Salt and pepper | To taste | Start with ¼ teaspoon salt and a pinch of pepper |
| Large tortilla wrap | 1 | Flour, whole wheat, or spinach flavored |
| Avocado | ¼ medium | Sliced or mashed |
| Baby spinach or lettuce | ½ cup | Rinsed and dried |
Substitution Options
Life happens, and sometimes you don’t have every ingredient on hand. Here are some tested substitutions that work well:
- No Greek yogurt? Use all mayonnaise instead.
- No sriracha? Try hot sauce, chili garlic sauce, or even a sprinkle of red pepper flakes.
- No lime juice? Lemon juice or a splash of any vinegar will provide the necessary acidity.
- No avocado? Use hummus or simply omit.
- No fresh vegetables? Pickled vegetables like jalapeños or roasted red peppers from a jar work great too.
Equipment Needed: Minimal and Basic
One of the things I appreciate most about this recipe is that it requires virtually no special equipment:
- Small mixing bowl
- Fork for mixing and flaking tuna
- Measuring spoons (though eyeballing works fine too)
- Knife and cutting board for minimal chopping
- Paper towels for draining tuna
That’s it! No fancy gadgets, no multiple pots and pans, just the basics that everyone has in their kitchen.
Step-by-Step Instructions
1. Prepare the Spicy Tuna Filling
- Open the can of tuna and drain thoroughly by pressing the lid against the tuna inside the can while tilting it over the sink. For extra dryness, you can also press the tuna between paper towels.
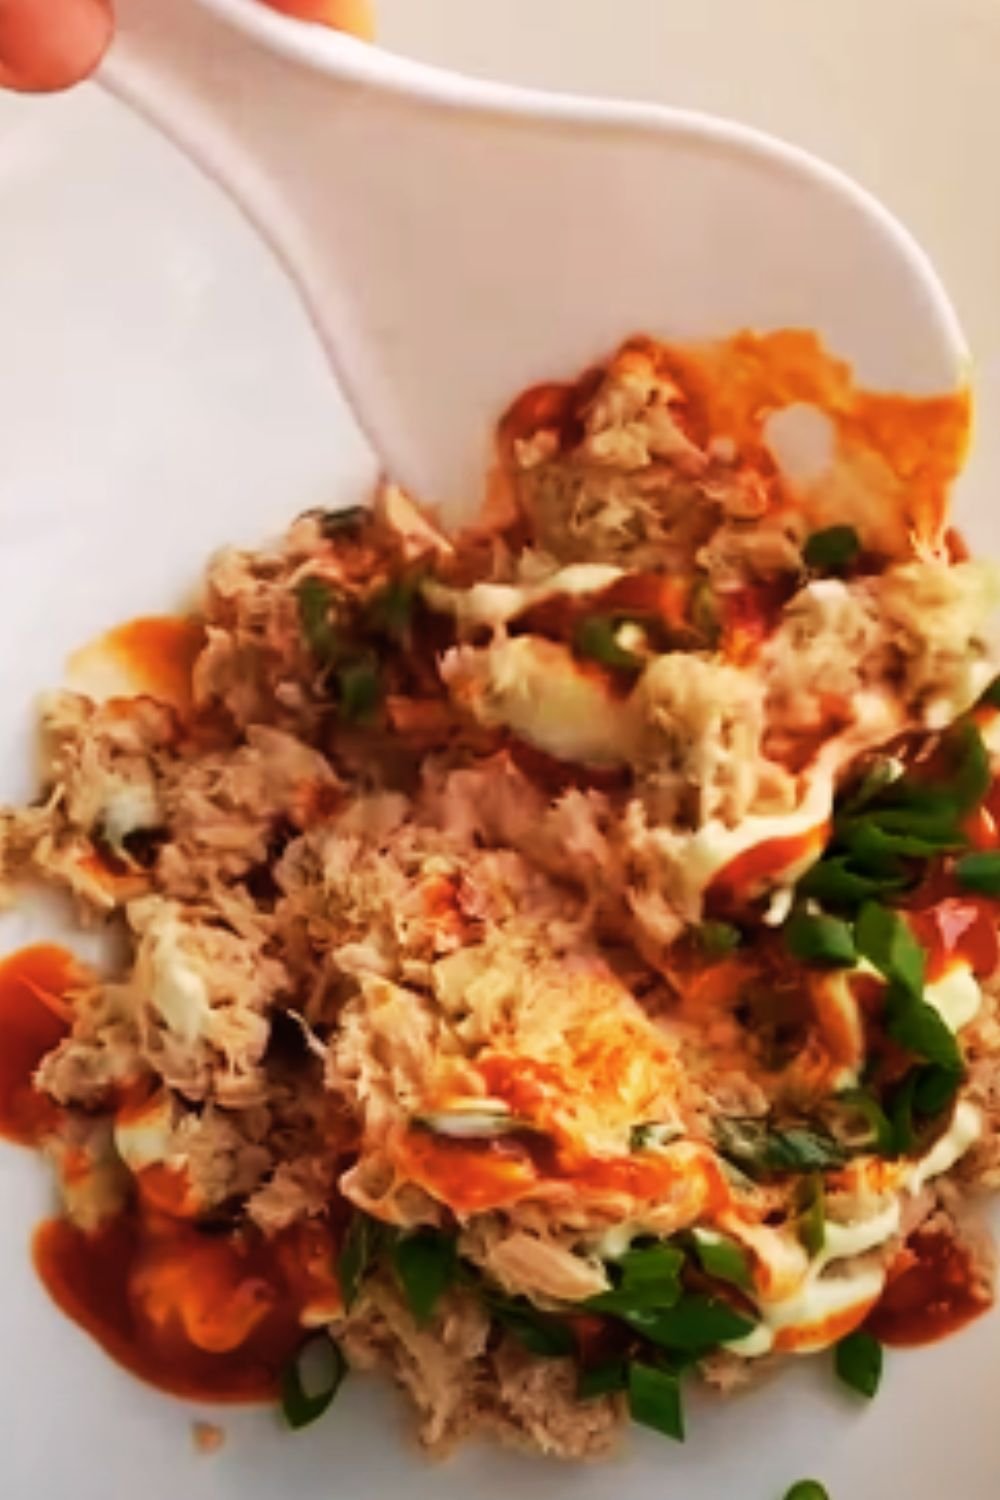
- In a small bowl, flake the drained tuna with a fork until it reaches your desired consistency.
- Add mayonnaise, Greek yogurt, sriracha, lime juice, garlic powder, diced red onion, celery, cilantro, salt, and pepper to the bowl.
- Mix thoroughly until all ingredients are well combined. The mixture should be moist and hold together but not overly wet.
- Taste and adjust seasonings as needed – add more sriracha for heat, more lime for brightness, or more salt if the flavor seems flat.
2. Assemble Your Wrap
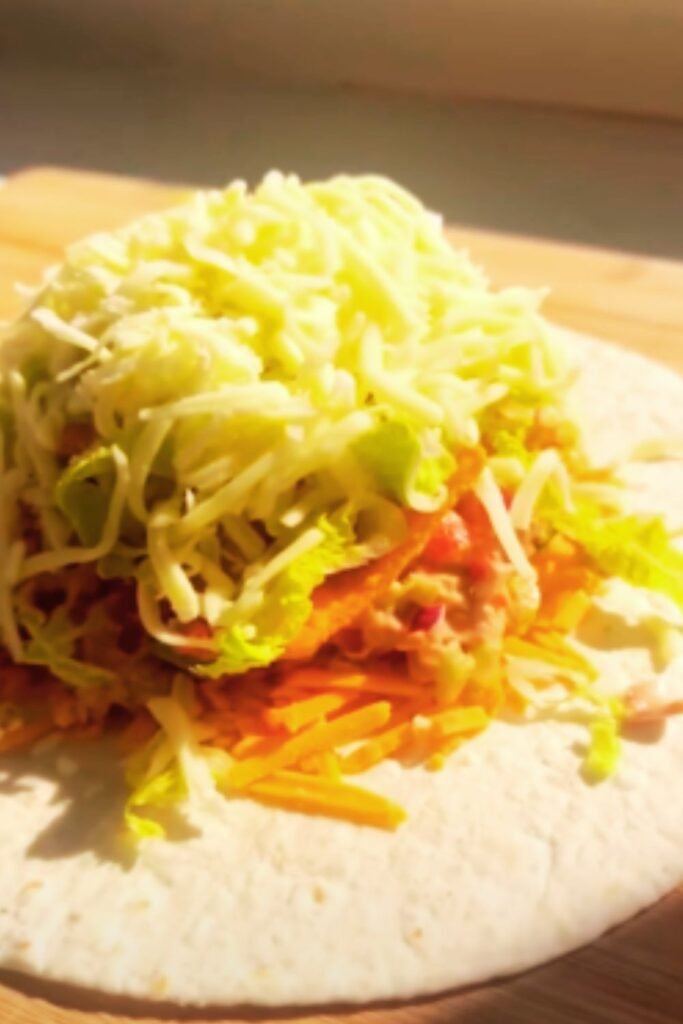
- Lay your tortilla flat on a clean work surface.
- If using mashed avocado, spread it in a thin layer over the center of the tortilla, leaving about 2 inches around the edges. If using sliced avocado, arrange the slices in a line down the center.
- Place the baby spinach or lettuce leaves on top of or beside the avocado.
- Spoon the tuna mixture evenly over the greens, keeping it centered in a rectangular shape.
3. Wrap Like a Pro
- Fold in both sides of the tortilla toward the center, overlapping the filling by about an inch.
- While holding these sides in, fold the bottom edge of the tortilla up and over the filling.
- Continue rolling tightly from the bottom to the top, tucking in the sides as you go.
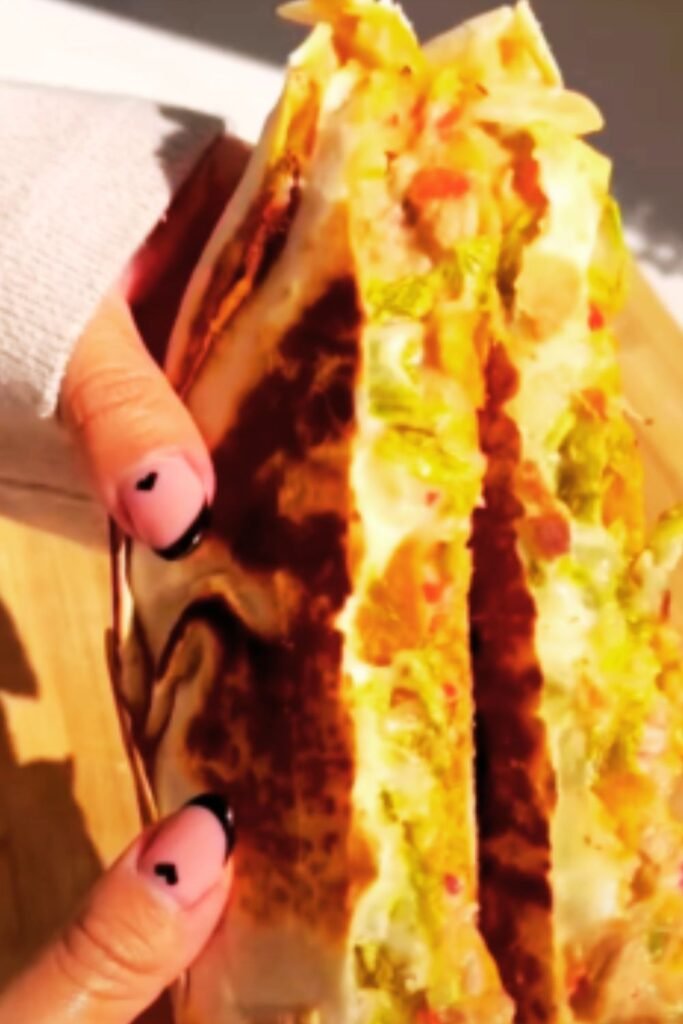
- If desired, cut the wrap diagonally in half for easier eating.
- If not eating immediately, wrap in parchment paper or aluminum foil to maintain freshness.
And that’s it! Your spicy tuna wrap is ready to enjoy in 5 minutes or less.
Nutritional Information
For those tracking their nutrition, here’s a breakdown of what you’re getting in each wrap:
| Nutrient | Amount per Serving |
|---|---|
| Calories | 420 |
| Protein | 29g |
| Carbohydrates | 30g |
| Dietary Fiber | 6g |
| Sugars | 3g |
| Fat | 21g |
| Saturated Fat | 4g |
| Unsaturated Fat | 17g |
| Sodium | 650mg |
| Omega-3 Fatty Acids | 300mg |
| Vitamin D | 40% DV |
| Calcium | 15% DV |
| Iron | 15% DV |
| Potassium | 12% DV |
Values are approximate and may vary based on specific brands and exact quantities used.
This wrap offers an excellent balance of macronutrients with substantial protein for muscle maintenance, healthy fats for satiety, and enough complex carbohydrates to fuel your afternoon.
Flavor Variations to Keep Things Interesting

I love having options to prevent meal fatigue, so I’ve developed several variations of this basic recipe to keep my lunches exciting:
Mediterranean Style
- Add 1 tablespoon chopped olives
- Replace cilantro with fresh basil or oregano
- Add 1 tablespoon crumbled feta cheese
- Use tzatziki instead of mayo+yogurt combination
Asian Fusion
- Replace sriracha with 1 teaspoon of gochujang or Thai chili paste
- Add shredded carrots and cucumber
- Include a few drops of sesame oil
- Garnish with sesame seeds
Southwest
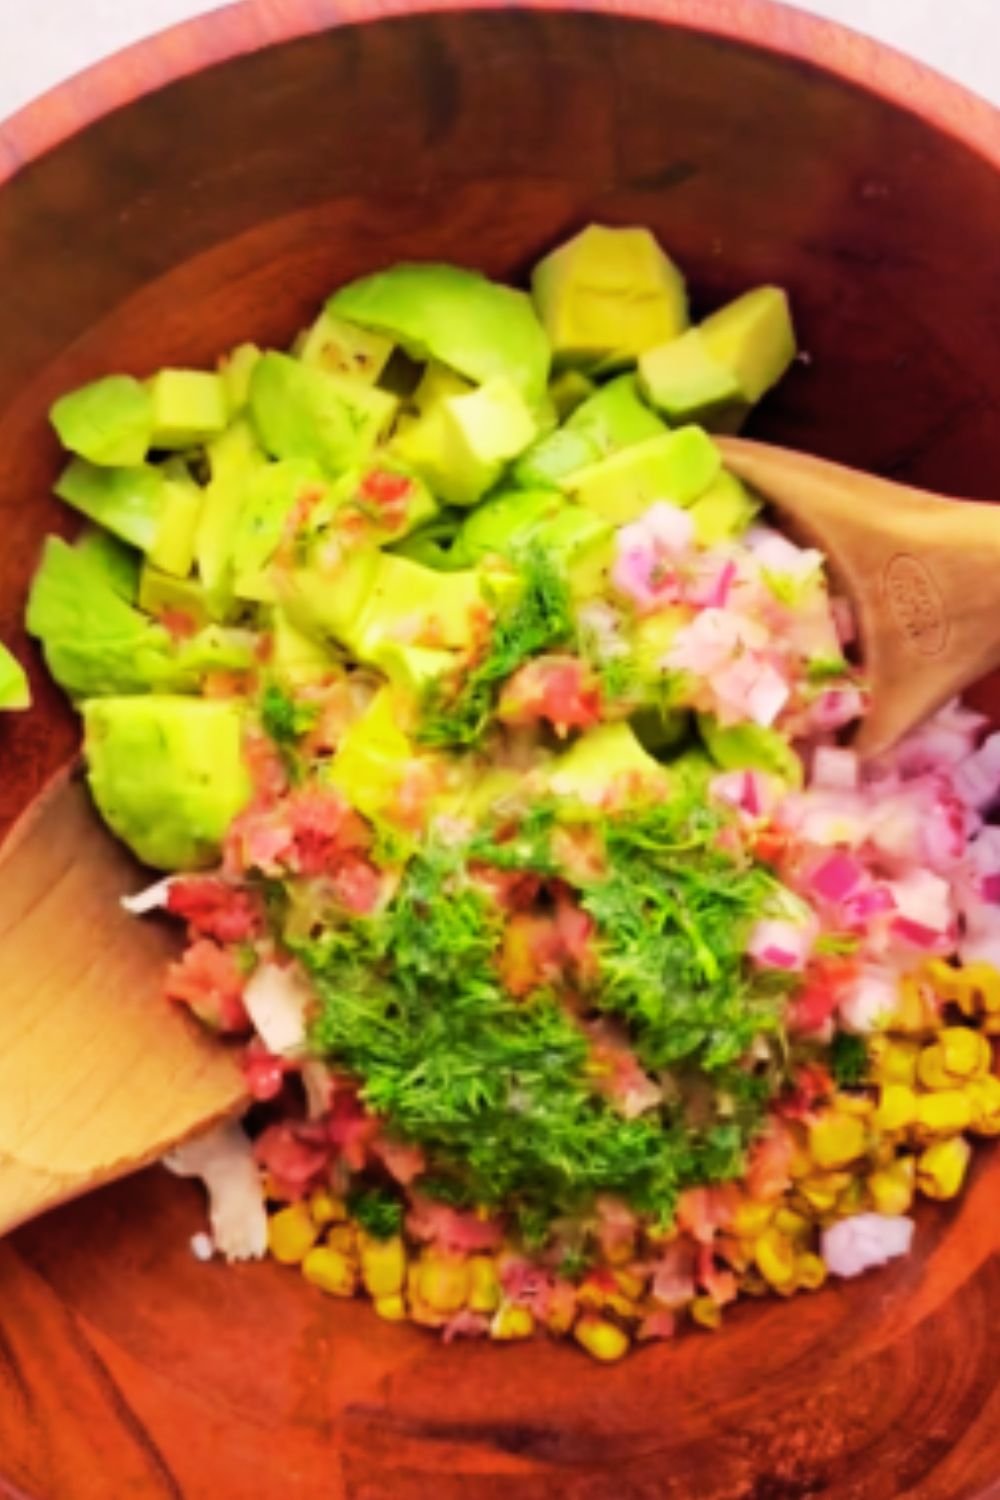
- Add ¼ cup black beans
- Include 2 tablespoons corn kernels
- Replace sriracha with chipotle in adobo sauce
- Add a sprinkle of cumin and chili powder
California Style
- Double the avocado
- Add sprouts or microgreens
- Include thin cucumber slices
- Use a squeeze of lemon instead of lime
The versatility of this basic recipe template means you’ll never get bored, even if you make it several times a week.
Make-Ahead and Storage Tips
While this wrap is designed to be made quickly, you can prepare elements in advance to make the process even faster:
- Tuna mixture: Can be made up to 2 days ahead and stored in an airtight container in the refrigerator. The flavor actually improves as it sits!
- Chopped vegetables: Prep diced onion and celery up to 3 days ahead and store separately in the refrigerator.
- Fully assembled wrap: Best eaten within 2 hours at room temperature or 4 hours if refrigerated, to prevent the tortilla from becoming soggy.
If you’re planning to pack this for lunch, I recommend keeping the tuna mixture separate from the tortilla and greens, then assembling just before eating. Alternatively, you can wrap it tightly in parchment paper, which helps absorb excess moisture.
Serving Suggestions
While this wrap is perfectly satisfying on its own, here are some quick sides that complement it beautifully:
- Fresh fruit slices or berries
- Vegetable sticks with hummus
- A handful of tortilla chips
- Simple side salad with lemon vinaigrette
- Cup of clear broth soup in cooler weather
- Sparkling water with citrus
- Iced tea with mint
For entertaining or when you have a bit more time, I love to slice this wrap into pinwheels and serve it as an appetizer alongside other finger foods.
Special Diet Adaptations
One of the reasons I return to this recipe so often is its adaptability for various dietary needs:
Gluten-Free Option
- Use a certified gluten-free tortilla or wrap
- Double-check your mayonnaise and sriracha for gluten-free certification
- Alternatively, serve as a lettuce wrap using large romaine or butter lettuce leaves
Dairy-Free Option
- Omit Greek yogurt and increase mayonnaise (or use a plant-based mayo)
- Ensure your tortilla is dairy-free (some contain whey)
Lower-Carb Option
- Use a low-carb tortilla alternative
- Serve as a salad over extra greens instead of in a wrap
- Use a hollowed bell pepper as the vessel instead of a tortilla
Paleo-Friendly
- Use a paleo-approved wrap (like coconut wraps) or large lettuce leaves
- Make sure to use paleo-compliant mayonnaise (avocado oil based)
- Omit the Greek yogurt
Why This Recipe Works: The Science Behind the Speed
There’s actually some culinary science behind why this quick recipe works so well:
- Acid + Protein: The lime juice begins to “cook” the proteins in the tuna through a process similar to ceviche, intensifying flavors rapidly.
- Fat + Spice Distribution: The mayo and yogurt help distribute the sriracha evenly throughout the mixture, ensuring consistent heat in every bite.
- Textural Balance: The combination of creamy (mayo, yogurt, avocado), crunchy (celery, onion), and tender (tuna) creates a satisfying mouthfeel despite minimal prep.
- Flavor Layering: Each component brings a different taste note—umami from tuna, heat from sriracha, brightness from lime, freshness from herbs—creating complexity without complicated techniques.
Understanding these principles has helped me develop other quick recipes that leverage similar science for maximum flavor in minimal time.
Frequently Asked Questions
Over the years, I’ve received many questions about this recipe from friends and family who’ve adopted it into their own lunch rotations. Here are the most common queries:
Q: Can I use tuna packed in oil instead of water? Yes, you can. Drain it well and reduce the mayo by about 1 teaspoon since the tuna will already have some oil. This actually adds more flavor, though it does increase the calorie count slightly.
Q: How spicy is this really? I’m sensitive to heat. With 1 teaspoon of sriracha, it has a mild warmth that most people find pleasant. If you’re very sensitive to spice, start with just ¼ teaspoon and adjust upward to taste. You can always add more, but you can’t take it away!
Q: Can I use canned salmon or chicken instead of tuna? Absolutely! Both make excellent substitutes. Canned salmon adds more omega-3s, while chicken offers a milder flavor that some prefer. The preparation remains exactly the same.
Q: My wrap always falls apart when I bite into it. Any tips? The key is proper rolling technique and not overfilling. Make sure to tuck the sides in first, then roll from the bottom up, keeping it tight. Wrapping it in parchment paper or foil before cutting can also help hold everything together.
Q: Is there a way to make this even faster? Yes! Use pre-made tuna salad from the deli counter and just mix in the sriracha and lime juice. Not quite as customized, but it works in a real pinch.
Q: How do I prevent the wrap from getting soggy if I’m packing it for lunch? Layer in this order: tortilla, dry greens, avocado (as a barrier), then tuna mixture. Alternatively, pack components separately and assemble just before eating.
Success Tips From My Kitchen to Yours
After making this wrap countless times, I’ve developed a few tricks that elevate it from good to great:
- Drain the tuna extremely well – excess moisture is the enemy of a good wrap. I press it between paper towels for the best texture.
- Room temperature tortilla – cold tortillas crack more easily. If yours is from the refrigerator, warm it for 10 seconds in the microwave or briefly on a dry skillet.
- Don’t skimp on the lime – that acid brightness cuts through the richness and makes the flavors pop.
- Seasoning matters – tuna needs proper seasoning. Don’t be shy with salt and pepper.
- Finely dice the vegetables – smaller pieces distribute better throughout the mixture and make for easier eating.
- Let it rest – if you have even just 2-3 minutes to let the mixed tuna sit before assembling your wrap, the flavors meld better.
- Quality matters for the tortilla – this is one place where the cheapest option isn’t always best. Look for tortillas that feel pliable and fresh.
Conclusion: Fast Food, Redefined
In our busy lives, “fast food” typically means something unhealthy from a drive-thru window. But this 5-minute spicy tuna wrap has redefined what fast food means to me. It’s quick, yes, but also nourishing, satisfying, and adaptable to whatever my day brings.
I hope this recipe serves you as well as it has served me through busy workdays, impromptu picnics, and those evenings when cooking feels impossible. Sometimes the simplest solutions are the most brilliant, and this humble wrap proves that delicious, healthy food doesn’t have to be complicated or time-consuming.
Next time you find yourself staring into the fridge wondering what to make, remember that you’re just 5 minutes away from this satisfying meal. Your future self will thank you for the nourishment, and your taste buds will wonder why you ever settled for less.
What quick meal solutions have saved your day? I’d love to hear about your favorite quick fixes in the comments below!