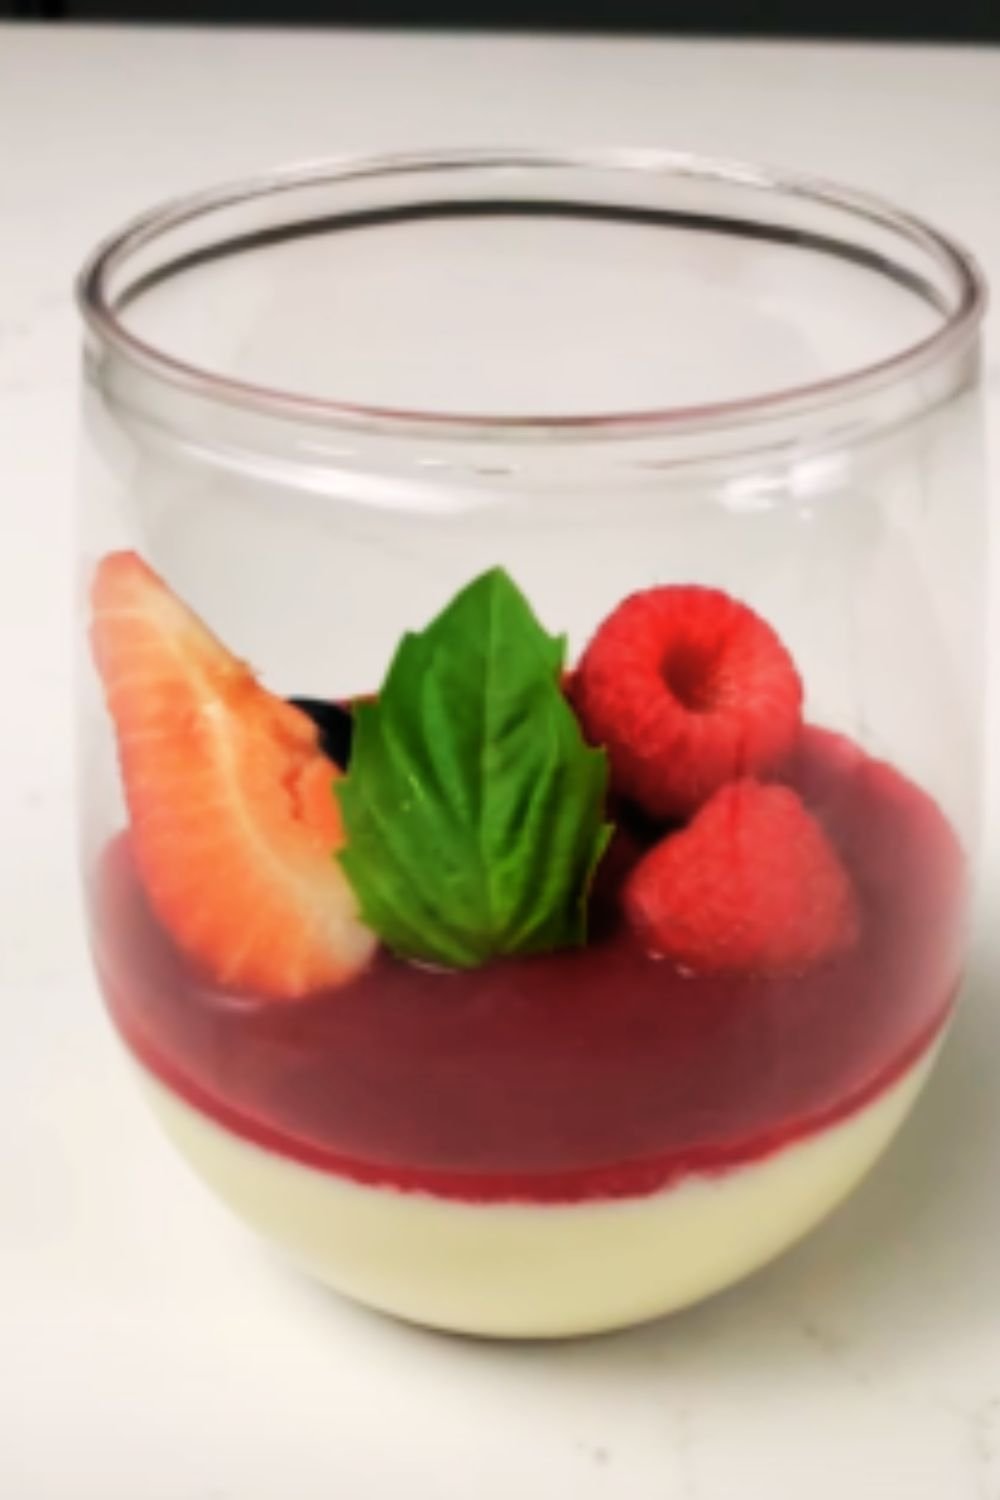
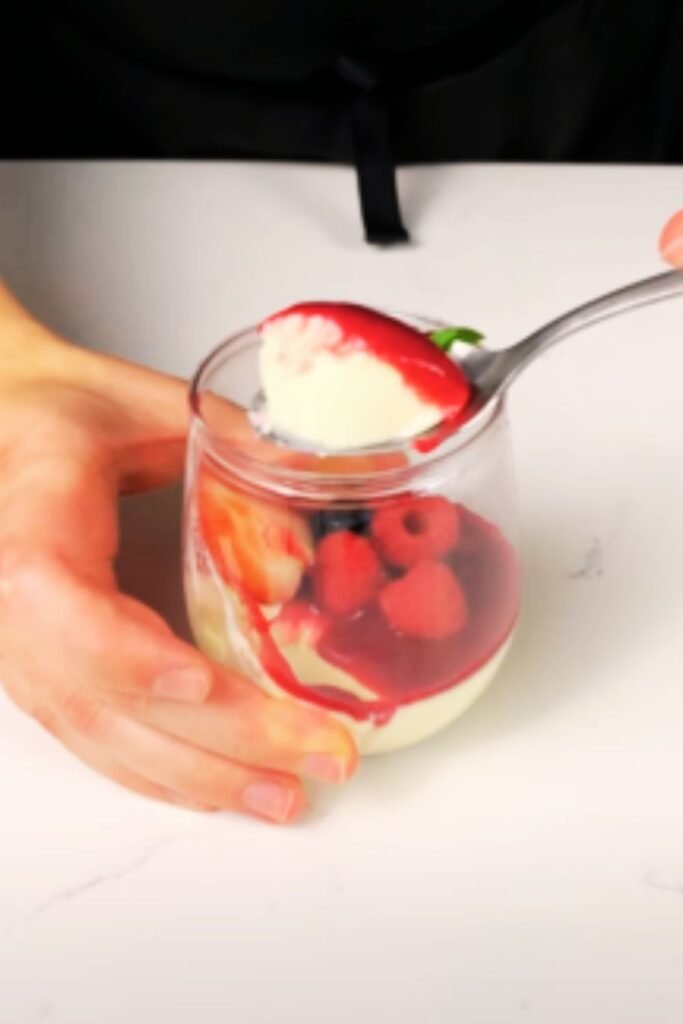
There’s something undeniably magical about the first spoonful of a perfectly executed panna cotta. The way it trembles ever so slightly on the spoon, promising a velvety texture that melts the moment it touches your tongue. I’ve spent years perfecting my panna cotta recipe, and today I’m sharing my ultimate version: a silky smooth vanilla bean panna cotta topped with a rich salted caramel that adds the perfect balance of sweetness and complexity.
This Italian dessert, whose name literally translates to “cooked cream,” might seem intimidating at first glance, but I promise it’s one of the most forgiving and impressive desserts in my repertoire. With just a handful of quality ingredients and some simple techniques, you’ll create a dessert worthy of the finest restaurants—right in your own kitchen.
The Magic Behind Perfect Panna Cotta
What makes a truly exceptional panna cotta? After countless experiments, I can tell you it’s all about achieving that perfect wobble—firm enough to hold its shape when unmolded, yet delicate enough to dissolve effortlessly in your mouth. The secret lies in finding the sweet spot with gelatin: too much and you’ll end up with something closer to Jell-O; too little and you’ll have a puddle on your plate.
My recipe uses just enough gelatin to create that signature silky texture while allowing the pure flavors of vanilla bean and cream to shine through. The addition of salted caramel elevates this classic dessert to new heights, creating a perfect harmony of flavors and textures that will leave your guests asking for the recipe.
Essential Ingredients for Success
The beauty of panna cotta lies in its simplicity, which means each ingredient plays a crucial role:
Heavy Cream and Milk : The foundation of our dessert. The ratio between these two determines the richness of your panna cotta.
Vanilla Bean : While extract will work in a pinch, nothing compares to the flavor and visual appeal of real vanilla bean seeds speckling your dessert.
Gelatin : The unsung hero that creates that perfect wobble. I prefer sheet gelatin for its clean flavor, but powdered works beautifully too.
Sugar : Balances the richness of the cream without overwhelming the delicate vanilla flavor.
Salt : A tiny pinch enhances all the other flavors, especially in the caramel.
Butter : Creates that luscious mouthfeel in our salted caramel sauce.
The Perfect Panna Cotta: Ingredients and Equipment
Before we dive into the method, let’s gather everything we’ll need:
For the Vanilla Bean Panna Cotta:
- 2 cups (475ml) heavy cream
- 1 cup (240ml) whole milk
- 1/2 cup (100g) granulated sugar
- 1 vanilla bean, split and seeds scraped
- 2 1/4 teaspoons (7g) powdered gelatin (or 4 sheets of sheet gelatin)
- 3 tablespoons cold water (for blooming gelatin)
- Pinch of fine sea salt
For the Salted Caramel Sauce:
- 1 cup (200g) granulated sugar
- 1/4 cup (60ml) water
- 3/4 cup (180ml) heavy cream, at room temperature
- 4 tablespoons (56g) unsalted butter, cubed
- 1 teaspoon flaky sea salt (like Maldon)
- 1/2 teaspoon vanilla extract
Equipment You’ll Need:
- 6 ramekins or dessert glasses (4-6oz capacity)
- Small saucepan for blooming gelatin
- Medium saucepan for cooking panna cotta mixture
- Whisk
- Fine-mesh strainer
- Measuring cups and spoons
- Medium heavy-bottomed saucepan for caramel
- Heatproof spatula
- Plastic wrap
Crafting the Perfect Panna Cotta: Step-by-Step Method
Preparing the Panna Cotta Base:
- Bloom the gelatin: If using powdered gelatin, sprinkle it over the cold water in a small bowl and let it sit for 5-10 minutes until fully absorbed and swollen. If using sheet gelatin, submerge the sheets in cold water for 5 minutes until soft.
- Infuse the cream mixture: In a medium saucepan, combine the heavy cream, milk, sugar, salt, and the split vanilla bean with its scraped seeds. Heat over medium-low heat, stirring occasionally to dissolve the sugar. Do not let it boil—we’re aiming for a gentle simmer with small bubbles around the edges (around 180°F/82°C).
- Steep the vanilla: Once the mixture reaches a simmer, remove from heat, cover, and allow the vanilla to steep for 30 minutes. This extracts maximum flavor from the precious vanilla bean.
- Reheat and add gelatin: After steeping, remove the vanilla bean pod (you can rinse and dry it for making vanilla sugar later). Gently reheat the mixture until warm but not boiling. Remove from heat and add the bloomed gelatin, whisking until completely dissolved.
- Strain and pour: Pass the mixture through a fine-mesh strainer into a pouring vessel like a large measuring cup. This ensures a silky-smooth texture without any undissolved gelatin or vanilla bean pieces.
- Fill ramekins: Divide the mixture evenly among your ramekins or glasses. Tap each one gently to remove any air bubbles.
- Chill thoroughly: Cover each ramekin with plastic wrap (not touching the surface to avoid condensation marks) and refrigerate for at least 6 hours, preferably overnight. Patience is key for the perfect set!
Creating the Salted Caramel Sauce:
- Prepare your ingredients: Have all your ingredients measured and ready—caramel waits for no one and can quickly go from perfect to burnt.
- Cook the sugar: In a medium heavy-bottomed saucepan, combine the sugar and water. Heat over medium heat, swirling occasionally (don’t stir!) until the sugar dissolves completely.
- Caramelize: Once dissolved, increase the heat to medium-high and stop swirling. Allow the mixture to boil until it turns a deep amber color, about 8-10 minutes. Watch carefully as it changes from clear to golden to amber—this happens quickly!
- Add cream carefully: Remove from heat and carefully add the room temperature cream while whisking constantly. The mixture will bubble vigorously, so be cautious. If some sugar seizes, return to low heat and whisk until smooth.
- Incorporate butter and flavorings: Whisk in the butter cubes one at a time until fully incorporated. Add the sea salt and vanilla extract, stirring to combine.
- Cool and store: Allow the caramel to cool to room temperature. It will thicken as it cools to a pourable consistency.
The Art of Unmolding and Presentation
If you’ve chosen to set your panna cotta in ramekins for unmolding (rather than serving directly in glasses), here’s how to achieve that perfect release:
- Prepare ramekins: Before unmolding, fill a bowl with hot (not boiling) water.
- Loosen edges: Run a thin knife around the edge of each panna cotta to break the vacuum seal.
- Dip briefly: Dip the bottom of each ramekin in the hot water for about 5-10 seconds—no longer, or you risk melting your creation.
- Unmold gracefully: Place your serving plate upside down on top of the ramekin, then flip both together in one swift motion. Gently shake or tap the ramekin to help release the panna cotta. Lift the ramekin slowly—if it resists, repeat the hot water dip briefly.
- Add caramel: Once unmolded, drizzle with the room temperature salted caramel sauce. For an extra touch, sprinkle with a few flakes of sea salt.
If serving in glasses, simply top with the caramel sauce just before serving.
Flavor Variations to Explore
While vanilla bean and salted caramel create a classic pairing, the panna cotta base is incredibly versatile. Here are some variations I love:
- Citrus Infusion: Add lemon or orange zest to the cream mixture during steeping.
- Coffee Lover’s Dream: Dissolve 2 tablespoons of espresso powder in the warm cream mixture.
- Honey Lavender: Replace sugar with honey and add 1 tablespoon of dried culinary lavender during steeping (strain before setting).
- Coconut: Replace half the heavy cream with full-fat coconut milk and add 1/2 teaspoon coconut extract.
- Almond: Add 1/2 teaspoon almond extract and top with toasted sliced almonds.
Make-Ahead and Storage Tips
One of the greatest advantages of panna cotta is that it’s the perfect make-ahead dessert:
| Storage Method | Maximum Storage Time | Notes |
|---|---|---|
| Refrigerated (covered) | 4 days | Flavors actually improve after 24 hours |
| With caramel topping | 2 days | Caramel may soften the top slightly |
| Caramel sauce alone | 2 weeks refrigerated | Warm gently before using |
| Unmolded | Best served within 2 hours | Can dry out if left too long |
Troubleshooting Common Panna Cotta Problems
Even experienced pastry chefs encounter challenges. Here’s how to address common issues:
| Problem | Possible Cause | Solution |
|---|---|---|
| Too firm texture | Too much gelatin | Reduce gelatin by 1/4 teaspoon next time |
| Too soft/won’t set | Too little gelatin or insufficient chilling | Increase gelatin slightly or chill longer |
| Grainy texture | Gelatin not fully dissolved or cream mixture boiled | Ensure gelatin is completely dissolved and never boil the mixture |
| Won’t unmold | Not enough gelatin or insufficient greasing | Try longer hot water dip or use non-stick spray next time |
| Weeping/separation | Mixture boiled or chilled with condensation | Never boil and ensure plastic wrap doesn’t touch surface |
Serving Suggestions and Pairings
Panna cotta’s elegant simplicity makes it perfect for both casual family dinners and sophisticated dinner parties. Some of my favorite serving ideas include:
- Fresh berries macerated with a touch of sugar and lemon juice
- Thin shortbread cookies for textural contrast
- A small scoop of berry sorbet on the side for a temperature contrast
- A shot of espresso for an Italian-inspired affogato variation
- A crisp cookie like langue de chat or tuile for elegant presentation

Nutritional Information
While this is certainly an indulgent dessert, it’s worth noting the nutritional content per serving (based on 6 servings):
| Nutrient | Amount per Serving |
|---|---|
| Calories | 410 |
| Total Fat | 31g |
| Saturated Fat | 19g |
| Cholesterol | 110mg |
| Sodium | 180mg |
| Total Carbohydrates | 32g |
| Sugar | 30g |
| Protein | 3g |
Frequently Asked Questions
Q: Can I make this dessert dairy-free? A: Yes! Replace the heavy cream and milk with full-fat coconut milk and coconut cream. Use a plant-based butter alternative in the caramel. The texture will be slightly different but still delicious.
Q: My caramel crystallized. What went wrong? A: Crystallization usually happens when sugar crystals form on the sides of the pan. Next time, try adding a teaspoon of corn syrup to the sugar and water, and avoid stirring once the sugar begins to color.
Q: Can I use vanilla extract instead of vanilla bean? A: Absolutely. Use 1.5 teaspoons of high-quality vanilla extract added after the mixture has been removed from heat. You’ll miss the beautiful speckling, but the flavor will still be lovely.
Q: How do I know when my caramel has reached the right color? A: The perfect caramel should be a deep amber color—similar to maple syrup or a shiny penny. If you have an instant-read thermometer, aim for 350°F (175°C) for medium caramel.
Q: My panna cotta has small bubbles throughout. What happened? A: This usually occurs from whisking too vigorously, incorporating air into the mixture. Next time, stir gently with a spatula rather than whisking, and tap the filled ramekins on the counter to release air bubbles before refrigerating.
Q: Is there a way to make this dessert less rich? A: Yes, you can adjust the cream-to-milk ratio. Try 1.5 cups cream and 1.5 cups milk for a lighter version that still maintains a silky texture.
Q: Can this recipe be scaled up for a large gathering? A: Absolutely! This recipe doubles or even triples beautifully—just make sure your saucepan is large enough to accommodate the increased volume.
Final Thoughts
There’s something deeply satisfying about creating a dessert that transforms simple ingredients into something truly spectacular. This vanilla bean panna cotta with salted caramel sauce has become my signature dessert—the one friends and family request for special occasions.
What I love most about it is the balance: the pure, delicate flavor of vanilla-infused cream contrasted with the bold, complex notes of salted caramel. It’s elegant enough for a special dinner party yet simple enough to make on a quiet Sunday afternoon when you’re craving something special.
Remember, the key to panna cotta perfection lies in patience—gentle heating, thorough chilling, and careful unmolding. Master these techniques, and you’ll have a dessert that rivals any restaurant creation. As with all cooking, the joy is in the process as much as the final result.
I hope this recipe brings as much pleasure to your table as it has to mine over the years. Happy cooking!