There’s something magical about the aroma of freshly baked biscuits wafting through the kitchen. When those biscuits are loaded with sharp cheddar and fragrant chives? Well, that’s what I call heaven on earth! Today, I’m sharing my absolute favorite recipe for ridiculously easy cheddar chive biscuits that will have your family begging for more.
I’ve spent years perfecting this recipe, and I promise these aren’t your average biscuits. They’re crispy on the outside, tender and flaky on the inside, and packed with so much flavor that they’ll upstage whatever main dish you serve them with. The best part? They come together in under 30 minutes with minimal effort!
Why You’ll Love These Biscuits
Before we dive into the recipe, let me tell you why these cheddar chive biscuits deserve a permanent spot in your recipe collection:
- They require just 7 basic ingredients
- No special equipment needed (not even a biscuit cutter!)
- Perfect for breakfast, lunch, dinner, or anytime snacking
- Make-ahead friendly for busy weeknights
- Customizable with your favorite herbs and cheeses
- Freezer-friendly for future enjoyment
I’ve served these biscuits at countless family gatherings, holiday meals, and casual weeknight dinners. They’re always the first thing to disappear from the table, and I frequently get asked for the recipe. Now, I’m sharing all my secrets with you!
Ingredients You’ll Need

For these incredible biscuits, you’ll need:
| Ingredient | Amount | Notes |
|---|---|---|
| All-purpose flour | 2 cups (250g) | I recommend unbleached for best flavor |
| Baking powder | 1 tablespoon | Make sure it’s fresh for maximum rise |
| Salt | 1 teaspoon | I use kosher salt, but table salt works too |
| Black pepper | 1/4 teaspoon | Freshly ground adds the best flavor |
| Cold unsalted butter | 6 tablespoons (85g) | Must be very cold, straight from refrigerator |
| Sharp cheddar cheese | 1 cup (113g) | Freshly grated yields best results |
| Fresh chives | 1/4 cup | Finely chopped |
| Buttermilk | 3/4 cup (180ml) | Cold from the refrigerator |
| Optional: garlic powder | 1/2 teaspoon | For extra flavor |
| Optional: honey | 1 tablespoon | For a slight sweetness |
Ingredient Tips
Flour: I always measure my flour using the spoon-and-level method for consistent results. Scooping directly from the bag can lead to too much flour and dry biscuits.
Butter: The colder the butter, the flakier your biscuits will be. I sometimes pop mine in the freezer for 10 minutes before starting the recipe.
Cheese: Pre-shredded cheese contains anti-caking agents that can affect texture. Take the extra minute to grate your own—the improved flavor and meltability are worth it!
Buttermilk: Don’t have buttermilk? No problem! Mix 3/4 cup regular milk with 2 teaspoons of lemon juice or white vinegar, let stand for 5 minutes, and you’ve got a perfect substitute.
Essential Equipment
The beauty of this recipe is its simplicity. You’ll need:
- Large mixing bowl
- Pastry cutter or two forks
- Measuring cups and spoons
- Baking sheet
- Parchment paper
- Optional: pastry brush for butter washing
Step-by-Step Instructions
Let me walk you through creating these delicious biscuits from start to finish:
Preparation
- Preheat your oven to 425°F (220°C) and line a baking sheet with parchment paper.
- In a large bowl, whisk together the flour, baking powder, salt, pepper, and garlic powder (if using).
- Cut the cold butter into small cubes.
Making the Dough
- Add the cold butter cubes to the flour mixture.
- Using a pastry cutter or two forks, cut the butter into the flour until the mixture resembles coarse crumbs with some pea-sized pieces remaining. This is crucial for flaky biscuits!
- Gently stir in the grated cheddar cheese and chopped chives until evenly distributed.
- Make a well in the center of the mixture and pour in the cold buttermilk.
- Stir just until the dough comes together. It will look slightly shaggy—this is perfect!
Shaping and Baking
- Turn the dough out onto a lightly floured surface.
- Gently pat the dough into a rectangle about 3/4-inch thick. Don’t overwork it!
- Fold the dough in thirds, like a letter. This creates those beautiful layers.
- Pat the folded dough into a rectangle about 1-inch thick.
- Using a sharp knife or bench scraper, cut the dough into 8-10 equal squares. No biscuit cutter needed!
- Place the biscuits on the prepared baking sheet, leaving about an inch between each.
- Optional: Brush the tops with a little extra buttermilk for a beautiful golden crust.
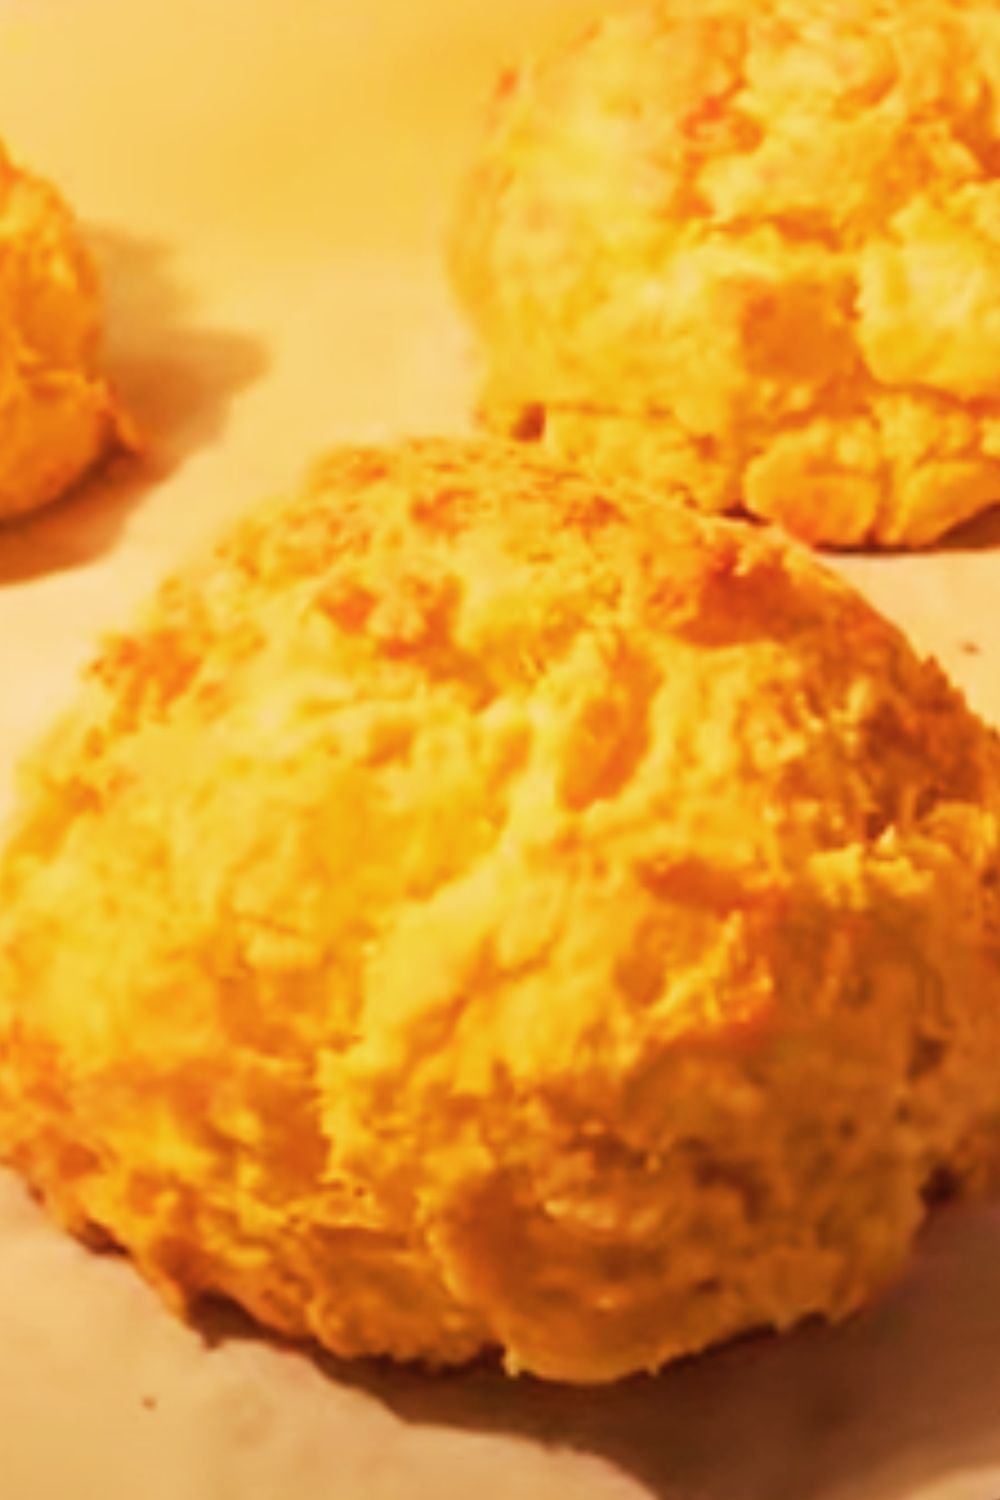
- Bake for 15-18 minutes, until the tops are golden brown and the biscuits have risen nicely.
Extra Tips for Perfect Biscuits
- Keep everything cold: I sometimes chill my mixing bowl and even the flour before starting.
- Don’t twist when cutting: If using a biscuit cutter, press straight down and lift straight up. Twisting seals the edges and prevents proper rising.
- Touch the dough minimally: The warmth from your hands can melt the butter, which we want to avoid until the biscuits hit the hot oven.
- Placement matters: Place biscuits close together (about 1/4 inch apart) for soft sides, or farther apart for crustier sides.
Variations to Try
One of the things I love most about this recipe is how versatile it is. Here are some of my favorite variations:
| Variation | Ingredient Changes | Notes |
|---|---|---|
| Jalapeño Cheddar | Add 2 tablespoons finely diced jalapeños | Remove seeds for mild heat, leave them in for spicy! |
| Rosemary Parmesan | Replace chives with 1 tablespoon fresh rosemary, cheddar with Parmesan | Perfect with Italian dishes |
| Bacon Cheddar | Add 1/4 cup cooked, crumbled bacon | Reduce salt slightly to account for bacon’s saltiness |
| Herb Garden | Use a mix of chives, parsley, and dill (1/4 cup total) | Lighter flavor perfect for spring |
| Everything Bagel | Top with everything bagel seasoning before baking | Adds amazing texture and flavor |
| Sweet Cinnamon | Omit cheese, chives, pepper; add 2 tablespoons sugar and 1 teaspoon cinnamon | Serve with honey butter |

Make-Ahead and Storage Tips
These biscuits are perfect for planning ahead:
Make-Ahead Options:
- Refrigerate the dough: Prepare the dough, cut into biscuits, and refrigerate on the baking sheet (covered) for up to 24 hours before baking.
- Freeze unbaked biscuits: Place cut biscuits on a baking sheet, freeze until solid, then transfer to a freezer bag. They’ll keep for up to 3 months. Bake straight from frozen, adding 3-5 minutes to the baking time.
- Prepare dry ingredients in advance: Mix the flour, baking powder, salt, and seasonings ahead of time and store in an airtight container for up to 3 months. When ready to bake, just add the butter, cheese, chives, and buttermilk.
Storage After Baking:
| Storage Method | Duration | Notes |
|---|---|---|
| Room temperature | 1-2 days | Store in airtight container; best eaten within 24 hours |
| Refrigerator | Up to 1 week | Reheat in 300°F oven for 5-7 minutes to refresh |
| Freezer | Up to 3 months | Wrap individually in foil, then place in freezer bag |
Reheating Tips
For that fresh-baked taste, reheat refrigerated or frozen biscuits:
- Oven method (best): Wrap biscuits in foil and heat in a 300°F oven for 5-10 minutes until warmed through.
- Toaster oven: Split biscuits in half and toast until edges are crisp and centers are warm.
- Microwave: For a quick fix, microwave for 10-15 seconds, though this may slightly alter the texture.
Serving Suggestions

These cheddar chive biscuits are incredibly versatile. Here are my favorite ways to serve them:
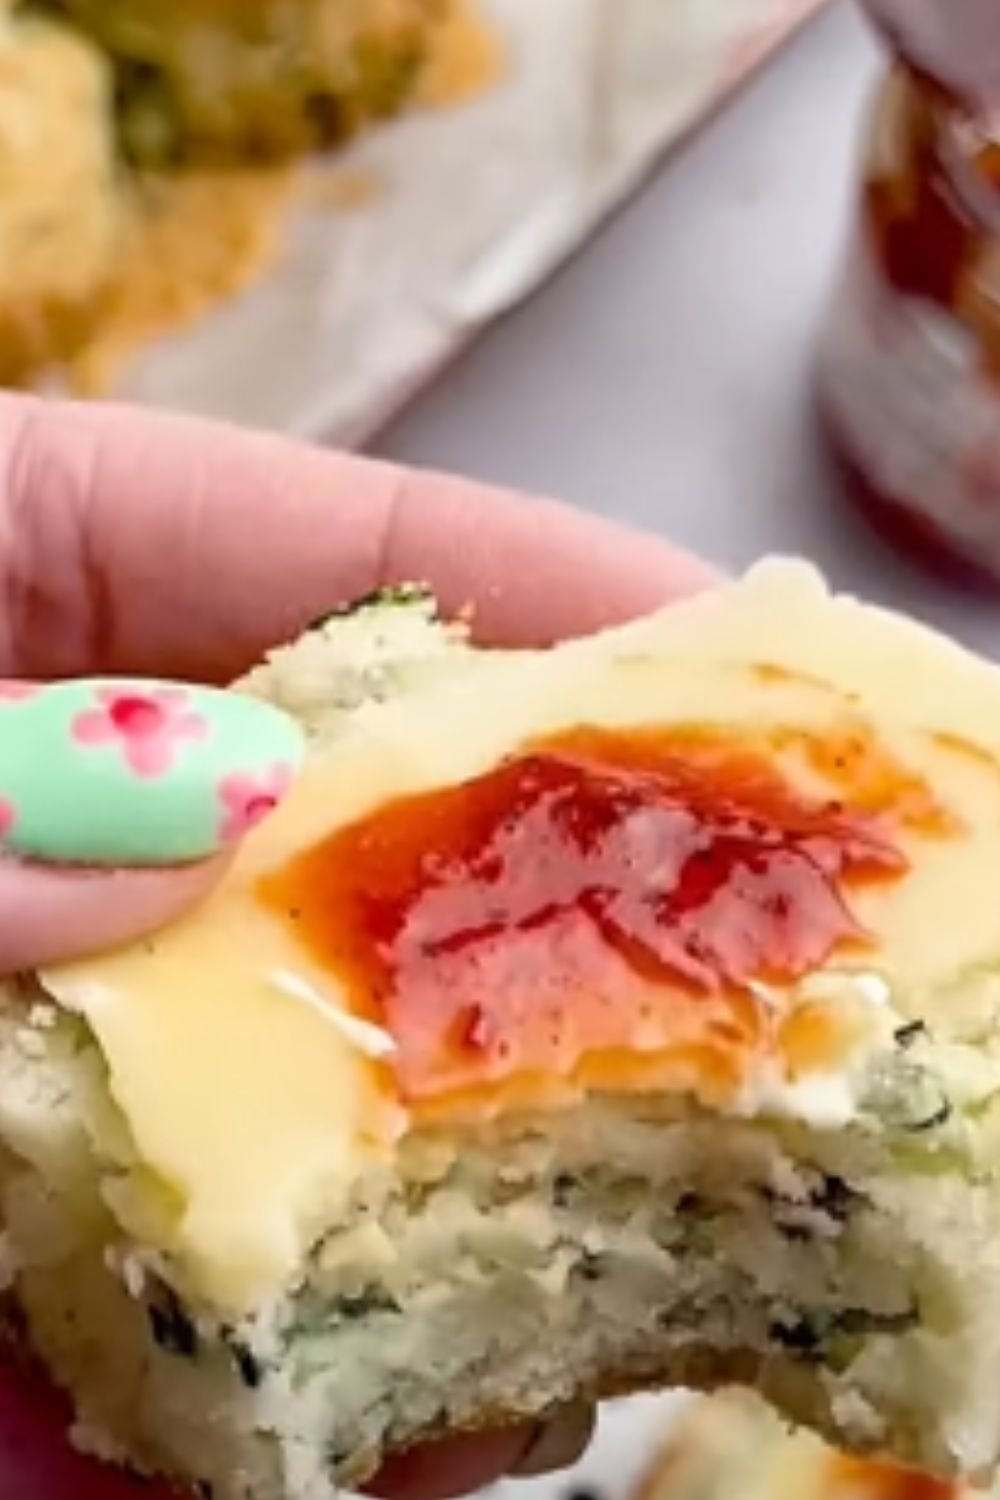
- Split and spread with honey butter for breakfast
- Alongside a hearty soup or stew for dinner
- As the base for breakfast sandwiches with eggs and bacon
- Sliced and toasted for gourmet grilled cheese
- With a bowl of chili on game day
- Alongside a fresh garden salad for lunch
- As a side for roasted chicken or turkey
- Crumbled over vegetable casseroles as a savory topping
If you’re hosting a brunch, set up a biscuit bar with various spreads like:
| Spread | Flavor Profile | Complementary Ingredients |
|---|---|---|
| Herb butter | Savory | Roasted garlic, fresh herbs |
| Honey butter | Sweet with a hint of salt | Cinnamon, vanilla |
| Pimento cheese | Tangy, spicy | Jalapeños, bacon bits |
| Fig jam | Sweet, fruity | Prosciutto, more cheese |
| Whipped goat cheese | Tangy, creamy | Fresh herbs, cracked pepper |
| Apple butter | Sweet, spiced | Thinly sliced apples |
Troubleshooting Common Issues
Even experienced bakers sometimes encounter problems. Here’s how to fix common biscuit issues:
| Problem | Possible Cause | Solution |
|---|---|---|
| Biscuits didn’t rise | Old baking powder or overworked dough | Test baking powder freshness; handle dough less |
| Too crumbly | Not enough liquid or butter pieces too small | Add 1-2 more tablespoons buttermilk; leave butter in larger pieces |
| Dense, not flaky | Dough overhandled or butter melted | Minimal mixing; make sure butter stays cold |
| Bottoms too dark | Oven too hot or biscuits placed too low | Lower oven temperature; use middle rack |
| Uneven baking | Oven hot spots | Rotate baking sheet halfway through baking |
| Cheese leaked out | Cheese pieces too large | Grate cheese finely; incorporate thoroughly into dough |
Nutritional Information
For those watching their nutrition, here’s an approximate breakdown per biscuit (based on 10 biscuits per batch):
| Nutrient | Amount per Biscuit |
|---|---|
| Calories | 215 |
| Total Fat | 12g |
| Saturated Fat | 7g |
| Cholesterol | 32mg |
| Sodium | 320mg |
| Total Carbohydrate | 21g |
| Dietary Fiber | 1g |
| Sugars | 1g |
| Protein | 6g |
Frequently Asked Questions
Here are answers to some common questions I receive about this recipe:
Q: Can I use a different type of cheese? A: Absolutely! While sharp cheddar is my favorite for its bold flavor, you can substitute Gruyère, Gouda, Pepper Jack, or even a mixture of cheeses. Just make sure to use a good melting cheese for best results.
Q: What can I substitute for chives? A: Green onions (scallions) work perfectly as a substitute. You could also use finely chopped fresh herbs like parsley, dill, or thyme, though the flavor profile will change slightly.
Q: Can I make these gluten-free? A: Yes! Use a 1:1 gluten-free flour blend that contains xanthan gum. The texture may be slightly different, but they’ll still be delicious. You might need to add an extra tablespoon or two of buttermilk as gluten-free flours tend to absorb more liquid.
Q: How do I know when the biscuits are done? A: Look for golden brown tops and bottoms. If you’re unsure, you can insert a toothpick into the center of a biscuit—it should come out clean with no wet dough.
Q: Why did my butter melt out of the biscuits during baking? A: This usually happens when the butter gets too warm before baking. Make sure to work quickly and keep the dough cold. If your kitchen is very warm, chill the cut biscuits for 15 minutes before baking.
Q: Can I make smaller, appetizer-sized biscuits? A: Definitely! Cut the dough into smaller pieces and reduce the baking time by about 3-5 minutes. Keep an eye on them as they’ll brown more quickly.
Q: What’s the secret to tall, flaky biscuits? A: Three things: cold ingredients, minimal handling, and the folding technique. The fold creates distinct layers, while cold butter creates steam pockets during baking that lift the dough.
Q: Can I double the recipe? A: Yes! Double all ingredients exactly, but be especially careful not to overwork the dough when handling the larger quantity.
A Personal Note
I first developed this recipe when I was snowed in during a particularly harsh winter storm. With limited ingredients on hand but a craving for something warm and comforting, these biscuits were born out of necessity—and have since become a family tradition.
What I love most about sharing this recipe is hearing how others have made it their own. One reader added crumbled breakfast sausage to the dough for a complete breakfast biscuit. Another swapped the chives for basil and served them with homemade tomato soup.
However you choose to enjoy them, I hope these ridiculously easy cheddar chive biscuits bring as much joy to your table as they have to mine. They’re proof that sometimes the simplest recipes become our most treasured.
Happy baking!
Q&A Section
Q: Do I really need to grate my own cheese instead of using pre-packaged shredded cheese? A: While you can use pre-shredded cheese in a pinch, I strongly recommend grating your own. Pre-shredded cheese contains anti-caking agents that can make your biscuits drier and less flavorful. Freshly grated cheese melts better and creates those wonderful pockets of cheesy goodness throughout your biscuits.
Q: My biscuits always turn out dry. What am I doing wrong? A: Dry biscuits usually result from either too much flour or overworking the dough. Be sure to measure your flour correctly (spoon and level rather than scooping), and handle the dough as little as possible. Also, make sure your oven isn’t running too hot, as this can dry out the exterior before the inside properly cooks.
Q: Can I make the dough in a food processor? A: While it’s possible, I don’t recommend it. Food processors tend to break down the butter too finely, eliminating those pea-sized pieces that create flaky layers. The quick pulses can also overwork the dough. For best results, use a pastry cutter or your fingers for that perfect texture.
Q: How thick should I pat out the dough? A: For tall, fluffy biscuits, aim for about 1-inch thickness. If your dough is too thin, the biscuits won’t rise as impressively. Too thick, and they might not cook through properly in the center. A 1-inch thickness gives you that perfect balance of height and even baking.
Q: My family doesn’t like chives. Can I leave them out completely? A: Absolutely! You can omit the chives entirely for straight-up cheddar biscuits, which are still delicious. Alternatively, try a small amount of dried herbs like oregano or thyme if you want some herb flavor without the distinctive chive taste.
Q: Can I use this recipe to make biscuits and gravy? A: These make excellent biscuits for sausage gravy! Their sturdy texture holds up well to gravy, and the cheese and chives add wonderful flavor. I recommend cutting them slightly larger if using for biscuits and gravy so they can support more of that delicious topping.
Q: Is there a way to make these biscuits lighter in calories? A: You can reduce calories by using reduced-fat cheese and light buttermilk. You could also replace up to half the butter with Greek yogurt, though this will change the texture somewhat. Keep in mind that any modifications may affect the taste and texture of the final product.
Q: Can I make these in a cast-iron skillet? A: Yes! Place the cut biscuits in a well-seasoned cast-iron skillet with the sides touching. This creates those classic soft-sided pull-apart biscuits. Bake as directed, though you might need to add 2-3 minutes to the baking time.