There’s something magical about the way freshly baked bread can transform an ordinary meal into a memorable experience. When I first discovered how to make naan dippers at home, it completely changed my approach to entertaining guests and even everyday snacking. These bite-sized pieces of naan bread are incredibly versatile, perfect for scooping up hummus, curry, or any dip you can imagine—and the best part? They’re surprisingly easy to make from scratch!
As someone who has been baking for years, I’ve tried countless bread recipes, but these naan dippers have become a staple in my kitchen. The soft, chewy interior with slightly crisp edges creates the perfect texture for dipping, while the customizable flavors allow you to complement any dish. Whether you’re hosting a dinner party or looking for a quick homemade snack, these naan dippers are guaranteed to impress.
In this article, I’ll share my foolproof recipe for making perfect naan dippers at home, along with variations, serving suggestions, and storage tips to ensure you get the most out of this fantastic bread. Let’s dive in and transform your dipping experience forever!
What Are Naan Dippers?
Before we get into the recipe, let’s talk about what naan dippers actually are. Traditional naan is a leavened flatbread originating from South Asia, particularly popular in Indian cuisine. Naan dippers are simply smaller, bite-sized versions of this beloved bread, cut or shaped specifically for dipping purposes.
Unlike regular naan, which is typically served as a side to scoop up curry, naan dippers are designed to be the perfect size for appetizers and snacks. They’re slightly thicker than pita chips but thinner than traditional naan, striking the ideal balance between sturdiness and tenderness.
What sets my naan dippers apart is the careful attention to the fermentation process and cooking method, which results in those signature bubbles and char marks that make homemade naan so irresistible.
Why Make Naan Dippers From Scratch?
You might be wondering why you should bother making naan dippers from scratch when you can buy them pre-made. Here are several compelling reasons:
- Superior Taste: Nothing compares to the flavor of freshly baked bread, with that distinctive yeasty aroma that fills your kitchen.
- Customizable Flavors: When you make your own, you can add any herbs, spices, or toppings you desire.
- No Preservatives: Homemade naan dippers contain no artificial preservatives or additives.
- Cost-Effective: Making a large batch at home costs a fraction of what you’d pay for store-bought versions.
- Impressive Skill: There’s something deeply satisfying about serving bread you’ve made with your own hands.
- Adjustable Texture: You can make them exactly as crispy or soft as you prefer.
I’ve found that my guests are always impressed when I mention the naan dippers are homemade, and they inevitably ask for the recipe!
Essential Ingredients for Perfect Naan Dippers

The beauty of naan dippers lies in their simplicity. You likely already have most of these ingredients in your pantry, making this an accessible recipe even for spontaneous baking sessions.
Basic Ingredients
- All-Purpose Flour: 3 cups (375g)
- Active Dry Yeast: 1 tablespoon (9g)
- Sugar: 1 tablespoon (12g)
- Warm Water: 1/4 cup (60ml)
- Warm Milk: 3/4 cup (180ml)
- Plain Yogurt: 1/4 cup (60g)
- Salt: 1 teaspoon (6g)
- Baking Powder: 1/2 teaspoon (2g)
- Oil: 2 tablespoons (30ml) plus extra for brushing
- Butter: 4 tablespoons (56g), melted, for brushing
Optional Flavor Enhancers
- Minced garlic (2-3 cloves)
- Fresh herbs (cilantro, mint, parsley)
- Spices (cumin seeds, nigella seeds, za’atar)
- Grated cheese (such as parmesan or cheddar)
The combination of yogurt and milk in this recipe is what gives these naan dippers their incredible texture—soft and chewy inside with a slightly crisp exterior. I’ve experimented with different ratios over the years, and this formula consistently produces the best results.
Equipment You’ll Need
Before we start baking, let’s make sure you have all the necessary equipment on hand:
- Large mixing bowl
- Measuring cups and spoons
- Wooden spoon or stand mixer with dough hook
- Clean kitchen towel
- Rolling pin
- Cast iron skillet, heavy-bottomed pan, or pizza stone
- Tongs or spatula
- Pastry brush
- Pizza cutter or sharp knife
- Cooling rack
While a stand mixer makes the process easier, you can absolutely make these naan dippers by hand. In fact, I often prefer hand-kneading as it helps me better feel the dough’s consistency and know exactly when it’s ready.
Step-by-Step Naan Dippers Recipe
Now that we have our ingredients and equipment ready, let’s dive into the recipe. I’ll break it down into manageable steps to ensure your naan dippers turn out perfectly every time.
Step 1: Activate the Yeast
- In a small bowl, combine warm water (around 110°F/43°C) and sugar.
- Sprinkle the active dry yeast over the water and let it sit for 5-10 minutes until foamy.
- If the yeast doesn’t foam, it may be inactive—start again with fresh yeast.
Step 2: Prepare the Dough
- In a large mixing bowl, combine flour, salt, and baking powder.
- Make a well in the center and add the activated yeast mixture, warm milk, yogurt, and oil.
- Mix with a wooden spoon until the dough starts to come together.
- Turn the dough out onto a floured surface and knead for 8-10 minutes until smooth and elastic.
- The dough should be soft but not sticky—add a little more flour if needed.
Step 3: First Rise
- Lightly oil a clean bowl and place the dough inside, turning to coat with oil.
- Cover with a damp kitchen towel or plastic wrap.
- Let rise in a warm place for 1-2 hours, or until doubled in size.
- I like to place mine in the oven with just the light on—it creates the perfect warm environment.
Step 4: Divide and Shape
- Punch down the risen dough to release air bubbles.
- Divide the dough into 4 equal portions, then divide each portion into 6 smaller pieces (24 pieces total).
- Roll each piece into a ball, then flatten and roll into an oval or round shape, about 1/8 inch thick.
- For traditional naan shape, elongate one end slightly.
Step 5: Cook the Naan Dippers
- Heat a cast iron skillet, heavy-bottomed pan, or pizza stone over medium-high heat until very hot.
- Place one rolled piece of dough onto the hot surface.
- Cook for 1-2 minutes until bubbles form and the bottom develops char marks.
- Flip and cook the other side for another 1-2 minutes.
- Remove from heat and brush with melted butter immediately.
- Repeat with remaining dough pieces.
Step 6: Cut Into Dippers
- Allow the naan to cool slightly before cutting.
- Use a pizza cutter or sharp knife to cut each naan into 3-4 triangular or rectangular pieces.
- For extra crispness, you can place the cut pieces back in the pan for 30 seconds per side.
Naan Dipper Variations to Try
One of the things I love most about making naan dippers is how versatile the recipe is. Once you’ve mastered the basic version, you can experiment with these delicious variations:
Garlic Naan Dippers
Melt 4 tablespoons of butter with 4 minced garlic cloves and brush this mixture onto the naan dippers immediately after cooking. Sprinkle with chopped fresh cilantro for an extra flavor boost.
Herb-Infused Naan Dippers
Add 2 tablespoons of finely chopped fresh herbs (such as rosemary, thyme, and oregano) to the dough during mixing. The herbs will release their aromatic oils during baking, infusing the dippers with incredible flavor.
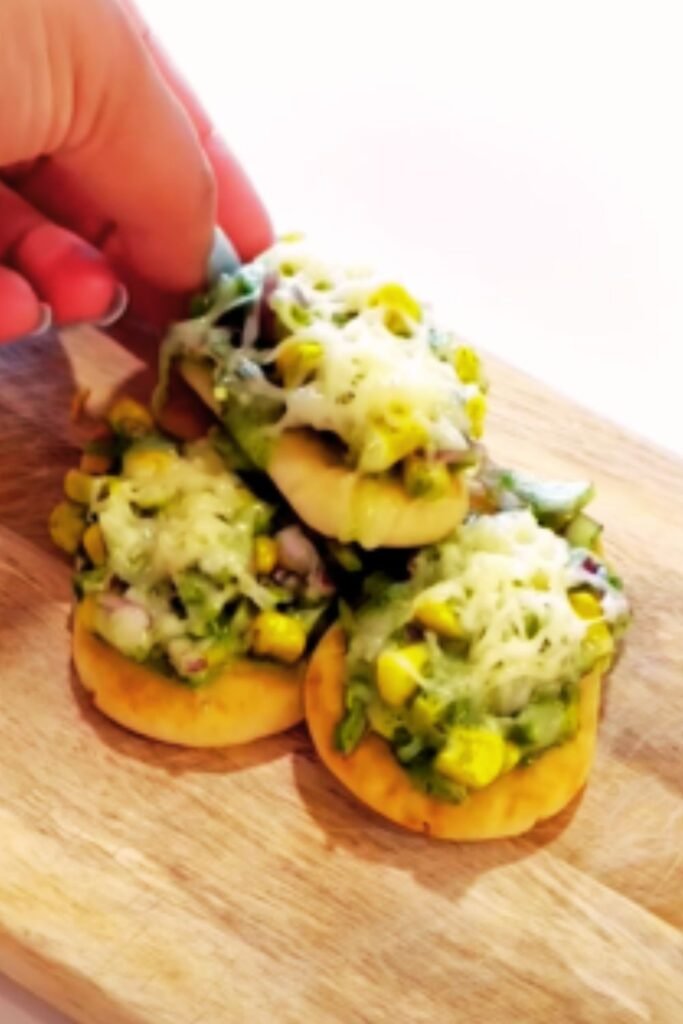
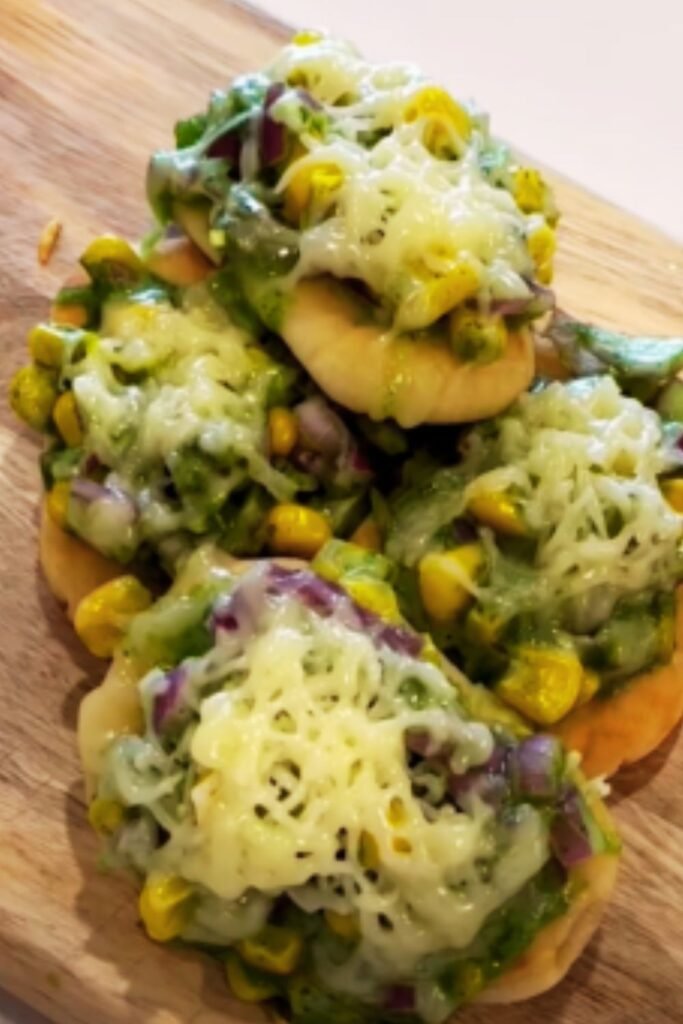
Cheesy Naan Dippers
Sprinkle grated cheese (such as parmesan, cheddar, or a blend) onto the rolled dough before cooking. Press lightly so the cheese sticks, then cook as usual for a deliciously melty, crispy result.
Spiced Naan Dippers
Add 1 teaspoon of your favorite spice blend (curry powder, garam masala, za’atar) to the flour mixture. For an extra kick, mix 1/2 teaspoon of cayenne pepper or red chili flakes into the melted butter before brushing.
Sweet Naan Dippers
For a dessert variation, add 2 tablespoons of sugar to the dough and brush with a mixture of melted butter, cinnamon, and sugar after cooking. These are perfect for dipping in chocolate sauce or fruit compote!
How to Store and Reheat Naan Dippers
One of the best things about this recipe is that it makes a generous batch, perfect for preparing ahead of time. Here’s how to store and reheat your naan dippers to maintain their delicious taste and texture:
Short-Term Storage (1-2 days)
- Allow the naan dippers to cool completely.
- Store in an airtight container or zip-top bag at room temperature.
- Place a paper towel in the container to absorb excess moisture.
Longer Storage (up to 1 week)
- After cooling, place in an airtight container in the refrigerator.
- Separate layers with parchment paper to prevent sticking.
Freezing (up to 3 months)
- Arrange cooled naan dippers in a single layer on a baking sheet.
- Freeze until solid (about 2 hours).
- Transfer to freezer bags, removing as much air as possible.
- Label with the date and contents.
Reheating Methods
For the best texture when reheating, try one of these methods:
- Oven: Preheat to 350°F (175°C). Arrange dippers on a baking sheet and heat for 3-5 minutes until warm.
- Toaster Oven: Heat on medium setting for 1-2 minutes.
- Skillet: Warm in a dry skillet over medium heat for 30 seconds per side.
- Microwave: As a last resort, microwave for 10-15 seconds. Note that this method may make them a bit chewy.
I’ve found that reheating in the oven or a skillet gives the best results, bringing back that fresh-baked quality with a slightly crisp exterior.
Perfect Dipping Companions for Naan Dippers
The joy of naan dippers comes from pairing them with the right dips and accompaniments. Here are some delicious options that I’ve found work particularly well:
Traditional Dips
| Dip | Flavor Profile | Key Ingredients | Best Paired With |
|---|---|---|---|
| Hummus | Creamy, nutty | Chickpeas, tahini, garlic | Garlic or herb naan dippers |
| Tzatziki | Cool, tangy | Yogurt, cucumber, dill | Plain or mint naan dippers |
| Baba Ganoush | Smoky, rich | Roasted eggplant, tahini | Spiced naan dippers |
| Raita | Refreshing, cooling | Yogurt, cucumber, mint | Spicy naan dippers |
| Muhammara | Spicy, sweet | Roasted red peppers, walnuts | Plain naan dippers |
Indian-Inspired Pairings
| Dish | Flavor Profile | Key Ingredients | Serving Temperature |
|---|---|---|---|
| Butter Chicken | Rich, mildly spiced | Chicken, tomato, cream | Warm |
| Chana Masala | Savory, hearty | Chickpeas, tomatoes, spices | Warm |
| Saag Paneer | Earthy, creamy | Spinach, paneer cheese | Warm |
| Mango Chutney | Sweet, tangy | Mangoes, vinegar, spices | Room temperature |
| Dal Makhani | Creamy, comforting | Black lentils, kidney beans | Warm |
Mediterranean Accompaniments
| Dish | Flavor Profile | Key Ingredients | Serving Style |
|---|---|---|---|
| Olive Tapenade | Briny, rich | Olives, capers, olive oil | Room temperature |
| Whipped Feta | Tangy, creamy | Feta cheese, cream cheese | Chilled |
| Labneh | Tangy, spreadable | Strained yogurt, olive oil | Chilled |
| Roasted Red Pepper Dip | Sweet, smoky | Red peppers, garlic, olive oil | Room temperature |
| Shakshuka | Savory, spiced | Tomatoes, eggs, spices | Warm |
Creative Fusion Options
I love experimenting with unexpected combinations! Here are some creative dips that work surprisingly well with naan dippers:
- Avocado Lime Dip: Mashed avocados, lime juice, cilantro, and a hint of jalapeño
- Caramelized Onion Dip: Slowly caramelized onions blended with Greek yogurt and cream cheese
- Roasted Garlic White Bean Spread: Cannellini beans blended with roasted garlic, lemon, and fresh herbs
- Pumpkin Sage Dip: Roasted pumpkin purée with brown butter, fried sage, and a touch of maple syrup
- Artichoke Spinach Dip: Creamy blend of artichokes, spinach, parmesan, and cream cheese
Serving Suggestions for Special Occasions
Naan dippers are perfect for elevating your entertaining game. Here are some serving ideas for different occasions:
Casual Gatherings
Create a grazing board with an assortment of naan dippers, hummus, tzatziki, olives, cherry tomatoes, and cucumber slices. This easy, interactive spread encourages mingling and casual snacking.
Elegant Dinner Parties
Serve warm naan dippers alongside small bowls of three complementary dips, such as muhammara, whipped feta, and olive tapenade. Add a garnish of fresh herbs and a drizzle of high-quality olive oil for a sophisticated touch.
Family-Style Meals
Place a basket of naan dippers at the center of the table alongside a hearty curry or stew. The shared experience of dipping and enjoying creates a warm, convivial atmosphere.
Weeknight Dinner Upgrade
Transform a simple soup or salad into a satisfying meal by serving freshly made naan dippers on the side. The contrast in textures makes even the simplest meal feel special.
Troubleshooting Common Naan Dipper Issues
Even experienced bakers encounter issues from time to time. Here are solutions to some common problems you might face when making naan dippers:
Dough Too Sticky
- Problem: The dough sticks to your hands and work surface.
- Solution: Add flour gradually, one tablespoon at a time, until the dough reaches a manageable consistency. Be careful not to add too much, as this can make the naan dippers tough.
Dough Not Rising
- Problem: The dough hasn’t doubled in size during the rising time.
- Solution: Check if your yeast is fresh and active. Ensure your rising environment is warm enough (75-85°F is ideal). If your kitchen is cold, try placing the dough in the oven with just the light on.
Naan Dippers Too Thick
- Problem: The finished dippers are too thick and doughy in the center.
- Solution: Roll the dough thinner (about 1/8 inch) and ensure your cooking surface is hot enough before adding the dough.
Burning Before Cooking Through
- Problem: The outside burns before the inside cooks.
- Solution: Lower the heat slightly and roll the dough a bit thinner. Also, make sure your pan isn’t too hot when you start cooking.
Naan Dippers Too Crisp
- Problem: The dippers are too crisp and cracker-like rather than chewy.
- Solution: Cook for less time and ensure you’re brushing them with butter immediately after cooking to lock in moisture.
Health Benefits of Homemade Naan Dippers
While naan dippers are certainly a treat, making them at home allows you to control the ingredients and make healthier choices. Here are some of the benefits of homemade naan compared to store-bought alternatives:
- No Preservatives: Homemade naan dippers contain no artificial preservatives or additives.
- Controlled Sodium: You can adjust the salt content to suit your dietary needs.
- Whole Grain Option: Substitute up to half of the all-purpose flour with whole wheat flour for added fiber.
- Probiotic Benefits: The yogurt in the dough provides beneficial probiotics.
- Portion Control: Making your own allows you to control the size and thickness, helping with portion management.
For a healthier version, try these modifications:
- Use olive oil instead of butter for brushing
- Incorporate whole wheat flour
- Reduce the salt slightly
- Add nutritious herbs and spices
- Bake in the oven instead of pan-frying
Q&A Section: Your Naan Dipper Questions Answered
Over the years, I’ve received many questions about making naan dippers. Here are answers to the most common ones:
Q: Can I make the dough ahead of time? Yes! You can make the dough up to 24 hours ahead and keep it in the refrigerator. This slow, cold fermentation actually improves the flavor. Just bring it to room temperature for about 30 minutes before shaping and cooking.
Q: Is there a way to make these without yeast? Absolutely! For a quick version, omit the yeast and increase the baking powder to 2 teaspoons. You won’t need to let the dough rise, but the texture will be slightly different—more like a flatbread than traditional naan.
Q: Can I make these gluten-free? Yes, you can substitute a gluten-free flour blend, but you may need to adjust the liquid amounts. I recommend adding xanthan gum (about 1 teaspoon per cup of flour) if your blend doesn’t already include it, to help with elasticity.
Q: How can I get those beautiful char marks? For authentic char marks, make sure your cooking surface is very hot before adding the dough. A cast iron skillet works best, but a pizza stone or heavy-bottomed pan will also work. Don’t be afraid of high heat—it’s key to those distinctive marks!
Q: My naan dippers puffed up too much. What went wrong? This isn’t necessarily a problem! Puffing is natural and creates that lovely airy texture. If you prefer flatter dippers, press down gently with a spatula during cooking or prick the rolled dough with a fork before cooking.
Q: Can I use Greek yogurt instead of plain yogurt? Yes, Greek yogurt works well but because it’s thicker, you might need to add a tablespoon or two of extra milk or water to achieve the right dough consistency.
Final Thoughts: Why Naan Dippers Will Become Your New Favorite
After making these naan dippers countless times, I can confidently say they’ve become one of my signature recipes. There’s something deeply satisfying about creating bread from scratch—watching the dough rise, smelling the yeasty aroma as it cooks, and finally enjoying the fruits of your labor.
What makes naan dippers so special is their versatility. They can elevate a simple weeknight dinner, shine as the star of a party appetizer spread, or even satisfy late-night cravings with a drizzle of honey or chocolate.
I encourage you to make this recipe your own. Experiment with different herbs and spices, try various cooking methods, and discover your perfect pairing. Baking is as much art as science, and there’s joy in finding your unique version of a classic.
Whether you’re an experienced baker or trying homemade bread for the first time, these naan dippers are approachable, forgiving, and guaranteed to impress. So gather your ingredients, roll up your sleeves, and prepare to experience the simple pleasure of freshly baked bread—one delicious dipper at a time.