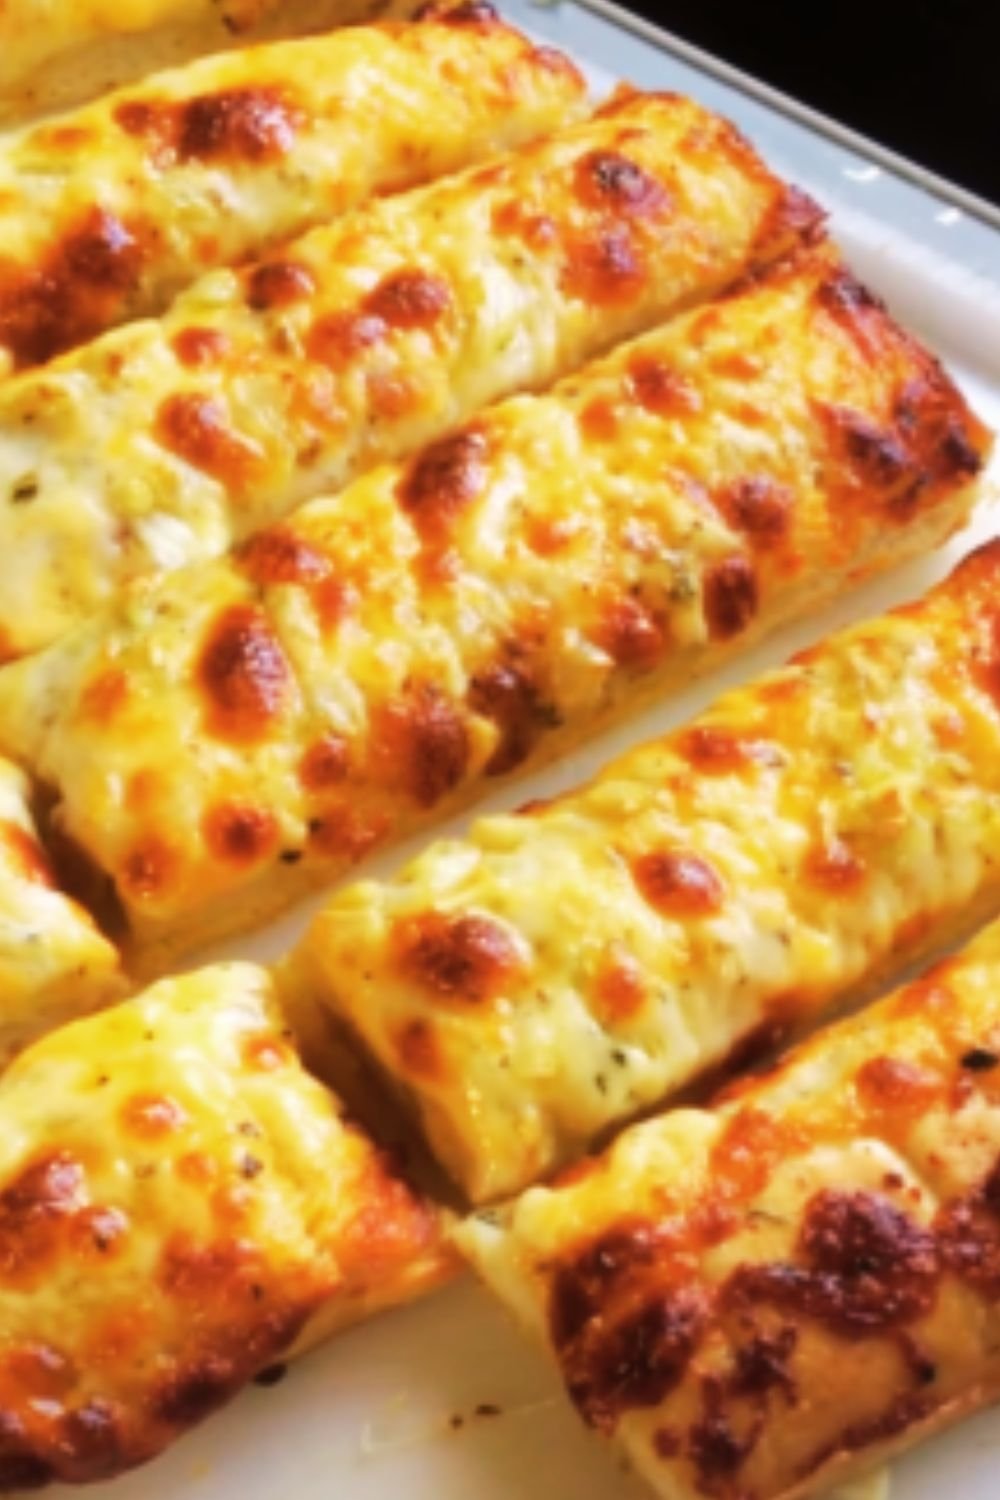
There’s something absolutely magical about biting into a warm, freshly baked cheese breadstick. That perfect combination of soft, pillowy bread and stretchy, melted cheese hits all the right notes whether you’re hosting a dinner party or just craving a comforting snack. As someone who’s spent years perfecting my breadstick game, I’m thrilled to share my complete guide to making restaurant-quality cheese breadsticks right in your own kitchen.
The Joy of Homemade Cheese Breadsticks
I still remember the first time I attempted to make cheese breadsticks at home. What started as a simple experiment quickly became an obsession as I discovered just how incredibly versatile and satisfying they can be. Unlike store-bought varieties, homemade cheese breadsticks give you complete control over the ingredients, flavors, and textures.
Whether you’re dipping them in marinara sauce, serving them alongside a hearty soup, or simply enjoying them on their own, these cheesy delights are guaranteed to impress. The best part? Once you master the basic technique, you can customize them endlessly to suit any occasion or preference.
Essential Ingredients for Perfect Cheese Breadsticks
The beauty of cheese breadsticks lies in their simplicity. With just a handful of quality ingredients, you can create something truly exceptional. Here’s what you’ll need:
- Bread Flour: The higher protein content gives breadsticks their characteristic chew and structure
- Active Dry Yeast: The leavening agent that brings your dough to life
- Warm Water: To activate the yeast and form the dough
- Olive Oil: Adds flavor and helps create a tender crumb
- Salt: Enhances all the flavors and strengthens the dough
- Sugar: Feeds the yeast and adds a subtle sweetness
- Cheese: The star of the show! Mozzarella, cheddar, parmesan, or a blend
- Garlic Powder: For that irresistible savory flavor
- Italian Herbs: Optional but highly recommended for extra flavor
- Butter: For brushing on top before baking
I’ve experimented with countless flour brands and cheese combinations over the years, and I’ve found that King Arthur bread flour and a blend of low-moisture mozzarella with sharp cheddar yields the most consistently delicious results.
Equipment You’ll Need
Before diving into the recipe, let’s make sure you have all the necessary equipment:
- Large mixing bowl
- Measuring cups and spoons
- Kitchen scale (for precise measurements)
- Wooden spoon or stand mixer with dough hook
- Clean work surface for kneading
- Baking sheets
- Parchment paper
- Pastry brush
- Sharp knife or pizza cutter
- Cooling rack
While not essential, a stand mixer makes the kneading process much easier, especially if you’re doubling the recipe for a crowd.
The Ultimate Cheese Breadsticks Recipe
Now, let’s get into the detailed recipe that I’ve perfected over countless batches. This recipe yields approximately 12-16 breadsticks, depending on how you size them.
Dough Ingredients:
- 3 cups (375g) bread flour
- 1 packet (2¼ teaspoons) active dry yeast
- 1 cup warm water (110-115°F/43-46°C)
- 2 tablespoons olive oil
- 1½ teaspoons salt
- 1 tablespoon sugar
Cheese Topping:
- 2 cups shredded cheese blend (mozzarella, cheddar, parmesan)
- ½ teaspoon garlic powder
- 1 teaspoon Italian herbs (oregano, basil, thyme)
- 3 tablespoons melted butter
- ½ teaspoon flaky sea salt (for sprinkling)
Instructions:
- Activate the yeast: In a small bowl, combine the warm water, sugar, and yeast. Let it sit for 5-10 minutes until foamy. This step is crucial as it ensures your yeast is alive and active.
- Prepare the dough: In a large mixing bowl, combine the flour and salt. Make a well in the center and pour in the activated yeast mixture and olive oil. Stir with a wooden spoon until a shaggy dough forms.
- Knead the dough: Turn the dough onto a lightly floured surface and knead for about 8-10 minutes until smooth and elastic. If using a stand mixer, knead with the dough hook on medium speed for 5-7 minutes.
- First rise: Place the dough in an oiled bowl, cover with a clean kitchen towel or plastic wrap, and let it rise in a warm spot for about 1 hour, or until doubled in size.
- Shape the breadsticks: Preheat your oven to 425°F (220°C). Line two baking sheets with parchment paper. Punch down the risen dough and turn it out onto a lightly floured surface. Roll the dough into a rectangle approximately 10×15 inches.
- Cut into strips: Using a pizza cutter or sharp knife, cut the dough into strips about ¾-inch wide. You should get 12-16 strips depending on how precisely you cut.
- Twist for texture: For an extra special touch, twist each strip 2-3 times before placing on the baking sheet. This creates more surface area for the cheese to cling to and gives the breadsticks a more artisanal appearance.
- Second rise: Cover the shaped breadsticks with a kitchen towel and let them rest for 15-20 minutes.
- Add cheese topping: Brush the breadsticks generously with melted butter. In a small bowl, combine the shredded cheese, garlic powder, and Italian herbs. Sprinkle this mixture evenly over the breadsticks, pressing gently to adhere.
- Bake to perfection: Bake in the preheated oven for 12-15 minutes, or until the breadsticks are golden brown and the cheese is melted and slightly crispy around the edges.
- Finish with flair: Remove from the oven and immediately sprinkle with flaky sea salt. Let cool slightly on the baking sheets for 5 minutes before transferring to a wire rack.
- Serve warm: These breadsticks are at their absolute best when served warm, when the cheese is still gooey and stretchy.

Troubleshooting Common Issues
Even experienced bakers encounter challenges sometimes. Here are solutions to the most common issues you might face:
Breadsticks Not Rising Properly
- Problem: Dough barely rises during proofing.
- Solution: Check the yeast’s expiration date. Ensure water temperature is correct—too hot will kill the yeast, too cold won’t activate it. Also make sure your proofing environment is warm enough.
Dough Too Sticky
- Problem: Dough sticks to everything and is difficult to handle.
- Solution: Add flour 1 tablespoon at a time during kneading until the dough becomes manageable. Be careful not to add too much, which can make the breadsticks tough.
Cheese Sliding Off
- Problem: The cheese topping melts off the breadsticks during baking.
- Solution: Make sure to press the cheese firmly into the dough before baking. Using a finer grate on your cheese and mixing it with a bit of butter can help it adhere better.
Uneven Baking
- Problem: Some breadsticks are golden while others are underbaked.
- Solution: Rotate your baking sheets halfway through the baking time. Also, make sure all breadsticks are uniformly sized.
Variations to Try
One of the joys of making cheese breadsticks is how easily they can be customized. Here are some of my favorite variations:
Garlic Parmesan
Add 2 minced garlic cloves to the melted butter and use predominantly parmesan cheese in your blend. Finish with fresh chopped parsley after baking.
Spicy Jalapeño Cheddar
Mix finely diced jalapeños into the cheese blend and use sharp cheddar as your primary cheese. Add a pinch of cayenne to the dough for extra heat.
Everything Bagel
Brush breadsticks with egg wash instead of butter and sprinkle with everything bagel seasoning along with the cheese before baking.
Stuffed Cheese Breadsticks
Roll the dough thinner, place string cheese in the center, and fold the dough over, sealing the edges well before twisting and baking.
Sweet Cinnamon Sugar (Dessert Version)
Skip the savory cheese altogether. Instead, brush with butter and sprinkle generously with cinnamon sugar before and after baking.
Make-Ahead and Storage Tips
I often get asked about preparing these breadsticks in advance, especially for parties or busy weeknights. Here’s my guidance:
Make-Ahead Options
- Dough: Prepare the dough up to 24 hours in advance and store it in the refrigerator. Let it come to room temperature for 30 minutes before shaping.
- Shaped Breadsticks: After shaping, cover and refrigerate for up to 8 hours. Let them sit at room temperature for 30 minutes before adding toppings and baking.
- Fully Baked: You can bake the breadsticks completely, allow them to cool, and then freeze for up to 1 month.
Storage Guidelines
- Counter: Store in an airtight container at room temperature for up to 2 days.
- Refrigerator: Keep in a sealed container for up to 5 days. The texture will change slightly.
- Freezer: Wrap individually in plastic wrap and store in a freezer bag for up to 1 month.
Reheating Instructions
For the best results when reheating:
| Storage Method | Reheating Method | Temperature | Time | Special Notes |
|---|---|---|---|---|
| Room Temperature | Oven | 350°F (175°C) | 3-5 min | Wrap loosely in foil |
| Refrigerated | Oven | 350°F (175°C) | 5-7 min | Wrap loosely in foil |
| Frozen | Oven | 350°F (175°C) | 8-10 min | No need to thaw first |
| Any | Microwave | High | 10-15 sec | Last resort; texture suffers |
| Any | Air Fryer | 350°F (175°C) | 2-3 min | Best for restoring crispness |
The oven method always yields the best results, maintaining the contrast between the crispy exterior and soft interior. I never recommend using a toaster as the cheese can create a fire hazard.
Perfect Pairings: What to Serve with Cheese Breadsticks
Cheese breadsticks are incredibly versatile and can complement so many dishes. Here are some of my favorite pairings:
Dipping Sauces
- Marinara sauce (classic and always a hit)
- Garlic butter
- Ranch dressing
- Pesto
- Creamy alfredo
- Spicy arrabbiata
Soups
- Tomato bisque
- Minestrone
- Creamy potato
- Italian wedding soup
- Butternut squash
Main Dishes
- Caesar salad
- Lasagna
- Chicken parmesan
- Spaghetti and meatballs
- Grilled vegetables
Serving Suggestions
- Arrange on a wooden board with small ramekins of different dipping sauces
- Wrap in parchment paper for casual outdoor dining
- Place vertically in a tall glass or jar for an impressive centerpiece
- Serve alongside a cheese and charcuterie board
- Create a breadstick bar with various toppings and dips

Nutritional Information
For those watching their nutritional intake, here’s an approximate breakdown per breadstick (based on the recipe yielding 16 breadsticks):
| Nutrient | Amount per Breadstick |
|---|---|
| Calories | 175 |
| Total Fat | 7g |
| Saturated Fat | 3.5g |
| Cholesterol | 15mg |
| Sodium | 320mg |
| Total Carbohydrates | 22g |
| Dietary Fiber | 0.8g |
| Sugars | 1g |
| Protein | 6g |
| Calcium | 80mg |
| Iron | 1.2mg |
Keep in mind that these values can vary depending on specific ingredients and portion sizes. For a lighter version, you can use part-skim mozzarella and reduce the butter by half.
Special Dietary Adaptations
I believe everyone should be able to enjoy delicious cheese breadsticks, regardless of dietary restrictions. Here are some modifications I’ve tested and approved:
Gluten-Free Version
Replace the bread flour with a high-quality gluten-free flour blend that contains xanthan gum. Add an extra 2 tablespoons of olive oil to improve texture. The dough won’t have quite the same elasticity, but the taste will still be delicious.
Dairy-Free Option
Use plant-based butter and dairy-free cheese alternatives. Violife and Daiya make melting cheeses that work well here. Add a pinch of nutritional yeast to the dough for a more cheesy flavor.
Lower-Carb Adaptation
While not truly low-carb, you can reduce carbs by making smaller, thinner breadsticks and focusing more on the cheese topping. Almond flour blends don’t work well for this particular recipe.
Whole Grain Version
Substitute up to half the bread flour with whole wheat flour. You may need to add an extra tablespoon or two of water as whole wheat flour absorbs more moisture.
Frequently Asked Questions
After sharing this recipe with friends and family over the years, I’ve collected some common questions that come up. Here are the answers to help you on your cheese breadstick journey:
Can I make these without a stand mixer? Yes, absolutely! While a stand mixer makes the process easier, you can mix the dough with a wooden spoon and knead by hand. It takes a bit more effort but yields equally delicious results.
Why didn’t my dough rise? The most common culprits are expired yeast or improper water temperature. Make sure your yeast is fresh and your water is warm (110-115°F/43-46°C) but not hot. Also ensure you’re placing the dough in a warm, draft-free spot.
Can I use all-purpose flour instead of bread flour? Yes, though the texture won’t be quite the same. Bread flour’s higher protein content creates more gluten, giving breadsticks their characteristic chew. If using all-purpose, knead a bit longer to develop more gluten.
How do I know when the breadsticks are done baking? They should be golden brown on top and sound hollow when tapped on the bottom. If you have an instant-read thermometer, the internal temperature should reach about 190°F (88°C).
Can I add pepperoni or other meats to these breadsticks? Absolutely! Finely chopped pepperoni, cooked and crumbled bacon, or ground Italian sausage can be mixed with the cheese topping. Make sure any meat is fully cooked before adding.
Why are my breadsticks tough instead of soft and chewy? Over-kneading or adding too much flour can make breadsticks tough. Only add enough flour to make the dough manageable, and stop kneading once the dough is smooth and elastic.
Can I use pizza dough for this recipe? Store-bought pizza dough can work in a pinch, though the texture will be slightly different. Let it come to room temperature before shaping, and follow the recipe from the shaping step onward.

The Science Behind Great Cheese Breadsticks
Understanding a bit of food science can help you create even better breadsticks. Here’s what’s happening behind the scenes:
Gluten Development
Kneading the dough develops gluten, a protein network that gives breadsticks their structure and chew. Bread flour contains more protein than all-purpose, creating stronger gluten networks.
Yeast Fermentation
As yeast consumes sugars in the dough, it produces carbon dioxide gas, which creates bubbles that make the dough rise. It also produces flavor compounds that contribute to the breadsticks’ taste.
Maillard Reaction
The golden-brown color and rich flavor come from the Maillard reaction, a chemical reaction between amino acids and reducing sugars that occurs when the breadsticks bake at high temperatures.
Cheese Melting Profiles
Different cheeses melt at different temperatures and have varying fat and moisture contents. This is why a blend of cheeses often gives the best results—combining the stretchiness of mozzarella with the flavor of cheddar and the umami of parmesan.
Salt’s Multiple Roles
Salt does more than just add flavor. It strengthens gluten, controls yeast activity, and enhances perception of other flavors. This is why it’s important not to skip or significantly reduce the salt in the recipe.
My Personal Tips for Cheese Breadstick Success
After making hundreds of batches over the years, I’ve collected these additional tips that can take your breadsticks from good to unforgettable:
- Cold Fermentation: For enhanced flavor, let the dough rise slowly in the refrigerator overnight instead of at room temperature for an hour.
- Cheese Grating: Always grate your own cheese rather than using pre-shredded. Pre-shredded cheese contains anti-caking agents that can prevent proper melting.
- Humidity Matters: On very humid days, you may need a bit more flour. On dry days, you might need a touch more water. Trust your instincts and adjust accordingly.
- Oven Temperature: Most home ovens have hot spots and temperature fluctuations. Using an oven thermometer can help ensure accurate baking temperatures.
- Double Cheese Method: For ultra-cheesy breadsticks, mix some grated cheese into the dough itself, then add more on top before baking.
- Let The Dough Tell You: Rather than adhering strictly to kneading times, learn to recognize when dough is properly kneaded by its smooth appearance and elastic feel.
- Finishing Touch: A light brush of garlic butter immediately after baking adds an incredible aroma and flavor boost.
Final Thoughts
Homemade cheese breadsticks have become my signature dish at gatherings, and friends regularly request them. There’s something deeply satisfying about transforming simple ingredients into something so irresistibly delicious. The process itself—feeling the dough come together under my hands, smelling the yeasty aroma as it rises, watching the cheese bubble and brown in the oven—has become as rewarding as enjoying the final product.
Whether you’re an experienced baker or trying breadsticks for the first time, I hope this guide inspires you to create your own cheesy masterpieces. Remember that each batch is an opportunity to learn and improve your technique. Before long, you’ll develop your own personal touches and variations that make these breadsticks uniquely yours.
So heat up that oven, gather your ingredients, and prepare to delight in one of life’s simple but profound pleasures: warm, freshly baked cheese breadsticks made with your own hands.

Q&A Section
Are cheese breadsticks the same as cheese sticks? No, they’re actually quite different! Cheese breadsticks are bread-based with cheese typically on top or incorporated into the dough. Cheese sticks (or mozzarella sticks) are made of solid cheese that’s breaded and fried. Both are delicious but completely different in preparation and texture.
How do I get the cheese to stick to the breadsticks? The key is brushing the dough with butter or egg wash before adding the cheese. Also, gently pressing the cheese into the dough helps it adhere during baking. Using finely grated cheese rather than coarsely shredded also improves adhesion.
Can I make these breadsticks ahead for a party? Absolutely! You can prepare the dough up to 24 hours in advance and refrigerate it. You can also shape the breadsticks, refrigerate them covered, and then add the toppings and bake just before serving. Alternatively, fully bake them earlier in the day and reheat briefly before serving.
What’s the best way to store leftover cheese breadsticks? Store completely cooled breadsticks in an airtight container at room temperature for up to 2 days. For longer storage, refrigerate for up to 5 days or freeze for up to a month. To reheat, warm them in a 350°F oven for 5-7 minutes until heated through.
Why are my breadsticks not as chewy as restaurant ones? Restaurant breadsticks often use dough conditioners and specialized flours to achieve that distinctive chew. For a closer match at home, use high-protein bread flour, allow for a longer rise time, and make sure you’re kneading the dough sufficiently to develop gluten.
Can I make these breadsticks without yeast? You can make a quick version using self-rising flour or a mixture of all-purpose flour, baking powder, and salt. However, yeast-free versions won’t have the same flavor complexity or texture as traditional yeast-based breadsticks.
What’s the best cheese combination to use? My favorite blend is 50% low-moisture mozzarella for stretch, 30% sharp cheddar for flavor, and 20% parmesan for umami depth. This combination melts beautifully while providing complex cheese flavor. Feel free to adjust ratios based on your preferences!
How do I prevent my breadsticks from becoming tough? Avoid over-kneading the dough and adding too much flour. Only use enough flour to prevent sticking, and stop kneading once the dough is smooth and elastic. Also, don’t overbake them—remove from the oven as soon as they’re golden brown.