
Have you ever craved the mouthwatering flavors of a cheeseburger but wanted something a bit more exciting? These Easy Garlic Parmesan Bacon Cheeseburger Bombs are the answer to your comfort food dreams! I’ve been making these for years, and they’re always a hit at family gatherings, game day parties, or just when I need something utterly satisfying for dinner.
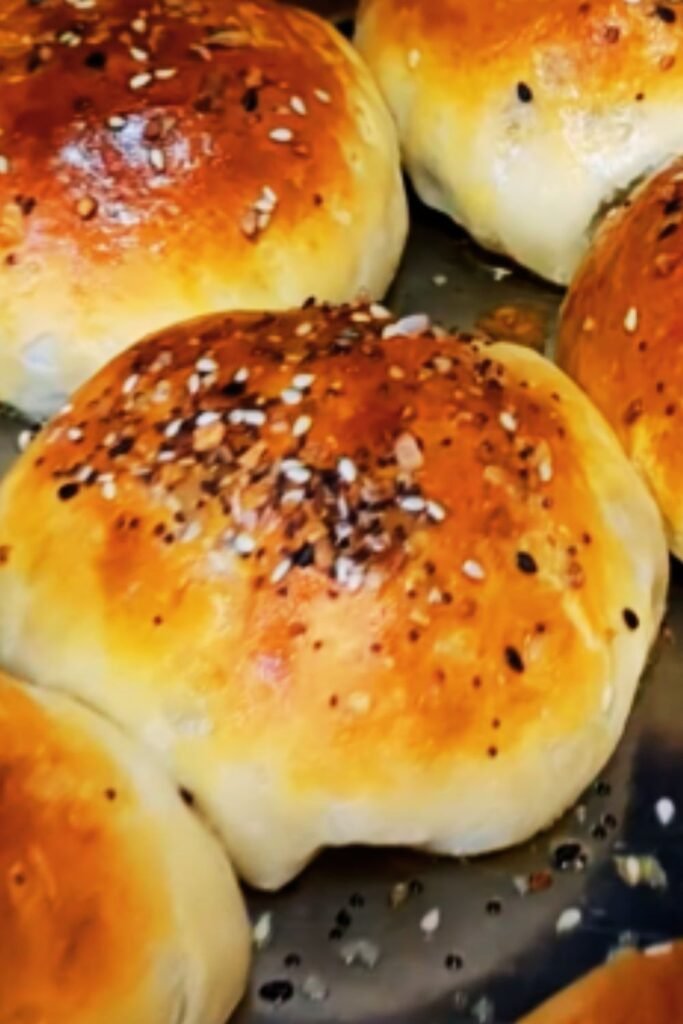
These bombs combine all the best elements of a delicious cheeseburger—juicy beef, melty cheese, savory bacon, and aromatic garlic—wrapped in a fluffy, golden biscuit dough and topped with a buttery garlic parmesan crust. The result is a handheld flavor explosion that will have everyone asking for seconds!
Why You’ll Love This Recipe
I remember the first time I made these for my family—they were gone within minutes! Here’s why these cheeseburger bombs have become a staple in my cooking rotation:
- Perfect for any occasion: From casual weeknight dinners to game day parties
- Customizable: Easy to adapt with your favorite burger toppings
- Kid-friendly: Little ones love these handheld treats
- Make-ahead friendly: Prep in advance and bake when ready
- Freezer-friendly: Great for meal prep and future cravings
Ingredients
For the Filling:
- 1 pound ground beef (80/20 for best flavor)
- 1 tablespoon olive oil
- 1 small onion, finely diced (about 1/2 cup)
- 3 cloves garlic, minced
- 1 tablespoon Worcestershire sauce
- 1 teaspoon dijon mustard
- 1/2 teaspoon salt
- 1/4 teaspoon black pepper
- 8 slices bacon, cooked crispy and crumbled
- 8 oz cheddar cheese, cut into 16 small cubes
- Optional: 2 tablespoons pickle relish
For the Dough:
- 2 cans refrigerated biscuit dough (16 biscuits total)
For the Garlic Parmesan Topping:
- 4 tablespoons butter, melted
- 3 cloves garlic, minced
- 1/4 cup freshly grated parmesan cheese
- 1 teaspoon dried parsley
- 1/2 teaspoon garlic powder
- Pinch of salt
Kitchen Equipment Needed
| Equipment | Purpose |
|---|---|
| Large skillet | For cooking the ground beef filling |
| Mixing bowl | For combining ingredients |
| Baking sheet | For baking the cheeseburger bombs |
| Parchment paper | To prevent sticking and ease cleanup |
| Small bowl | For preparing the garlic butter topping |
| Pastry brush | For applying the garlic butter |
| Meat thermometer | To ensure beef is fully cooked |
| Cutting board | For prep work |
| Sharp knife | For cutting cheese into cubes |
Step-by-Step Instructions
Preparing the Filling
- Preheat your oven to 375°F (190°C) and line a large baking sheet with parchment paper.
- Heat olive oil in a large skillet over medium heat. Add the diced onions and cook until translucent, about 3-4 minutes.
- Add the minced garlic and cook for another 30 seconds until fragrant (be careful not to burn the garlic as it can become bitter).
- Add the ground beef to the skillet, breaking it up with a wooden spoon. Cook until no longer pink, about 5-7 minutes.
- Drain excess grease if necessary (I prefer to leave a little for flavor).
- Add the Worcestershire sauce, dijon mustard, salt, and pepper to the beef mixture. Stir well to combine.
- Remove from heat and stir in the crumbled bacon and pickle relish (if using). Allow the mixture to cool slightly while you prepare the dough.

Assembling the Cheeseburger Bombs
- Open the cans of biscuit dough and separate into 16 individual biscuits.
- Take one biscuit and flatten it in your hand or on a lightly floured surface until it’s about 1/4 inch thick and forms a 3-inch circle.
- Place a spoonful (about 1 1/2 tablespoons) of the beef mixture in the center of the flattened biscuit.
- Add a cube of cheddar cheese on top of the beef.
- Carefully fold the edges of the dough up and around the filling, pinching to seal completely. Make sure there are no holes or gaps where the cheese could leak out.
- Place the sealed bomb seam-side down on the prepared baking sheet, leaving about 2 inches between each one.
- Repeat with the remaining biscuits and filling.
Preparing the Garlic Parmesan Topping
- In a small bowl, combine the melted butter, minced garlic, garlic powder, dried parsley, and a pinch of salt.
- Using a pastry brush, generously brush the tops and sides of each cheeseburger bomb with the garlic butter mixture.
- Sprinkle the freshly grated parmesan cheese evenly over the tops.
Baking the Cheeseburger Bombs
- Bake in the preheated oven for 18-22 minutes, or until the bombs are golden brown and the dough is cooked through.
- If you notice they’re browning too quickly, tent them loosely with aluminum foil.
- Allow to cool for 5 minutes before serving (the filling will be extremely hot).

Pro Tips for Perfect Cheeseburger Bombs
I’ve made these countless times, and along the way, I’ve discovered some secrets to making them absolutely perfect:
- Cheese selection matters: While cheddar is classic, try pepper jack for heat, mozzarella for stretch, or blue cheese for a gourmet twist.
- Seal thoroughly: Double-check your seams to prevent cheese leakage during baking.
- Don’t overfill: It’s tempting to pack in the filling, but this makes sealing difficult and increases the chance of explosions in the oven.
- Rest before eating: Give them at least 5 minutes to cool slightly before biting in – your mouth will thank you!
- Oil your hands: Lightly oil your hands when working with the biscuit dough to prevent sticking.
- Even sizing: Try to make all bombs roughly the same size for even cooking.
- Internal temperature: For food safety, ensure the internal temperature reaches 165°F (74°C).
Nutritional Information
| Nutrient | Amount per Serving (2 bombs) |
|---|---|
| Calories | 485 |
| Total Fat | 28g |
| Saturated Fat | 12g |
| Cholesterol | 75mg |
| Sodium | 890mg |
| Total Carbohydrates | 35g |
| Dietary Fiber | 1g |
| Sugars | 6g |
| Protein | 23g |
| Calcium | 180mg |
| Iron | 3mg |
| Potassium | 245mg |
Note: Nutritional values are approximate and may vary based on specific ingredients used.
Variations to Try
One of the things I love most about these cheeseburger bombs is how versatile they are. Here are some of my favorite variations:
Tex-Mex Style
- Add 1 tablespoon of taco seasoning to the beef
- Use pepper jack cheese instead of cheddar
- Mix in 1/4 cup of corn and black beans
- Serve with guacamole and salsa for dipping
Mushroom Swiss
- Sauté 1 cup of finely chopped mushrooms with the onions
- Use Swiss cheese instead of cheddar
- Add 1 teaspoon of fresh thyme to the beef mixture
Pizza Bombs
- Add 1/4 cup of pizza sauce to the beef
- Use mozzarella cheese
- Mix in 1/4 cup diced pepperoni
- Sprinkle Italian seasoning on top with the parmesan
Buffalo Chicken
- Substitute ground chicken for beef
- Mix in 3 tablespoons of buffalo sauce
- Use blue cheese or mozzarella
- Serve with ranch or blue cheese dressing
Breakfast Bombs
- Use breakfast sausage instead of beef
- Add scrambled eggs to the filling
- Use American cheese
- Brush with maple syrup instead of garlic butter
Make-Ahead and Storage Instructions
Make-Ahead Options:
I often prepare these in advance when I’m hosting a gathering. Here’s how:
- Prepare the filling up to 2 days ahead: Cook the beef mixture, cool completely, and store in an airtight container in the refrigerator.
- Assemble but don’t bake: You can assemble the bombs, place them on a baking sheet, cover tightly with plastic wrap, and refrigerate for up to 24 hours before baking. Let them sit at room temperature for 20 minutes before baking.
- Freeze for later: Assemble the bombs, place them on a baking sheet, and freeze until solid (about 2 hours). Transfer to a freezer bag and store for up to 3 months. When ready to bake, place the frozen bombs on a baking sheet and bake at 375°F for 25-30 minutes.
Storage and Reheating:
- Refrigerator: Store leftover baked bombs in an airtight container for up to 3 days.
- Freezer: Baked bombs can be frozen in an airtight container for up to 2 months.
- Reheating: For best results, reheat in the oven at 350°F (175°C) for 10-12 minutes until heated through. You can also microwave them for 45-60 seconds, but the texture won’t be as crispy.
Serving Suggestions
These cheeseburger bombs are hearty enough to be a meal on their own, but I like to serve them with complementary sides for a complete experience:
- Fresh garden salad with ranch dressing
- Sweet potato fries or regular french fries
- Crispy onion rings
- Pickle spears
- Coleslaw
- Roasted vegetables like broccoli or asparagus
- Tomato soup for dipping
- BBQ sauce, ketchup, or special sauce for dipping
For a party spread, I arrange them on a platter with different dipping sauces in small bowls around them. My homemade special sauce (equal parts mayo, ketchup, and relish with a dash of smoked paprika) is always a hit!
Common Mistakes to Avoid
Over the years, I’ve made plenty of mistakes with these bombs. Learn from my experience:
- Undercooking the beef: Make sure your beef is fully cooked before assembling the bombs.
- Too much filling: Overstuffing makes them impossible to seal properly.
- Not sealing properly: If you don’t pinch the seams tightly, cheese will leak everywhere.
- Skipping the parchment paper: Trust me, cleanup is much easier with it.
- Baking too long: They can dry out if overbaked. Look for golden brown, not dark brown.
- Not allowing to cool: Serve too soon, and you’ll burn your mouth on the molten cheese center.
- Under-seasoning: The biscuit dough is plain, so make sure your filling is well-seasoned.

Frequently Asked Questions
Can I use homemade biscuit dough instead of canned? Absolutely! Homemade dough works wonderfully, just make sure it’s not too thin or it may burst during baking. My basic recipe is 2 cups flour, 1 tablespoon baking powder, 1/2 teaspoon salt, 1/3 cup cold butter, and 3/4 cup milk.
What’s the best ground beef to use? I prefer 80/20 ground beef for the best flavor and moisture. If you go leaner, consider adding a tablespoon of butter to the filling.
Can I make these vegetarian? Yes! Substitute the beef with a plant-based ground meat alternative, or use a mixture of chopped mushrooms, walnuts, and lentils for a homemade vegetarian option. Skip the bacon or use a plant-based bacon alternative.
How do I know when they’re done? The bombs should be golden brown, and if you use a meat thermometer, the internal temperature should reach 165°F (74°C).
My cheese is leaking out during baking. What am I doing wrong? You may not be sealing the dough completely. Make sure to pinch all seams firmly and place the bombs seam-side down on the baking sheet.
Can I add vegetables to the filling? Absolutely! Finely chopped bell peppers, spinach, or grated carrots work well. Just make sure to cook them first to remove excess moisture.
What if I don’t have parmesan cheese? Any hard, grated cheese works well for the topping. Try Pecorino Romano, Asiago, or even sharp cheddar.
Can I make mini versions for appetizers? Yes! Use smaller portions of dough and filling to create bite-sized bombs. Reduce the baking time to about 12-15 minutes.
Health Considerations and Substitutions
While these cheeseburger bombs are definitely an indulgence, there are ways to make them slightly healthier:
Lower-Fat Options:
- Use 93% lean ground beef or substitute ground turkey or chicken
- Reduce the amount of cheese or use reduced-fat cheese
- Use turkey bacon instead of pork bacon
- Opt for reduced-fat biscuit dough if available
Lower-Carb Options:
- Use fathead dough (made with cream cheese, mozzarella, almond flour, and egg) instead of biscuit dough
- Omit the pickle relish or use a sugar-free variety
Gluten-Free Options:
- Use gluten-free biscuit dough
- Ensure your Worcestershire sauce is gluten-free (many brands are not)
Dairy-Free Options:
- Use dairy-free cheese alternatives
- Replace the butter in the topping with olive oil or dairy-free butter
Remember that any substitutions may affect the final taste and texture of your bombs, but experimenting is part of the fun of cooking!
The Story Behind This Recipe
I first discovered these cheeseburger bombs when I was looking for creative ways to use up leftover hamburger meat after a family barbecue. My kids were getting tired of regular hamburgers, and I wanted something that would make them excited about dinner again.
The first batch was a simple version with just beef and cheese, but over time, I’ve perfected the recipe by adding the garlic parmesan topping and the bacon for extra flavor. Now they’re requested at every family gathering and have become something of a signature dish of mine.
What I love most about this recipe is seeing people’s faces when they take their first bite and the melted cheese stretches out—that moment of pure food joy is why I love cooking so much. These bombs may not be fancy cuisine, but they bring happiness to my table, and that’s what matters most.
I hope they bring as much happiness to your table as they have to mine!
Final Thoughts
These Easy Garlic Parmesan Bacon Cheeseburger Bombs blend the comforting flavors of a classic cheeseburger with the convenience of a handheld treat. They’re perfect for busy weeknights, game day gatherings, or anytime you want to put a smile on someone’s face with minimal effort.
The beauty of this recipe lies in its versatility—feel free to experiment with different cheeses, meat combinations, and toppings to create your own signature bomb. Whether you stick to the classic recipe or venture into one of the variations, I’m confident these will become a favorite in your recipe collection.
Remember, cooking is about creating moments and memories around the table. So gather your loved ones, prepare a batch of these delicious bombs, and enjoy the simple pleasure of good food shared with good company.

