Have you ever walked into a bakery and been stopped in your tracks by a pastry that looks like a cross between a croissant and a muffin? That’s exactly what happened to me three years ago, and I’ve been obsessed with cruffins ever since. These delightful treats combine the buttery, flaky layers of a croissant with the shape and versatility of a muffin, creating something truly magical.
I’ve spent countless weekends perfecting my cruffin technique, and today I’m sharing everything I’ve learned. From the basics of laminated dough to creative filling ideas that will impress even the most discerning pastry connoisseurs, this guide has it all.
What Exactly Is a Cruffin?
A cruffin, as the name suggests, is a hybrid pastry combining elements of croissants and muffins. The concept originated in Australia around 2013 but gained worldwide popularity when Mr. Holmes Bakehouse in San Francisco started producing them. The basic idea is simple yet brilliant: take laminated, croissant-like dough, roll it up, and bake it in a muffin tin.
The result? A tall, flaky pastry with a crisp exterior and tender, buttery interior that creates the perfect vessel for all kinds of delicious fillings. Unlike traditional croissants, which are shaped into crescents, or muffins, which have a cake-like texture, cruffins offer the best of both worlds – the airiness and butteriness of a croissant with the shape and portability of a muffin.
Essential Ingredients for Perfect Cruffins
Before we dive into the detailed recipe, let’s understand what makes these pastries so special. The quality of ingredients matters tremendously when making laminated dough, so here’s what you’ll need:
- High-protein bread flour: The higher protein content (around 12-14%) gives the dough strength to hold all those beautiful layers.
- European-style butter: With a higher fat content (at least 82%), European butter creates more distinct layers and a richer flavor.
- Active dry yeast: This leavening agent helps the dough rise slowly, allowing flavor to develop.
- Sugar: Just enough to feed the yeast and add a touch of sweetness.
- Salt: Essential for flavor development and controlling the yeast.
- Water and milk: The combination provides both hydration and richness.
The ratio of these ingredients is crucial, as is the technique. Let’s break down exactly what you’ll need for a batch of 12 cruffins:
| Ingredient | Amount | Notes |
|---|---|---|
| Bread flour | 500g (4 cups) | Look for 12-14% protein content |
| European-style butter (for lamination) | 250g (1 cup + 1 Tbsp) | Keep very cold until ready to use |
| Active dry yeast | 7g (2¼ tsp) | One standard packet |
| Granulated sugar | 50g (¼ cup) | Helps with browning and flavor |
| Salt | 10g (1½ tsp) | Table salt or fine sea salt |
| Whole milk | 120g (½ cup) | Room temperature |
| Cold water | 120g (½ cup) | Filtered if possible |
| Egg | 1 large | For egg wash |
| Vanilla extract | 5g (1 tsp) | Optional, for additional flavor |
Equipment You’ll Need
Making cruffins requires some specific equipment for the best results:
- Kitchen scale: Precision is key for laminated dough
- Stand mixer with dough hook: Makes the initial dough development much easier
- Rolling pin: A heavy, straight rolling pin works best
- Bench scraper: Helpful for handling and cutting dough
- Muffin tin: Standard 12-cup size
- Pastry brush: For applying egg wash
- Ruler: For measuring dough thickness and dimensions
- Piping bags and tips: For filling the baked cruffins
Step-by-Step Cruffin Method
I’ve broken down the process into manageable stages spread over two days. This might seem labor-intensive, but the hands-on time is actually quite reasonable, and the results are absolutely worth it.
Day 1: Make the Dough Base
- Activate the yeast: In a small bowl, combine the warm milk (about 105°F/40°C), 1 tablespoon of sugar, and the yeast. Let it sit for about 5-10 minutes until foamy.
- Mix the dough: In the bowl of your stand mixer fitted with the dough hook, combine the flour, remaining sugar, and salt. With the mixer running on low speed, add the yeast mixture, cold water, and vanilla (if using). Mix for about 3-4 minutes until a rough dough forms.
- Develop the gluten: Increase the speed to medium-low and continue mixing for about 5-7 minutes until the dough is smooth, elastic, and pulls away from the sides of the bowl. It should pass the “windowpane test” – when you stretch a small piece, it should form a thin, translucent membrane without tearing.
- First rise: Shape the dough into a rough rectangle about 1 inch thick, wrap it tightly in plastic wrap, and refrigerate for at least 2 hours or overnight. This cold fermentation develops flavor and relaxes the gluten.
Prepare the Butter Block
While the dough is chilling, prepare your butter block:
- Take the cold butter and place it between two sheets of parchment paper.
- Use a rolling pin to pound it into a flat, even rectangle about 7×10 inches (18×25 cm).
- Wrap this butter block in the parchment and refrigerate until firm but pliable – about 20-30 minutes.
Day 1: First Lamination
- Roll out the dough: Remove the chilled dough from the refrigerator and roll it out on a lightly floured surface to a rectangle approximately 10×14 inches (25×35 cm).
- Enclose the butter: Place the butter block on one half of the dough, leaving a small border around the edges. Fold the other half of the dough over the butter and press the edges to seal completely, enclosing the butter.
- First letter fold: Roll the dough into a long rectangle about 12×24 inches (30×60 cm). Brush off excess flour. Fold the dough like a letter: fold the top third down, then fold the bottom third up. You should have a neat rectangle with three layers.
- First rest: Wrap the dough in plastic wrap and refrigerate for at least 1 hour.
Day 1: Complete the Lamination
- Second letter fold: Place the chilled dough on a lightly floured surface with the open ends facing left and right. Roll it out again to a 12×24 inch (30×60 cm) rectangle. Perform another letter fold.
- Second rest: Wrap and refrigerate for another hour.
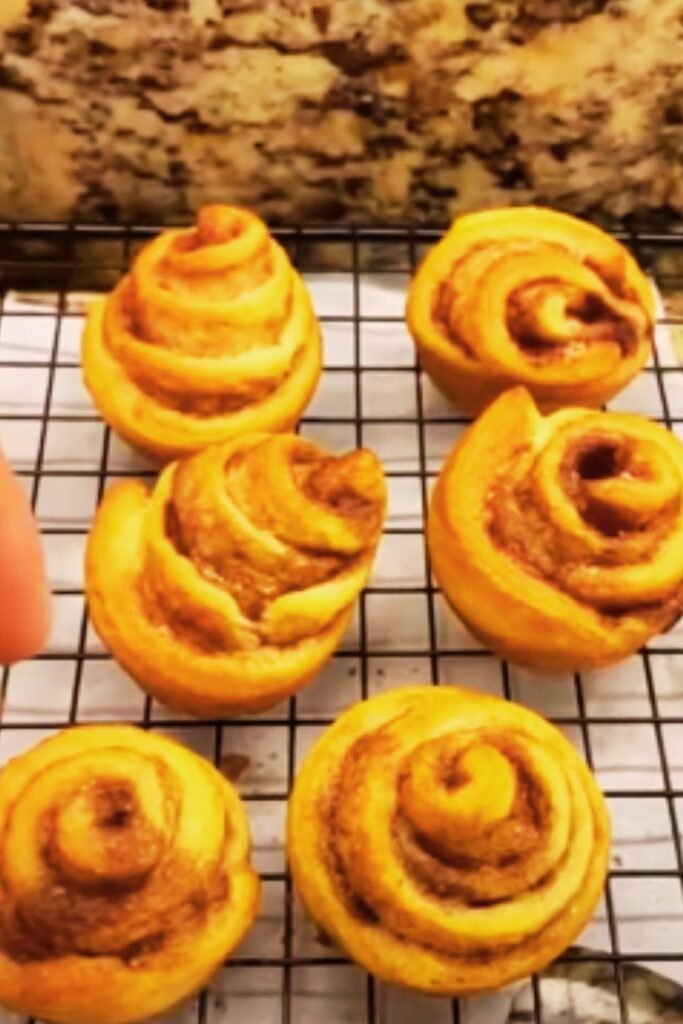
- Third letter fold: Repeat the rolling and folding process one more time. This will create 27 layers of butter and dough (3 × 3 × 3).
- Overnight rest: Wrap the dough tightly in plastic wrap and refrigerate overnight. This extended rest is crucial for relaxing the gluten and allowing the flavors to develop.
Day 2: Shape and Bake
- Final rolling: Remove the dough from the refrigerator and let it rest at room temperature for about 15 minutes. Roll it out to a rectangle approximately 12×20 inches (30×50 cm) and about ⅛ inch (3 mm) thick.
- Cut into strips: Using a pizza cutter or sharp knife, trim the edges to create straight sides, then cut the dough into 12 strips, each about 1½ inches (4 cm) wide and 20 inches (50 cm) long.
- Shape the cruffins:
- Brush each strip lightly with water to help them stick.
- Starting from one end, roll each strip up tightly like a cinnamon roll.
- Place each rolled-up strip in a muffin cup, with the end tucked underneath to prevent unraveling.
- Final proof: Cover the muffin tin loosely with plastic wrap and let the cruffins proof at room temperature for about 1-2 hours, until noticeably puffy. They won’t double in size like regular bread, but should increase by about 50%.
- Preheat and prepare: Preheat your oven to 375°F (190°C). Brush the tops of the cruffins with egg wash (1 egg beaten with 1 tablespoon of water).
- Bake: Bake for 25-30 minutes, rotating the pan halfway through, until the cruffins are deeply golden brown. If they’re browning too quickly, cover loosely with foil.
- Cool slightly: Let the cruffins cool in the tin for 5 minutes, then carefully remove them to a wire rack. They’re best enjoyed warm but need a few minutes to set up.
Pro Tips for Cruffin Success
After making hundreds of cruffins, I’ve learned a few tricks that can make a big difference:
- Temperature control is everything: Keep your dough cool at all times. If it feels too soft or the butter starts to melt, return it to the refrigerator immediately.
- Count your folds: It’s easy to lose track of where you are in the lamination process. Make a note or mark the plastic wrap to remember.
- Don’t rush the process: The resting periods are non-negotiable. They allow the gluten to relax and prevent the butter from being absorbed into the dough.
- Use a metal muffin tin: Metal conducts heat better than silicone and will give you a better rise and crisper exterior.
- Watch for “butter breakthrough”: If butter starts to break through the dough during rolling, dust the spot with a little flour, fold the dough over it, and continue gently.
Troubleshooting Common Cruffin Problems
Even experienced bakers encounter issues with laminated dough. Here are solutions to common problems:
| Problem | Possible Cause | Solution |
|---|---|---|
| Dough tears during rolling | Gluten too tight or dough too cold | Let the dough rest at room temperature for 5-10 minutes |
| Butter leaks during baking | Oven temperature too low or butter too warm | Ensure proper temperature; chill shaped cruffins before baking |
| Dense, not flaky texture | Improper lamination or overworked dough | Follow folding technique precisely; handle dough gently |
| Cruffins collapse after baking | Underproofed or underbaked | Increase proofing time; ensure full baking time |
| Uneven rising | Inconsistent rolling thickness | Use guide sticks for even thickness; measure carefully |
| Dough too elastic and shrinks back | Gluten overdeveloped | Rest dough longer between folds |
Creative Filling Ideas
The magic of cruffins is that they create a perfect pocket for delicious fillings. Here are some of my favorites:
Classic Fillings
- Vanilla pastry cream: Rich, smooth, and classic
- Chocolate ganache: Use high-quality chocolate for the best flavor
- Lemon curd: Bright, tangy, and perfect for spring
- Raspberry jam: The tartness balances the buttery richness
Adventurous Options
- Matcha white chocolate: Earthy and sweet with visual appeal
- Salted caramel with candied pecans: Sweet, salty, and crunchy
- Tiramisu cream: Coffee-infused mascarpone with a dusting of cocoa
- Pistachio praline: Nutty with a beautiful green hue
Savory Variations
- Whipped goat cheese with herbs: Tangy and aromatic
- Ham and gruyère: Classic breakfast combination
- Pesto and ricotta: Fresh and herbal
- Caramelized onion and thyme: Sweet, savory, and complex
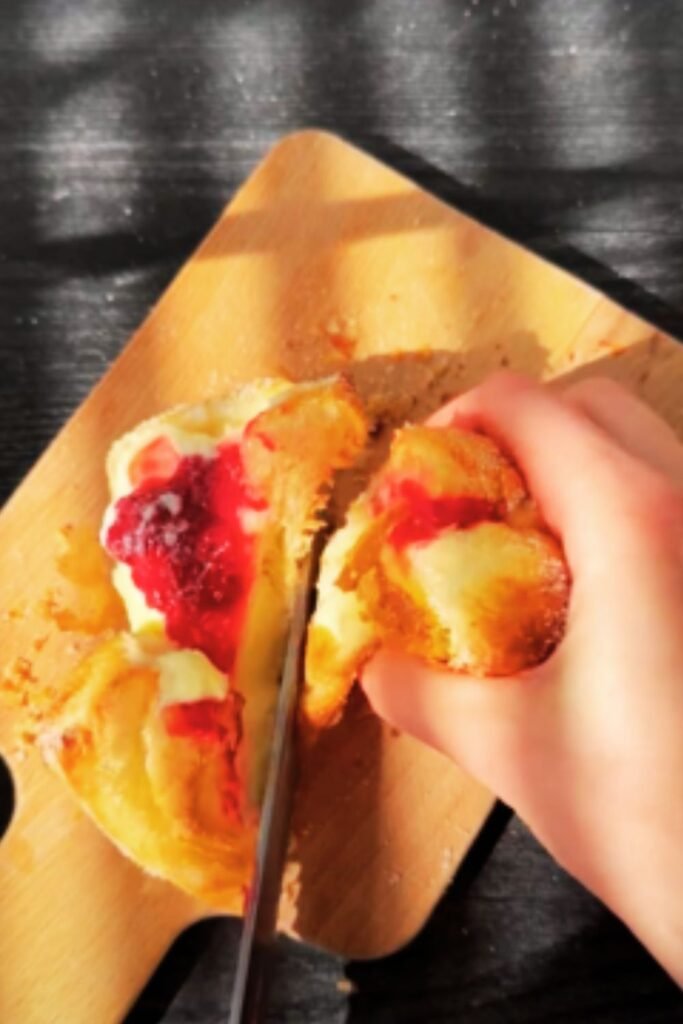
How to Fill Your Cruffins
Once your cruffins have cooled enough to handle but are still warm, it’s time to fill them:
- Use a small paring knife or apple corer to create a hole in the top center of each cruffin, going about halfway down.
- Fill a piping bag fitted with a medium round tip with your chosen filling.
- Insert the tip into each hole and gently squeeze, filling until you feel some resistance.
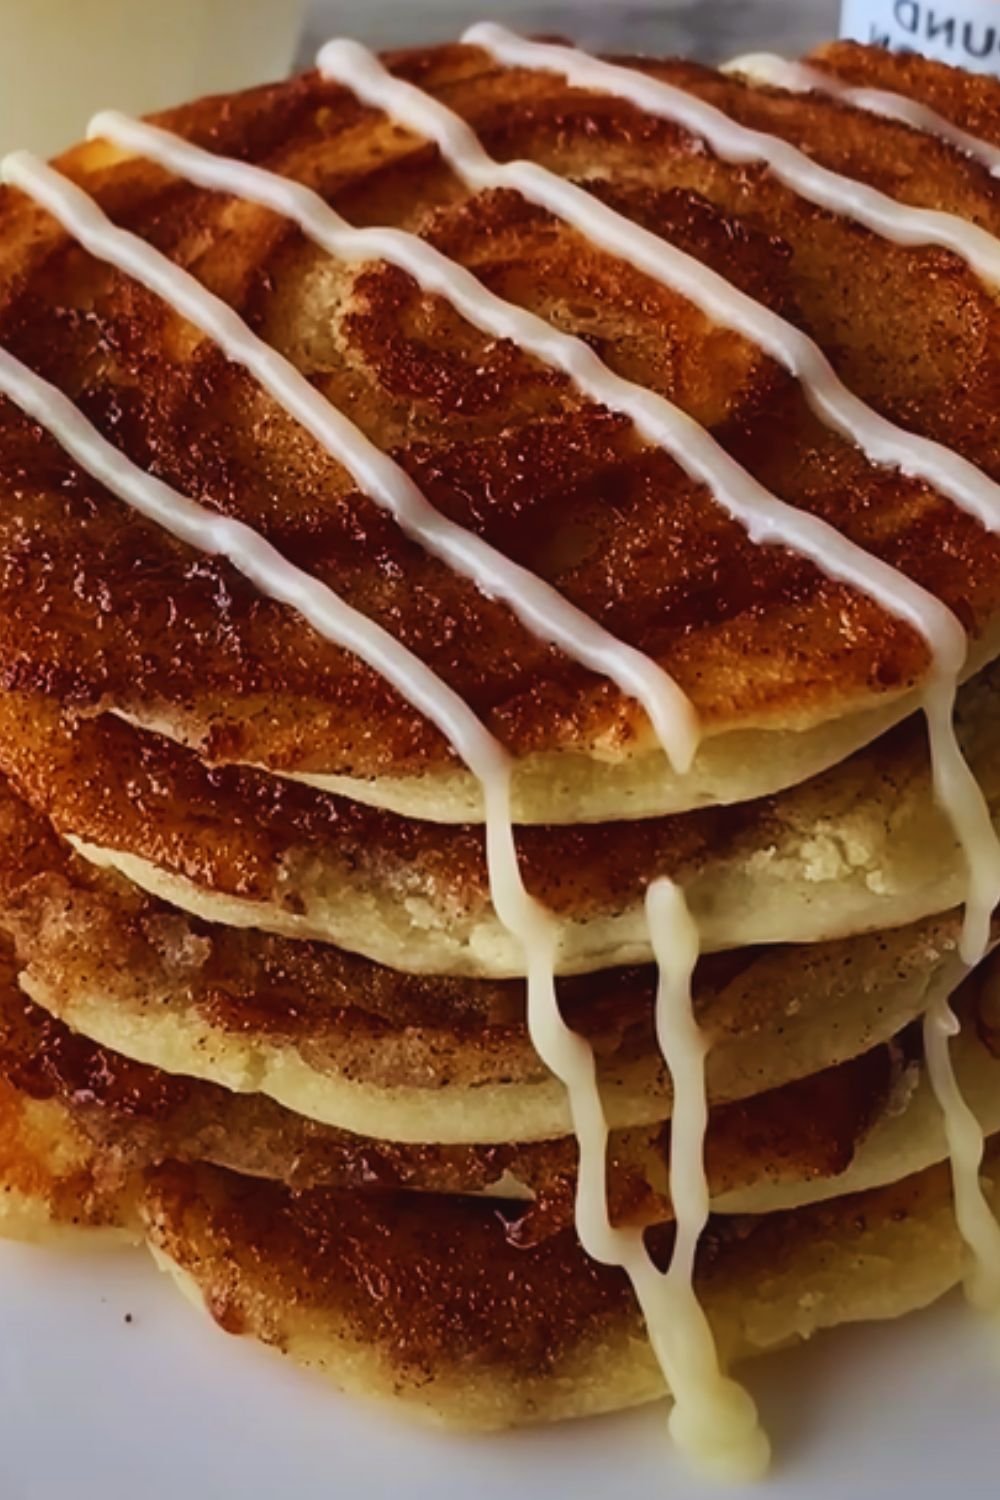
- Finish with appropriate toppings: a dusting of powdered sugar, a drizzle of glaze, or a sprinkle of chopped nuts.
Cruffin Storage and Reheating
Like all pastries made with laminated dough, cruffins are best enjoyed fresh on the day they’re baked. However, if you need to store them:
- Same day: Keep at room temperature in an airtight container for up to 8 hours.
- Next day: Store in an airtight container overnight. Reheat in a 325°F (165°C) oven for 5-7 minutes to recrisp.
- Extended storage: Freeze unfilled cruffins in an airtight container for up to 1 month. Thaw at room temperature and reheat in a 325°F (165°C) oven for 7-10 minutes until warmed through.
Nutritional Information
While cruffins are definitely a special treat rather than an everyday food, here’s the approximate nutritional breakdown per plain cruffin:
| Nutrient | Amount per Serving | % Daily Value |
|---|---|---|
| Calories | 320 | – |
| Total Fat | 22g | 28% |
| Saturated Fat | 13g | 65% |
| Cholesterol | 55mg | 18% |
| Sodium | 230mg | 10% |
| Total Carbohydrate | 28g | 10% |
| Dietary Fiber | 1g | 4% |
| Total Sugars | 5g | – |
| Protein | 5g | 10% |
Note that filled cruffins will have additional calories and nutrients depending on the filling used.
Serving Suggestions
Cruffins make a showstopping addition to any breakfast or brunch spread. Here are some ideas for serving:
- Create a cruffin bar with various fillings and toppings for guests to customize their own
- Serve alongside fresh fruit and coffee for a perfect weekend breakfast
- Pair with a citrus salad to balance the richness
- Offer as part of an afternoon tea service with assorted hot teas
- For special occasions, stack them in a tower as an alternative to a traditional cake
Time-Saving Variations
If you’re short on time but still want to enjoy homemade cruffins, try these shortcuts:
- Quick version: Use store-bought puff pastry instead of making the dough from scratch. While not authentic, it still creates a delicious laminated effect.
- Make ahead: Prepare the dough through the final fold, then freeze for up to one month. Thaw overnight in the refrigerator before shaping and baking.
- Mini cruffins: Use a mini muffin tin to make bite-sized versions that bake more quickly.
Frequently Asked Questions
Q: Can I make cruffins without a stand mixer? A: Yes, you can mix the dough by hand with a wooden spoon and then knead it, but be prepared for a workout! The key is developing enough gluten strength without overworking the dough.
Q: How do I know if my butter is the right consistency for lamination? A: The butter should be cold but pliable – similar to the consistency of the dough itself. It should bend without breaking when you apply gentle pressure. Too soft, and it will absorb into the dough; too hard, and it will break through.
Q: Why did my cruffins collapse after baking? A: This typically happens when the cruffins are underproofed or underbaked. Make sure they’re noticeably puffy before baking and bake until deeply golden. Also check that your oven temperature is accurate with an oven thermometer.
Q: Can I use all-purpose flour instead of bread flour? A: While bread flour is ideal, you can use all-purpose flour in a pinch. The higher protein content in bread flour creates stronger gluten development, which helps maintain those distinctive layers.
Q: My kitchen is very warm. How can I keep the dough cold enough? A: Work in short bursts, returning the dough to the refrigerator whenever it starts to feel soft. You can also chill your work surface by placing ice packs on it for a few minutes before rolling, chill your rolling pin, and work near an air conditioner or fan if possible.
Q: Do I need to use European-style butter? A: While traditional American butter will work, European-style butter (with at least 82% fat content) creates more distinct layers and better flavor. The extra fat helps create those beautiful flaky layers we’re looking for in cruffins.
Seasonal Cruffin Variations
One of my favorite things about cruffins is how adaptable they are to seasonal flavors and ingredients:
Spring
- Strawberry and rhubarb compote filling
- Lemon curd with fresh berries
- Lavender-infused pastry cream
Summer
- Fresh peach with vanilla bean
- Blueberry compote with lemon zest
- Coconut cream with toasted coconut flakes
Fall
- Pumpkin spice pastry cream
- Apple butter with cinnamon sugar
- Maple cream with candied pecans
Winter
- Dark chocolate peppermint ganache
- Eggnog custard with nutmeg
- Gingerbread-spiced cream
A Final Note
Cruffins represent everything I love about baking – the perfect combination of technique, patience, and creativity. While they require some effort, the moment you bite into that flaky, buttery pastry with its delicious filling makes it all worthwhile.
Remember that laminated dough takes practice, so don’t be discouraged if your first batch isn’t perfect. Each time you make them, you’ll learn something new and improve your technique. The journey is part of the joy of baking.
Happy baking, and enjoy your homemade cruffins!