| A Decadent Dessert for Any Occasion!
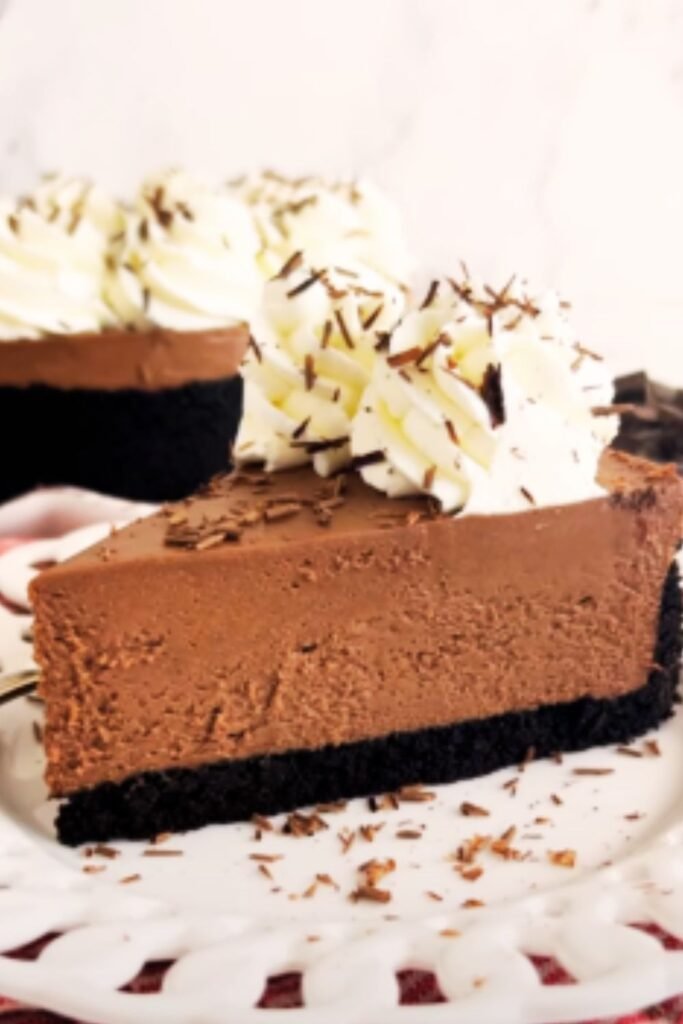
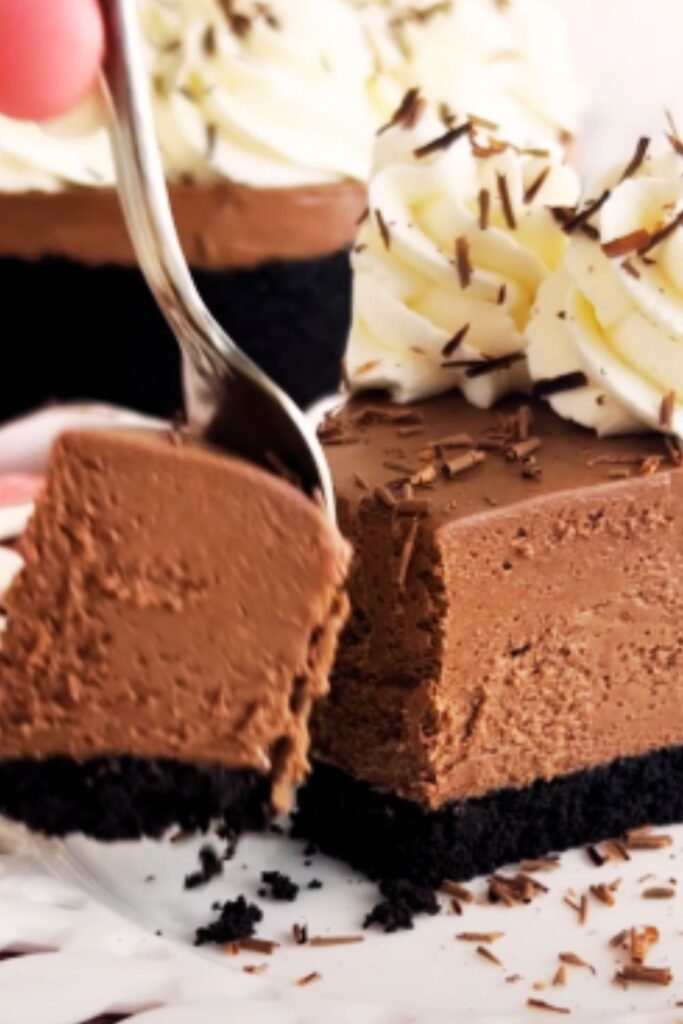
There’s something magical about the marriage of rich chocolate and creamy mascarpone cheese that creates an irresistible symphony of flavors. As someone who has spent countless hours perfecting the art of cheesecake making, I’m thrilled to share my ultimate chocolate mascarpone cheesecake recipe with you today. This isn’t just any dessert – it’s a show-stopping centerpiece that will have your guests begging for seconds (and your secret recipe).
I first discovered this delightful combination when traveling through northern Italy, where mascarpone originates. The locals showed me how this luxurious cheese could transform an ordinary cheesecake into something extraordinary. After years of tweaking and perfecting, I’ve created this foolproof recipe that balances the silky-smooth texture of mascarpone with the deep, complex flavors of quality chocolate.
The Magic of Mascarpone
Before diving into the recipe, let’s talk about what makes mascarpone so special. Unlike cream cheese (the traditional cheesecake base), mascarpone has a higher fat content and less tanginess, resulting in an unbelievably smooth and rich texture. It originates from the Lombardy region of Italy and has been made since the 16th century. When combined with chocolate, it creates a velvety consistency that melts in your mouth while delivering intense flavor.
Mascarpone cheese: : A fresh, creamy Italian cheese with a butterfat content of 60-75%, giving it an unparalleled richness : Milder and less tangy than cream cheese, allowing the chocolate flavors to shine : Creates a silkier, more luxurious texture than standard cheesecakes
Ingredients You’ll Need
For the Chocolate Cookie Crust:
- 2 cups chocolate cookie crumbs (about 24 Oreo cookies, filling removed)
- 1/4 cup granulated sugar
- 6 tablespoons unsalted butter, melted
- 1/4 teaspoon salt
For the Chocolate Mascarpone Filling:
- 16 oz (450g) mascarpone cheese, room temperature
- 8 oz (225g) cream cheese, room temperature
- 1 cup granulated sugar
- 3 large eggs, room temperature
- 1 tablespoon pure vanilla extract
- 1/4 cup heavy cream
- 8 oz (225g) dark chocolate (70% cocoa), melted and slightly cooled
- 2 tablespoons unsweetened cocoa powder
- 1/4 teaspoon espresso powder (optional, enhances chocolate flavor)
- 1/4 teaspoon salt
For the Chocolate Ganache Topping:
- 6 oz (170g) dark chocolate, finely chopped
- 3/4 cup heavy cream
- 1 tablespoon unsalted butter
- 1 teaspoon vanilla extract
For Garnish (Optional):
- Fresh berries (raspberries, strawberries, blackberries)
- Chocolate shavings
- Edible gold dust for special occasions
- Whipped cream
Essential Equipment
Before we begin, ensure you have these tools on hand:
| Equipment | Purpose | Recommendation |
|---|---|---|
| 9-inch springform pan | Allows for easy removal of the cheesecake | Use a high-quality, leak-proof model |
| Food processor | For creating cookie crumbs | Any standard processor will work |
| Stand mixer or hand mixer | For perfectly smooth filling | Stand mixers give the best results |
| Double boiler | For melting chocolate | Can substitute a heat-proof bowl over simmering water |
| Roasting pan | For water bath baking | Must be larger than your springform pan |
| Heavy-duty aluminum foil | To wrap pan for water bath | Extra-wide foil works best |
| Instant-read thermometer | For checking doneness | Optional but helpful |
| Cooling rack | For proper cooling | Any standard rack works |
Step-by-Step Instructions
Preparing the Crust (Day Before or 3 Hours Before Assembly)
- Preheat your oven to 350°F (175°C).
- Prepare a 9-inch springform pan by lightly greasing the bottom and sides.
- Process the chocolate cookies in a food processor until they form fine crumbs.
- In a medium bowl, combine the cookie crumbs, sugar, melted butter, and salt. Mix until the texture resembles wet sand.
- Press the mixture firmly and evenly into the bottom and about 1.5 inches up the sides of the springform pan. (I use the bottom of a measuring cup for even pressing).
- Bake for 10 minutes, then remove and let cool completely on a wire rack.
- Once cool, wrap the outside of the pan with two layers of heavy-duty aluminum foil, ensuring it’s watertight. This prevents water from seeping in during the water bath baking.
Creating the Chocolate Mascarpone Filling
- Reduce oven temperature to 325°F (165°C).
- In a double boiler or heatproof bowl over simmering water, melt the dark chocolate. Stir occasionally until smooth, then set aside to cool slightly.
- In a large mixing bowl or stand mixer fitted with the paddle attachment, beat the mascarpone and cream cheese on medium speed until completely smooth and free of lumps, about 3-4 minutes. Scrape down the sides of the bowl frequently.
- Gradually add the sugar and beat until fully incorporated and the mixture looks silky smooth.
- Add eggs one at a time, beating well after each addition. Be careful not to overbeat after adding the eggs as this can introduce too much air.
- Mix in the vanilla extract and heavy cream until just combined.
- Sift in the cocoa powder, espresso powder (if using), and salt. Mix on low speed until incorporated.
- Finally, pour in the melted chocolate and mix until the batter is uniform in color and texture. The batter should be smooth, glossy, and fairly thick.
Baking the Cheesecake (The Water Bath Method)
- Pour the filling into the prepared crust, smoothing the top with a spatula.
- Place the foil-wrapped springform pan into a larger roasting pan.
- Place the roasting pan on the middle rack of your preheated oven.
- Carefully pour hot water into the roasting pan until it reaches about halfway up the sides of the springform pan. This water bath ensures gentle, even baking and prevents cracking.
- Bake for 60-70 minutes, or until the edges are set but the center still has a slight jiggle (like set Jell-O).
- Turn off the oven, crack the door open about 1 inch, and let the cheesecake cool gradually in the oven for 1 hour. This slow cooling helps prevent the top from cracking.
- Remove from the oven and let cool completely at room temperature, about 2 hours.
- Refrigerate for at least 6 hours, preferably overnight.

Creating the Chocolate Ganache Topping
- Place the finely chopped chocolate in a medium heatproof bowl.
- Heat the heavy cream in a small saucepan until it just begins to simmer around the edges (do not let it boil).
- Pour the hot cream over the chocolate and let it sit for 2-3 minutes.
- Gently stir until the chocolate is completely melted and the mixture is smooth.
- Add the butter and vanilla extract, stirring until fully incorporated.
- Allow the ganache to cool slightly until it thickens but is still pourable, about 10 minutes.
- Remove the chilled cheesecake from the refrigerator, carefully release it from the springform pan, and place it on a serving plate.
- Pour the ganache over the center of the cheesecake, using an offset spatula to guide it to the edges if needed.
- Return the cheesecake to the refrigerator for at least 30 minutes to set the ganache.
Serving Your Masterpiece
When you’re ready to serve, garnish with fresh berries, chocolate shavings, or a light dusting of cocoa powder. For special occasions, I like to add a touch of edible gold dust for that extra wow factor. Let the cheesecake sit at room temperature for about 20-30 minutes before serving to bring out the full flavor profile.
Troubleshooting Common Issues
| Problem | Possible Cause | Solution |
|---|---|---|
| Cracked top | Overbaking or rapid temperature change | Always use a water bath and cool gradually in the oven |
| Soggy crust | Water leaking into pan | Use multiple layers of heavy-duty foil or a silicone wrap |
| Filling not setting | Underbaking or incorrect proportions | Bake until edges are set but center still jiggles slightly |
| Lumpy filling | Cold ingredients or insufficient mixing | Ensure all dairy ingredients are properly room temperature |
| Ganache too thick | Chocolate cooled too much | Reheat gently over a double boiler, adding a touch more cream if needed |
| Ganache too thin | Not enough cooling time | Refrigerate for 5-10 minutes, stirring occasionally until desired consistency |
Make-Ahead and Storage Tips
This cheesecake is perfect for preparing in advance, making it ideal for entertaining:
- The complete cheesecake (without garnishes) can be made up to 3 days ahead and stored in the refrigerator.
- For longer storage, the cheesecake can be frozen for up to 2 months. Wrap it tightly in plastic wrap, then in aluminum foil.
- To thaw a frozen cheesecake, transfer it to the refrigerator 24 hours before serving.
- Add the fresh garnishes just before serving for the best presentation.
Variations to Try
Once you’ve mastered the basic recipe, try these delicious variations:
- White Chocolate Raspberry: Replace the dark chocolate with white chocolate and swirl raspberry puree through the filling before baking.
- Mint Chocolate: Add 1/2 teaspoon of pure mint extract to the filling and sprinkle the top with crushed mint chocolate candies.
- Mocha Mascarpone: Increase the espresso powder to 1 tablespoon for a more pronounced coffee flavor.
- Orange-Infused Chocolate: Add the zest of one orange to the filling for a bright citrus note that pairs beautifully with the chocolate.
Nutritional Information
For those tracking their dietary intake, here’s the approximate nutritional information per slice (based on 12 slices per cake):
| Nutrient | Amount per Serving |
|---|---|
| Calories | 620 |
| Total Fat | 47g |
| Saturated Fat | 28g |
| Cholesterol | 175mg |
| Sodium | 320mg |
| Total Carbohydrates | 45g |
| Dietary Fiber | 3g |
| Sugars | 35g |
| Protein | 8g |
Serving Suggestions
This decadent cheesecake pairs wonderfully with:
- A dollop of lightly sweetened whipped cream
- Fresh berries, particularly raspberries or strawberries
- A small scoop of vanilla bean ice cream
- A drizzle of warm caramel sauce
- A sprinkle of flaky sea salt to enhance the chocolate flavors
- A cup of freshly brewed espresso or coffee
- Sparkling water with a twist of orange
Special Diet Adaptations
While this recipe is unapologetically indulgent, here are some modifications for different dietary needs:
- Gluten-Free: Use gluten-free chocolate cookies for the crust.
- Lower Sugar: Reduce the sugar by up to 1/4 cup and use dark chocolate with 85% cocoa content.
- Dairy Sensitivities: Unfortunately, this particular recipe relies heavily on dairy products. For severe dairy allergies, I recommend looking for a vegan chocolate cheesecake recipe instead.
Why This Recipe Works
The secret to this exceptional cheesecake lies in several key techniques:
- The Cheese Blend: While many recipes use only cream cheese, the combination of mascarpone and cream cheese creates the perfect balance of richness and structure.
- Room Temperature Ingredients: This cannot be stressed enough! Cold mascarpone or cream cheese will never fully incorporate, leaving you with a lumpy filling.
- The Water Bath: This gentle baking method ensures even heat distribution, preventing overcooking and cracking.
- Quality Chocolate: Using high-quality chocolate (70% cocoa content) provides depth of flavor that cheaper chocolate simply cannot match.
- Slow Cooling: Allowing the cheesecake to cool gradually in the turned-off oven prevents the dramatic temperature change that often leads to cracking.
Frequently Asked Questions
Q: Can I use all mascarpone instead of the mascarpone-cream cheese blend?
While mascarpone is deliciously rich, using it exclusively can make the cheesecake too soft and potentially unstable. The cream cheese provides structure while the mascarpone contributes luxurious texture.
Q: Why did my cheesecake crack even though I used a water bath?
Several factors can cause cracking despite using a water bath: overbaking, opening the oven door during baking, or cooling too quickly. Ensure you’re baking just until the center is slightly jiggly and cooling gradually in the turned-off oven.
Q: Can I make this without a springform pan?
A springform pan is strongly recommended for easy removal. If you must use a regular cake pan, line it with parchment paper with overhanging edges to help lift the cheesecake out after cooling.
Q: How do I know when the cheesecake is done?
The cheesecake is done when the edges are set but the center 2-3 inches still jiggle slightly when gently shaken. It will continue to set as it cools. For the technically inclined, the internal temperature should reach 150°F (65°C).
Q: My ganache seized and became grainy. What happened?
This typically occurs when liquid is added to chocolate that’s too hot or if water gets into the mixture. Ensure your cream is hot but not boiling, and that all utensils are completely dry.
Q: Can I make mini cheesecakes with this recipe?
Absolutely! This recipe will make about 24 mini cheesecakes in a muffin tin. Line with paper liners, press crust into the bottom, fill with batter, and bake for approximately 20-25 minutes.
The journey to creating the perfect chocolate mascarpone cheesecake has been one of my most rewarding culinary adventures. While it may seem complex at first glance, breaking it down into manageable steps makes it accessible even for intermediate bakers. The result is truly worth the effort – a sophisticated, velvety dessert that will become your signature special occasion treat.
Remember, patience is key when making cheesecake. Take your time with each step, from ensuring ingredients are properly at room temperature to the slow cooling process. Your reward will be a dessert that not only tastes professional but looks stunning on your table.
I hope this recipe brings as much joy to your kitchen as it has to mine. Happy baking!