When autumn winds start whipping around my kitchen windows and I find myself craving something that feels like a warm hug on a plate, I turn to my beloved loaded potato and meatloaf casserole. This isn’t just any ordinary weeknight dinner – it’s a symphony of comfort that transforms two classic American dishes into one spectacular, soul-warming masterpiece.
I discovered this recipe during one of those chaotic weeks when my family was juggling soccer practice, work deadlines, and the general mayhem of daily life. I needed something that would satisfy everyone’s cravings while being simple enough to throw together without losing my sanity. What emerged from my kitchen that evening was pure magic – layers of seasoned ground beef, creamy mashed potatoes, melted cheese, and crispy bacon bits that had my family practically licking their plates clean.
The beauty of this casserole lies in its versatility and forgiving nature. Whether you’re feeding a crowd at a potluck dinner, meal-prepping for busy weeknights, or simply wanting to spoil your family with something special, this dish delivers every single time. I’ve served it to picky teenagers, discerning in-laws, and even my most health-conscious friends – and everyone walks away asking for the recipe.
Understanding the Perfect Casserole Foundation
Before diving into the cooking process, let me share what makes this casserole truly exceptional. The secret isn’t just in the ingredients – it’s in understanding how each component works together to create layers of flavor and texture that complement rather than compete with each other.
Ground Beef Layer: The foundation starts with properly seasoned ground beef that’s been browned to develop deep, savory flavors. I prefer using 80/20 ground beef because the fat content keeps the meat moist during the longer baking process.
Potato Layer: The middle layer consists of creamy mashed potatoes that act as both a flavor bridge and moisture barrier. These aren’t your ordinary mashed potatoes – they’re enriched with butter, cream cheese, and seasonings that make them irresistibly smooth.
Cheese Layer: A generous sprinkling of sharp cheddar cheese adds that melty, gooey texture that makes every bite satisfying.
Bacon Topping: Finally, crispy bacon bits provide the perfect textural contrast and smoky flavor that ties everything together.
Essential Ingredients and Quality Considerations
Selecting the right ingredients makes the difference between a good casserole and an unforgettable one. Here’s my carefully curated list of what you’ll need:
Meat Components
- 2 pounds ground beef (80/20 lean-to-fat ratio)
- 8 strips thick-cut bacon
- 1 medium yellow onion, finely diced
- 3 cloves fresh garlic, minced
Potato Foundation
- 3 pounds Yukon Gold potatoes
- 8 ounces cream cheese, softened
- 1/2 cup unsalted butter
- 1/2 cup whole milk or heavy cream
- 1/2 cup sour cream
Flavor Enhancers
- 2 cups sharp cheddar cheese, freshly grated
- 1/2 cup green onions, chopped
- 2 tablespoons Worcestershire sauce
- 1 tablespoon tomato paste
- 2 teaspoons garlic powder
- 1 teaspoon onion powder
- 1 teaspoon smoked paprika
- Salt and black pepper to taste
Optional Additions
- 1 cup frozen corn kernels
- 1/2 cup bell peppers, diced
- 1 cup mushrooms, sliced
| Ingredient Category | Primary Purpose | Quality Tips |
|---|---|---|
| Ground Beef | Protein base and flavor foundation | Choose 80/20 ratio; avoid pre-formed patties |
| Potatoes | Creamy texture and bulk | Yukon Gold provides best consistency |
| Dairy Products | Richness and binding | Use full-fat versions for best results |
| Bacon | Smoky flavor and textural contrast | Thick-cut bacon renders better |
| Vegetables | Freshness and nutritional value | Fresh ingredients always preferred |
| Seasonings | Flavor enhancement | Freshly ground spices make a difference |
Step-by-Step Preparation Process
Preparing the Potato Base
I always start with the potatoes because they take the longest and need time to cool slightly before assembly. Wash and peel your Yukon Gold potatoes, then cut them into evenly sized chunks – about 1-inch pieces work perfectly. This ensures uniform cooking and prevents some pieces from becoming waterlogged while others remain hard.
Place the potato chunks in a large pot and cover with cold, salted water by about two inches. Starting with cold water helps the potatoes cook evenly from the outside in. Bring the water to a rolling boil, then reduce heat to maintain a steady simmer. Cook for 15-20 minutes until the potatoes are fork-tender but not falling apart.
While the potatoes are cooking, I like to warm my dairy ingredients slightly. Take the cream cheese and butter out of the refrigerator early, or microwave them briefly to soften. Room temperature dairy ingredients incorporate much more smoothly into hot potatoes.
Drain the potatoes thoroughly and return them to the pot. Using a potato masher or electric mixer, begin breaking them down while they’re still hot. Gradually add the softened cream cheese, butter, and warm milk, mixing until you achieve a smooth, creamy consistency. Season generously with salt, pepper, and garlic powder. The mixture should be rich and flavorful on its own.
Creating the Meat Layer

While your potatoes are cooling slightly, it’s time to tackle the meat component. I prefer cooking the bacon first because I use the rendered fat to cook the vegetables and beef – it adds incredible depth of flavor that you simply can’t achieve with cooking oil alone.
Cut your bacon into bite-sized pieces and cook them in a large skillet over medium heat until they’re crispy and golden brown. Remove the bacon pieces with a slotted spoon and set them aside on paper towels to drain, but leave about 2 tablespoons of the rendered fat in the pan.
Add the diced onions to the bacon fat and cook until they become translucent and slightly caramelized, about 5-7 minutes. The natural sugars in the onions will develop and create a beautiful foundation flavor. Add the minced garlic during the last minute of cooking to prevent it from burning.
Increase the heat to medium-high and add the ground beef to the pan. Here’s where patience becomes crucial – resist the urge to constantly stir the meat. Let it brown in batches, breaking it up with a wooden spoon only occasionally. This browning process, called the Maillard reaction, creates complex flavors that will elevate your entire casserole.
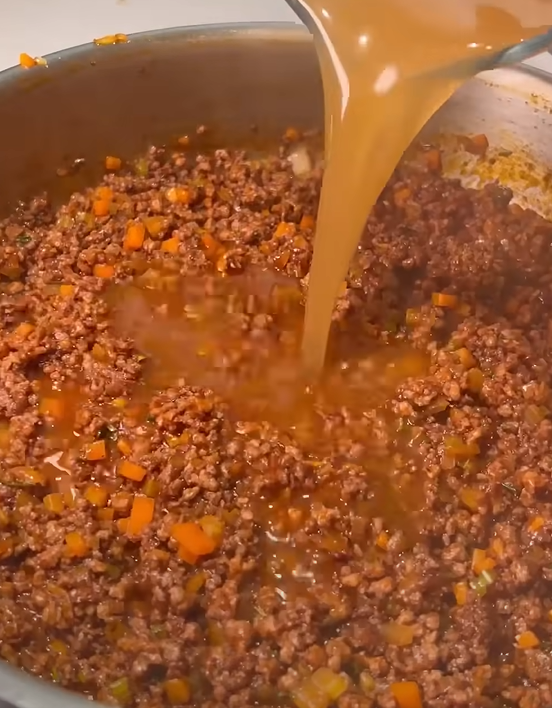
Once the beef is browned, add the tomato paste and cook for another minute until it darkens slightly. This step intensifies the tomato flavor and removes any raw taste. Stir in the Worcestershire sauce, smoked paprika, onion powder, and season with salt and pepper. The mixture should smell incredibly savory and rich.
Assembly Techniques for Perfect Layers
Preheat your oven to 375°F (190°C) and generously butter a 9×13 inch baking dish. The size of your baking dish matters – too small and the casserole will overflow, too large and it won’t have the proper depth for even cooking.
Start with the meat layer, spreading it evenly across the bottom of the prepared dish. Press it down gently with the back of a spoon to create a firm foundation. This prevents the layers from sliding around during baking.
Next comes the star of the show – those creamy mashed potatoes. Using a large spoon or offset spatula, carefully spread the potato mixture over the meat layer. I like to create gentle swirls and peaks in the potatoes because these raised areas will brown beautifully during baking, adding visual appeal and textural variety.
Sprinkle the grated cheddar cheese evenly over the potato layer, making sure to reach all the corners. Finally, distribute the crispy bacon pieces across the top, followed by the chopped green onions.
Baking and Timing Considerations
The baking process is where all your careful preparation comes together. Slide the assembled casserole into your preheated oven and bake for 25-30 minutes. You’re looking for the cheese to be melted and bubbly, and the potato peaks to develop a gorgeous golden-brown color.
If you want extra browning on top, switch your oven to broil during the last 2-3 minutes of cooking. Watch carefully during this time because the line between beautifully browned and burnt is very thin.
The casserole is ready when a knife inserted into the center comes out hot, and the edges are bubbling slightly. Let it rest for 10-15 minutes before serving – this resting period allows the layers to set up properly and makes serving much cleaner.
Nutritional Profile and Dietary Adaptations
| Nutritional Component | Per Serving (1/8 of recipe) | Daily Value % |
|---|---|---|
| Calories | 485 | 24% |
| Total Fat | 28g | 36% |
| Saturated Fat | 14g | 70% |
| Cholesterol | 105mg | 35% |
| Sodium | 890mg | 39% |
| Total Carbohydrates | 32g | 12% |
| Dietary Fiber | 3g | 11% |
| Protein | 28g | 56% |
| Vitamin C | 15mg | 17% |
| Iron | 3mg | 17% |
This casserole provides a substantial amount of protein and essential nutrients, making it a complete meal in itself. The combination of potatoes and meat provides both complex carbohydrates and high-quality protein.
For those following specific dietary requirements, this recipe adapts beautifully:
Lower Fat Version: Substitute ground turkey or chicken for beef, use reduced-fat cheese, and replace some of the butter and cream cheese with Greek yogurt.
Gluten-Free: This recipe is naturally gluten-free, making it perfect for those with celiac disease or gluten sensitivity.
Dairy-Free Adaptations: Use plant-based milk, vegan butter, and dairy-free cheese alternatives. Nutritional yeast can add extra savory flavor.
Lower Sodium: Reduce or eliminate added salt and choose low-sodium bacon options.
Serving Suggestions and Accompaniments
This loaded potato and meatloaf casserole is substantial enough to serve as a complete meal, but I love pairing it with lighter sides that complement rather than compete with its rich flavors.
A crisp green salad with a tangy vinaigrette cuts through the richness beautifully. I particularly enjoy a simple mixed greens salad with cherry tomatoes, cucumber, and a lemon-herb dressing. The acidity helps cleanse the palate between bites.
Steamed or roasted vegetables add color and nutrition to the plate. Broccoli, green beans, or roasted Brussels sprouts work wonderfully. The slight bitterness of these vegetables provides a nice contrast to the casserole’s rich, savory flavors.
For bread lovers, a slice of crusty bread or dinner rolls helps soak up any delicious juices, though the casserole is certainly hearty enough to stand alone.
Storage and Reheating Strategies
One of my favorite aspects of this casserole is how well it stores and reheats. In fact, I often think it tastes even better the next day after all the flavors have had time to meld together.
Refrigerator Storage: Cover the cooled casserole tightly with plastic wrap or aluminum foil. It will keep in the refrigerator for up to 4 days. I like to cut it into individual portions before storing, which makes reheating much more convenient.
Freezer Storage: This casserole freezes beautifully for up to 3 months. I recommend wrapping individual portions in plastic wrap, then placing them in freezer bags. Label with the date and contents for easy identification.
Reheating Methods: For refrigerated leftovers, microwave individual portions for 1-2 minutes, stirring halfway through. For larger portions, reheat in a 350°F oven for 15-20 minutes until heated through. Frozen portions should be thawed overnight in the refrigerator before reheating.
Troubleshooting Common Issues
| Problem | Cause | Solution |
|---|---|---|
| Watery casserole | Excess moisture from vegetables or meat | Drain ingredients thoroughly; cook meat completely |
| Dry texture | Overbaking or insufficient fat content | Reduce baking time; add more butter to potatoes |
| Uneven browning | Incorrect oven temperature or rack position | Use oven thermometer; position rack in center |
| Lumpy potatoes | Cold dairy additions or overworking | Use room temperature dairy; mix gently |
| Bland flavor | Under-seasoning or low-quality ingredients | Taste and adjust seasonings; use fresh spices |
| Separated cheese | Too high temperature | Bake at correct temperature; avoid overheating |
Seasonal Variations and Creative Adaptations
Throughout the year, I love adapting this basic recipe to incorporate seasonal ingredients and flavors. During summer months, I might add fresh corn kernels and diced bell peppers for extra color and sweetness. Fall calls for additions like diced butternut squash or sweet potatoes mixed into the regular potatoes.
Winter variations might include mushrooms, caramelized onions, or even a layer of sautéed spinach. Spring brings opportunities to incorporate fresh herbs like chives, parsley, or dill into the potato mixture.
For special occasions, I’ve created elevated versions using ingredients like Gruyere cheese instead of cheddar, or adding a layer of caramelized leeks for sophisticated flavor development.
Questions and Answers
Q: Can I prepare this casserole ahead of time? Absolutely! You can assemble the entire casserole up to 24 hours in advance. Cover tightly and refrigerate, then add an extra 10-15 minutes to the baking time since you’re starting with a cold dish. This make-ahead capability makes it perfect for entertaining or meal planning.
Q: What’s the best way to prevent the potatoes from becoming gluey? The key is avoiding overworking the potatoes and ensuring your dairy ingredients are at room temperature. Use a light hand when mashing, and stop as soon as the mixture is smooth. Yukon Gold potatoes are naturally less starchy than russets, which also helps prevent a gluey texture.
Q: Can I substitute different types of meat? Definitely! Ground turkey, chicken, or even a mixture of meats works beautifully. You might need to add a bit more seasoning since these leaner meats can be less flavorful than beef. I’ve also made delicious versions using leftover pulled pork or shredded chicken.
Q: How do I know when the casserole is fully cooked? The casserole is done when the top is golden brown, the cheese is melted and bubbly, and a knife inserted into the center comes out hot. The internal temperature should reach 165°F (74°C) for food safety.
Q: What size baking dish should I use? A 9×13 inch baking dish is perfect for this recipe. If you only have a smaller dish, you can divide the mixture between two 8×8 inch pans, but adjust the baking time accordingly as they’ll cook faster.
Q: Can I make this recipe healthier? Absolutely! Use lean ground turkey, reduce the amount of cheese, substitute Greek yogurt for some of the dairy in the potatoes, and add extra vegetables like spinach or bell peppers. You can also use cauliflower for half of the potatoes to reduce carbohydrates.
Q: Why does my cheese sometimes become grainy? Grainy cheese usually results from too high heat or overheating. Make sure your oven temperature is accurate, and avoid overcooking. Using freshly grated cheese instead of pre-shredded also helps prevent this issue.
Q: Can I add vegetables to this recipe? Yes! Diced bell peppers, mushrooms, corn, or spinach all work wonderfully. Sauté any raw vegetables with the onions to remove excess moisture and develop flavors before adding them to the meat mixture.
Q: How long should I let the casserole rest before serving? Allow the casserole to rest for 10-15 minutes after removing it from the oven. This resting period lets the layers set up properly and makes serving much cleaner and easier.
Q: What’s the secret to getting perfectly smooth mashed potatoes? Start with the right type of potato (Yukon Gold), don’t overcook them, drain them thoroughly, and mash them while they’re still hot. Add room temperature dairy gradually, and stop mixing as soon as the potatoes are smooth.
This loaded potato and meatloaf casserole has become more than just a recipe in my kitchen – it’s become a tradition that brings my family together around the dinner table. There’s something magical about the way the layers meld together, creating a dish that’s somehow greater than the sum of its parts. Whether you’re cooking for a special occasion or just want to treat your family to something extraordinary, this casserole delivers comfort, satisfaction, and memories that will last long after the last bite is gone.
The beauty of this recipe lies not just in its incredible flavor, but in its ability to adapt to your family’s preferences and dietary needs. It’s forgiving enough for beginner cooks yet sophisticated enough to impress dinner guests. Most importantly, it creates those precious moments when everyone gathers around the table, phones forgotten, sharing stories and creating memories over a meal made with love.