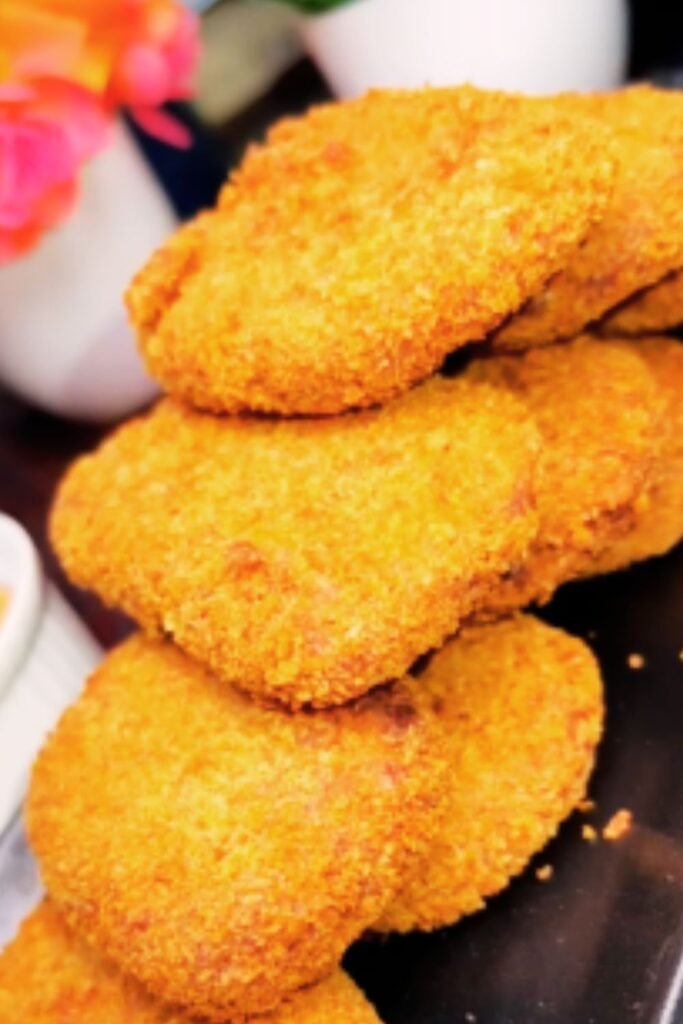
There’s something undeniably satisfying about biting into a perfectly crispy, juicy chicken nugget. While fast food joints have made them famous worldwide, I’ve discovered that making them from scratch at home elevates this simple comfort food to an entirely new level. Not only do homemade nuggets taste infinitely better, but I can also control exactly what goes into them – no mysterious ingredients or preservatives, just real food that I feel good serving to my family.
After years of experimenting with different recipes and techniques, I’ve perfected my homemade chicken nugget recipe that consistently produces nuggets that are crispy on the outside, tender on the inside, and bursting with flavor. In this comprehensive guide, I’ll share everything I’ve learned about creating these delectable morsels, including step-by-step instructions, helpful tips, and creative variations to keep things interesting.
Why Make Chicken Nuggets at Home?
Before diving into the recipe, let me explain why taking the time to make chicken nuggets from scratch is absolutely worth the effort:
- Superior Taste: The flavor difference between fresh, homemade nuggets and processed ones is simply incomparable.
- Quality Control: I can choose high-quality chicken and other ingredients, avoiding fillers and additives.
- Customization: I can adjust the seasonings, coating, and cooking method to suit my family’s preferences.
- Cost-Effective: Making a large batch at home costs significantly less than buying pre-made nuggets.
- Family Fun: Getting everyone involved in the preparation makes for a wonderful bonding activity.
- Healthier Choice: Baking or air-frying options offer a lighter alternative to deep-fried versions.
Essential Ingredients for Perfect Chicken Nuggets
The secret to exceptional homemade chicken nuggets begins with selecting the right ingredients. Here’s what I always have on hand:
For the Chicken:
- Boneless, skinless chicken breasts: I prefer using breast meat for its lean texture and mild flavor, but thighs work wonderfully too if you prefer darker meat.
- Salt and pepper: The foundation of any good seasoning.
- Garlic powder: For a subtle depth of flavor without overwhelming the palate.
- Paprika: Adds a touch of color and mild sweetness.
- Onion powder: Enhances the savory profile without adding texture.
For the Traditional Breading (Three-Stage Dredging):
- All-purpose flour: Creates the first layer that helps other coatings adhere.
- Eggs: Acts as the glue between the flour and outer coating.
- Breadcrumbs: Provides that classic crispy exterior.
For the Marinade (Optional but Recommended):
- Buttermilk: Tenderizes the chicken and adds subtle tanginess.
- Dijon mustard: Introduces complexity without overwhelming the flavor profile.
- Honey: Balances the tang with a touch of sweetness.
Equipment You’ll Need
Having the right tools makes the process much smoother:
- Sharp knife and cutting board: For trimming and cutting the chicken into even pieces
- Shallow dishes or bowls: For the breading stations
- Parchment paper: For less mess during the breading process
- Baking sheet with wire rack: Allows air circulation for even cooking if baking
- Meat thermometer: Ensures chicken is safely cooked to 165°F (74°C)
- Tongs: For handling the nuggets during cooking
- Deep fryer, large pot, air fryer, or oven: Depending on your preferred cooking method
Chicken Nugget Comparison: Homemade vs. Commercial
Let’s compare homemade chicken nuggets with popular commercial options to understand why making them yourself is worth the effort:
| Feature | Homemade Nuggets | Fast Food Nuggets | Frozen Store-Bought |
|---|---|---|---|
| Main Ingredients | 100% chicken breast or thigh | Often contains chicken with added fillers | Typically contains chicken plus fillers and binders |
| Preservatives | None | Multiple preservatives | Several preservatives for extended shelf life |
| Sodium Content | Controllable (avg. 150mg per serving) | High (avg. 540mg per serving) | High (avg. 460mg per serving) |
| Cost per Serving | $1.50-$2.00 | $3.50-$5.00 | $2.00-$3.50 |
| Cooking Method | Bake, air-fry, or pan-fry | Deep-fried | Pre-fried, then baked or microwaved |
| Customization | Fully customizable | None | None |
| Texture | Tender chicken with crispy exterior | Consistent but often rubbery | Variable, often dry |
| Shelf Life | 3-4 days refrigerated, 3 months frozen | Served fresh | 6-12 months frozen |
My Foolproof Homemade Chicken Nuggets Recipe
Now for the main event—let’s make some chicken nuggets!
Ingredients (Makes about 24 nuggets):
- 1½ pounds boneless, skinless chicken breasts
- 1 cup buttermilk (optional for marinade)
- 1 tablespoon Dijon mustard (if using marinade)
- 1 teaspoon honey (if using marinade)
- 1½ cups all-purpose flour
- 1 tablespoon garlic powder
- 2 teaspoons paprika
- 1 tablespoon onion powder
- 1 teaspoon salt
- ½ teaspoon black pepper
- 3 large eggs, beaten
- 2 cups panko breadcrumbs
- Oil for frying (if using that method)
- Cooking spray (if baking or air-frying)
Step-by-Step Instructions:
- Prepare the chicken:
- Trim away any fat or connective tissue from the chicken breasts.
- Cut the chicken into approximately 1½-inch pieces, aiming for uniformity so they cook evenly.
- If using the marinade, whisk together buttermilk, Dijon mustard, and honey in a bowl.
- Add the chicken pieces to the marinade, cover, and refrigerate for at least 30 minutes (up to 4 hours).
- Set up your breading station:
- In the first shallow dish, combine the flour, half the garlic powder, half the paprika, half the onion powder, half the salt, and half the pepper.
- In the second dish, beat the eggs until smooth.
- In the third dish, mix the panko breadcrumbs with the remaining garlic powder, paprika, onion powder, salt, and pepper.
- Bread the nuggets:
- If you marinated the chicken, remove the pieces from the buttermilk mixture, allowing excess to drip off.
- Dredge each piece in the seasoned flour, shaking off excess.
- Dip into beaten eggs, allowing excess to drip off.
- Finally, coat thoroughly in the seasoned breadcrumb mixture, pressing gently to adhere.
- Place breaded nuggets on a parchment-lined tray.
- Choose your cooking method:Option A: Deep Frying (Classic Method)
- Heat oil to 350°F (175°C) in a deep fryer or heavy pot (oil should be about 2-3 inches deep).
- Fry nuggets in batches for 3-4 minutes until golden brown and internal temperature reaches 165°F (74°C).
- Transfer to a wire rack lined with paper towels to drain excess oil.
- Preheat oven to 425°F (220°C).
- Place nuggets on a wire rack set over a baking sheet.
- Spray nuggets lightly with cooking spray for better browning.
- Bake for 15-20 minutes, flipping halfway through, until golden and internal temperature reaches 165°F (74°C).
- Preheat air fryer to 400°F (200°C).
- Spray basket lightly with cooking spray.
- Place nuggets in a single layer, working in batches if needed.
- Spray tops lightly with cooking spray.
- Cook for 8-10 minutes, flipping halfway through, until crispy and fully cooked.
- Rest and serve:
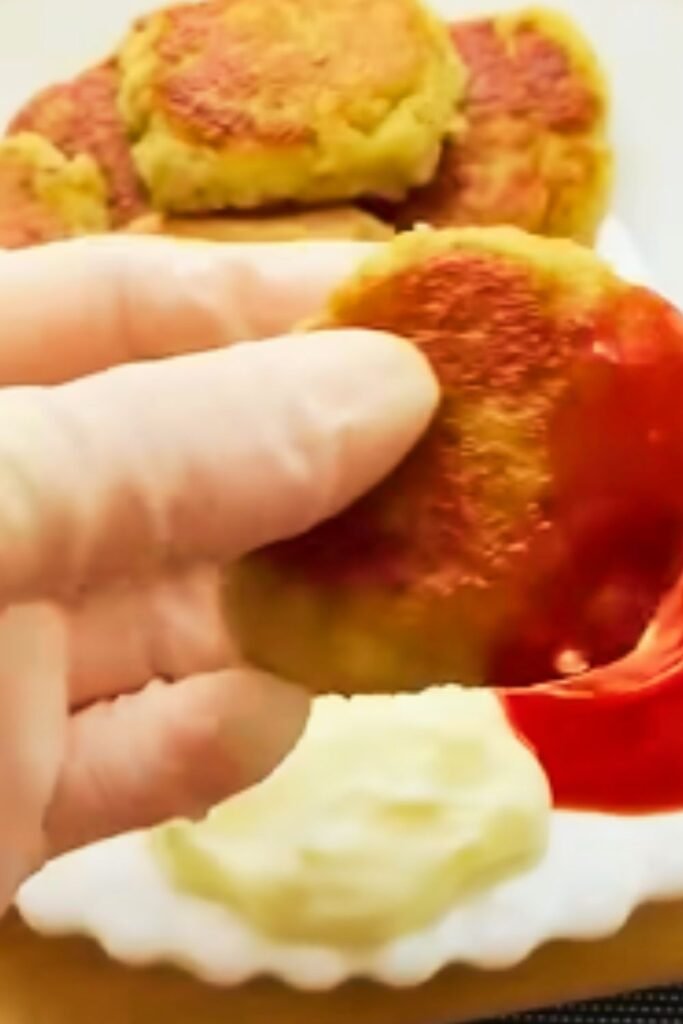
- Allow nuggets to rest for 2-3 minutes before serving.
- Serve with your favorite dipping sauces.
Nutritional Information Per Serving (4 nuggets)
| Nutrient | Amount (Baked Version) | Amount (Fried Version) |
|---|---|---|
| Calories | 220 | 310 |
| Protein | 24g | 23g |
| Carbohydrates | 18g | 19g |
| Fat | 6g | 16g |
| Saturated Fat | 1.5g | 4g |
| Fiber | 1g | 1g |
| Sodium | 380mg | 410mg |
| Sugar | 1g | 1g |
| Cholesterol | 125mg | 130mg |
Troubleshooting Common Chicken Nugget Problems
Even experienced cooks encounter challenges. Here are solutions to common issues:
| Problem | Possible Cause | Solution |
|---|---|---|
| Breading falls off during cooking | Surface moisture on chicken; not pressing breading firmly | Pat chicken dry before breading; press coating firmly; refrigerate breaded nuggets for 20 minutes before cooking |
| Nuggets too dry | Overcooking; using only breast meat | Use a meat thermometer to avoid overcooking; mix in some thigh meat for juicier nuggets |
| Nuggets greasy or soggy | Oil not hot enough; overcrowding the fryer | Ensure oil is at proper temperature (350°F); fry in smaller batches |
| Bland flavor | Insufficient seasoning | Season each component (chicken, flour, and breadcrumbs); don’t skip the marinade |
| Uneven cooking | Inconsistent nugget size | Cut chicken pieces uniformly; monitor smaller pieces which will cook faster |
| Burning on outside, raw inside | Cooking temperature too high | Lower heat; if frying, maintain steady oil temperature |
Creative Variations to Keep Things Interesting
Once you’ve mastered the basic recipe, try these exciting variations:
Coating Alternatives:
- Cornflake Crunch: Replace panko with crushed cornflakes for extra crispiness
- Pretzel Coating: Use finely crushed pretzels for a salty twist
- Tortilla Crust: Crushed tortilla chips make a zesty Tex-Mex version
- Parmesan & Herb: Add ½ cup grated Parmesan and 2 tablespoons Italian herbs to panko
- Coconut Crusted: Mix 1 cup shredded coconut with 1 cup panko for tropical flair
- Gluten-Free: Use gluten-free flour and breadcrumbs or crushed rice cereal
Flavor Infusions:
- Buffalo: Add 1 tablespoon hot sauce to the egg wash
- Ranch: Mix 2 tablespoons ranch seasoning into the flour mixture
- Lemon Herb: Add lemon zest and fresh herbs to the marinade
- Smoky BBQ: Mix 2 teaspoons smoked paprika and 1 tablespoon brown sugar into breadcrumbs
- Southwest: Add 1 tablespoon taco seasoning to the flour mixture
- Asian-Inspired: Include 1 teaspoon five-spice powder in the breading
Make-Ahead and Storage Tips
Homemade chicken nuggets are perfect for batch preparation:
Freezing Uncooked Nuggets:
- Follow the recipe through the breading step.
- Place breaded nuggets on a parchment-lined baking sheet, not touching.
- Freeze until solid (about 2-3 hours).
- Transfer to freezer bags or containers, separating layers with parchment.
- Label with the date and store for up to 3 months.
- Cook directly from frozen, adding 3-5 minutes to cooking time.
Storing Cooked Nuggets:
- Refrigerator: Store in an airtight container for up to 3-4 days.
- Freezer: Cool completely, then freeze in a single layer before transferring to freezer containers. Store for up to 2 months.
Reheating Methods:
- Oven: Preheat to 400°F (200°C). Heat nuggets on a wire rack for 8-10 minutes.
- Air Fryer: 3-4 minutes at 375°F (190°C).
- Microwave: Use only as a last resort as it makes nuggets soggy. Cover with a paper towel and heat in 30-second intervals.
Delicious Homemade Dipping Sauces
Elevate your nuggets with these easy homemade dipping sauces:
Honey Mustard:
- ¼ cup mayonnaise
- 2 tablespoons Dijon mustard
- 2 tablespoons honey
- 1 teaspoon apple cider vinegar
- Pinch of cayenne pepper (optional)
Garlic Aioli:
- ½ cup mayonnaise
- 2 garlic cloves, minced
- 1 tablespoon lemon juice
- Salt and pepper to taste
- 1 teaspoon finely chopped fresh herbs (optional)
BBQ Ranch:
- ¼ cup ranch dressing
- 2 tablespoons BBQ sauce
- ½ teaspoon smoked paprika
Sweet Chili Sauce:
- ¼ cup sweet chili sauce
- 2 tablespoons rice vinegar
- 1 teaspoon soy sauce
- 1 teaspoon honey
Kid-Friendly Serving Suggestions
Transform nuggets into a fun meal with these serving ideas:
- Create a DIY dipping station with colorful sauces
- Serve with veggie sticks and fruit for a balanced meal
- Make “nugget sliders” with mini buns and toppings
- Thread onto skewers with cherry tomatoes and cheese cubes
- Use cookie cutters to shape nuggets before breading (stars, hearts, etc.)
- Serve with sweet potato fries or carrot chips for a healthier side
Beyond Dinner: Creative Uses for Chicken Nuggets
Think beyond the basic nugget dinner with these creative ideas:
- Chop and add to salads for protein
- Make a “nugget parmesan” with marinara and mozzarella
- Use as protein in grain bowls
- Create mini chicken and waffle bites for brunch
- Add to mac and cheese for a heartier meal
- Make nugget tacos with slaw and avocado
- Use in wraps with greens and sauce
Common Questions About Homemade Chicken Nuggets
Q: Can I use chicken thighs instead of breasts? Absolutely! Chicken thighs actually produce juicier nuggets with more flavor. Just trim them well and cut into similar-sized pieces.
Q: How can I make these gluten-free? Substitute regular flour with gluten-free all-purpose flour and use crushed rice cereal, crushed gluten-free pretzels, or gluten-free panko for the outer coating.
Q: Is there an egg substitute I can use for the breading process? Yes! Try buttermilk, yogurt, or a flax egg (1 tablespoon ground flaxseed mixed with 3 tablespoons water, left to thicken). The coating might be slightly less adhesive but will still work.
Q: Can I make these nuggets spicy? Definitely! Add cayenne pepper, hot sauce, or finely chopped jalapeños to your breading mixture. You can also mix hot sauce into the egg wash.
Q: How do I know when the nuggets are fully cooked? The safest way is to use an instant-read thermometer—chicken is safely cooked at 165°F (74°C). Alternatively, cut into one of the larger pieces; the meat should be white throughout with no pink.
Q: My breading keeps falling off during cooking. What am I doing wrong? This usually happens if the chicken surface is too wet, the breading isn’t pressed on firmly enough, or you’re flipping the nuggets too early during cooking. Try patting the chicken very dry before breading, pressing the coating on firmly, and refrigerating the breaded nuggets for 20-30 minutes before cooking to help the coating adhere.
Q: Can I prepare these ahead for a party? Yes! Either freeze the uncooked breaded nuggets or cook them ahead of time and reheat in the oven right before serving. For best results at parties, I recommend baking or air-frying, then keeping warm in a low oven (200°F/95°C).
Q: What’s the best oil to use for frying chicken nuggets? Oils with high smoke points work best, such as vegetable oil, canola oil, peanut oil, or avocado oil. I typically use canola or vegetable oil for their neutral flavor and affordability.
Q: How can I make these nuggets healthier? Choose the baking or air-frying methods rather than deep-frying. You can also use whole wheat flour and whole grain breadcrumbs. For even more nutrition, try adding finely grated vegetables like zucchini or carrots to the chicken mixture.
Q: Can I grind my own chicken? Absolutely! Using a food processor, you can pulse chicken breasts or thighs into small pieces. This creates a texture more similar to commercial nuggets if that’s what you prefer.
Final Tips for Nugget Perfection
After making countless batches of homemade chicken nuggets, I’ve discovered these final tips that make all the difference:
- Temperature matters: Whether frying, baking, or air-frying, preheating is essential for that perfect crispy exterior.
- Don’t skip the rest: Letting the nuggets rest for a few minutes after cooking allows the juices to redistribute, resulting in moister chicken.
- Season every layer: The most flavorful nuggets have seasoning in the marinade, flour, and breadcrumb coating.
- Texture contrast: For maximum crispiness, ensure your breadcrumbs have varying sizes—some fine, some coarser.
- Batch cooking: When making large quantities, keep cooked nuggets warm in a 200°F (95°C) oven while finishing the remaining batches.
Making your own chicken nuggets may take a bit more time than opening a frozen bag, but the superior taste, quality, and satisfaction of creating something truly delicious from scratch make it absolutely worthwhile. Plus, seeing the delight on everyone’s faces when they bite into these crispy, juicy morsels is reward enough!
Now it’s your turn to try this recipe and discover just how amazing homemade chicken nuggets can be. I’d love to hear how yours turn out and what creative variations you come up with!