Have you ever craved a luxurious, creamy dessert but didn’t want to spend hours in the kitchen or deal with complicated techniques? Well, I’ve got incredible news for you! I’m about to share the most mind-blowing mousse recipe that requires just TWO ingredients and practically makes itself. This recipe has been my secret weapon for impromptu dinner parties and dessert emergencies for years, and now I’m finally sharing it with you.
Why This Recipe Will Change Your Life
When I first discovered this recipe, I honestly couldn’t believe it. The texture is impossibly silky, the flavor is rich and intense, and guests always assume I’ve been slaving away in the kitchen for hours. Little do they know that I spent about 5 minutes of active preparation time!
What makes this recipe truly special is its versatility and foolproof nature. I’ve made it countless times, and it has never failed me. Even my culinary-challenged friends have mastered this recipe on their first try. It’s that simple!
The Magic Ingredients
Are you ready for the big reveal? The two miracle ingredients that create this heavenly dessert are:
- Chocolate (any kind you love)
- Water
Yes, you read that correctly. Just chocolate and water. No cream, no eggs, no gelatin, no complicated stabilizers. The science behind this recipe is fascinating and was popularized by the renowned French chemist and chocolate expert Hervé This, who discovered that when chocolate is melted and combined with water in precise proportions, it creates a stable emulsion with a mousse-like texture.
The Science Behind The Magic
Before we dive into the recipe, let me briefly explain why this works. Traditional chocolate mousse recipes typically use eggs, cream, or both to create that light, airy texture. Those ingredients act as emulsifiers and stabilizers, binding the fat in chocolate with water molecules.
In this recipe, we’re creating what food scientists call a “water ganache” or “chocolate chantilly.” When chocolate melts, its cocoa solids and cocoa butter separate. By introducing water and rapid whisking while cooling, we’re forcing tiny air bubbles into the mixture while simultaneously allowing the cocoa butter to crystallize around these air bubbles, creating a stable foam.
It seems counterintuitive because we’ve all been taught that water and chocolate don’t mix – and typically, a few drops of water will cause melted chocolate to “seize” and become grainy. But with the right proportion and technique, magic happens.
Equipment You’ll Need
Before we begin, gather these basic tools:
- A medium saucepan
- A heat-resistant bowl that fits snugly over the saucepan
- A whisk (an electric hand mixer makes this easier, but a manual whisk works too)
- A rubber spatula
- Serving glasses or ramekins
The Basic Recipe
Let’s start with the fundamental recipe, and then I’ll share some variations and tips to make it your own.
Ingredients:
- 8 oz (225g) quality chocolate (dark, milk, or white – your choice)
- 6 oz (175ml) water
Instructions:
- Prepare an ice bath: Fill a large bowl with ice cubes and some cold water. Set aside.
- Chop the chocolate: Cut your chocolate into small, uniform pieces to ensure even melting.
- Create a double boiler: Pour water into a saucepan, about 1-2 inches deep. Place a heat-resistant bowl on top, making sure the bottom doesn’t touch the water.
- Melt the chocolate: Place the chopped chocolate and the 6 oz of water in the bowl. Heat on medium-low, stirring gently until the chocolate is completely melted and the mixture is smooth and glossy. This typically takes 3-5 minutes.
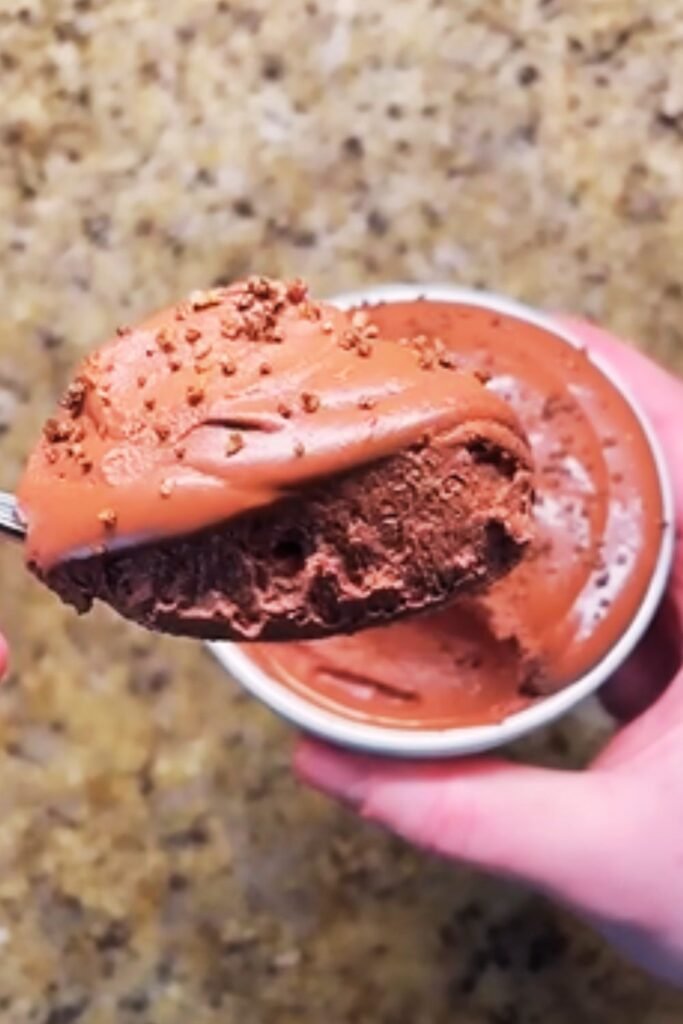
- Cool and whip: Immediately transfer the bowl to the ice bath you prepared. Begin whisking vigorously. As the mixture cools, it will start to thicken. Keep whisking until it reaches the consistency of whipped cream, usually about 3-5 minutes.
- Be vigilant: The transformation happens quickly! If you whisk too long, the mousse will become grainy as the chocolate sets too firmly. If this happens, you can remelt and try again.
- Serve: Spoon the mousse into serving dishes. For best texture, refrigerate for at least 1 hour before serving.
That’s it! You’ve just made gourmet chocolate mousse with two ingredients and minimal effort.
Choosing The Right Chocolate
Since chocolate is the star of this recipe, its quality will directly impact your mousse. Here’s what I’ve learned from extensive experimentation:
Dark Chocolate
- Best for a sophisticated, less sweet dessert
- Choose chocolate with 60-70% cocoa content for optimal texture
- Higher-end brands generally contain better cocoa butter that enhances the final texture
- Single-origin chocolates offer unique flavor profiles
Milk Chocolate
- Creates a sweeter, more familiar flavor
- Look for high-quality milk chocolate with at least 30% cocoa solids
- The higher milk content means a creamier mouthfeel
White Chocolate
- Makes an elegant, vanilla-forward mousse
- Must contain actual cocoa butter (check the ingredients!)
- Requires slightly less water (use 5 oz instead of 6 oz)
Chocolate Quality Comparison Table
| Chocolate Type | Cocoa % | Water Ratio | Setting Time | Flavor Profile | Best Pairings |
|---|---|---|---|---|---|
| Dark (Premium) | 65-70% | 6 oz per 8 oz chocolate | 3-5 mins | Rich, complex, slightly bitter | Orange zest, sea salt, espresso |
| Dark (Standard) | 50-60% | 6 oz per 8 oz chocolate | 4-6 mins | Balanced, chocolate-forward | Berries, mint, cinnamon |
| Milk (Premium) | 35-45% | 5.5 oz per 8 oz chocolate | 4-7 mins | Creamy, caramel notes | Caramelized nuts, banana |
| Milk (Standard) | 25-35% | 5 oz per 8 oz chocolate | 5-8 mins | Sweet, mild chocolate | Strawberries, peanut butter |
| White (Premium) | N/A (33% cocoa butter) | 4.5 oz per 8 oz chocolate | 5-8 mins | Vanilla, cream, subtle | Raspberries, lemon, passion fruit |
| White (Standard) | N/A (20-25% cocoa butter) | 4 oz per 8 oz chocolate | 6-9 mins | Very sweet, milky | Tart fruits, matcha |
Troubleshooting Common Issues
Even though this recipe is remarkably simple, there are a few pitfalls I’ve encountered over the years. Here’s how to avoid them:
Problem: Mousse Won’t Set
- Cause: Temperature not cold enough or insufficient whisking
- Solution: Return to ice bath and continue whisking vigorously
Problem: Mousse Becomes Grainy
- Cause: Over-whisking or chocolate cooled too quickly
- Solution: Gently remelt over double boiler and try again, being careful not to over-whisk
Problem: Watery Texture
- Cause: Too much water or insufficient cooling before serving
- Solution: Add a little more melted chocolate and rewhisk, or refrigerate longer
Problem: Too Firm
- Cause: Too much chocolate relative to water or over-refrigeration
- Solution: Gently warm slightly or let sit at room temperature for 10-15 minutes before serving
Exciting Variations
Now that you’ve mastered the basic recipe, let’s explore some exciting variations that still maintain the two-ingredient simplicity:
Flavor Infusions
Instead of using plain water, infuse it with complementary flavors before adding to the chocolate:
- Coffee Chocolate Mousse: Replace water with strong brewed coffee
- Mint Chocolate Mousse: Steep fresh mint leaves in hot water for 10 minutes, strain, then use
- Orange Chocolate Mousse: Add orange zest to the water, heat, steep for 10 minutes, strain, then use
- Spiced Chocolate Mousse: Infuse water with cinnamon sticks, star anise, or cardamom pods
Chocolate Combinations
Mix different types of chocolate for unique flavor profiles:
- Half dark, half milk: The perfect balance of rich and sweet
- White chocolate with a small amount of matcha powder: Creates a stunning green tea mousse
- Dark chocolate with a touch of cayenne: For a Mexican-inspired spicy chocolate experience

Serving Suggestions
The beauty of this mousse is its versatility. Here are my favorite ways to serve it:
Simple Elegance
- Serve in clear glasses to show off the beautiful texture
- Top with a single fresh raspberry or a mint leaf
- Dust lightly with cocoa powder or powdered sugar
Dessert Bar
- Offer small portions in shot glasses or espresso cups
- Provide various toppings in small bowls:
- Fresh berries
- Crushed cookies
- Toasted nuts
- Candied citrus peel
- Whipped coconut cream
Dinner Party Wow-Factor
- Layer the mousse with complementary elements:
- Fresh fruit compote
- Crushed amaretti cookies
- Salted caramel sauce
- Chocolate cookie crumbs
Make-Ahead Magic
This mousse keeps beautifully in the refrigerator for up to 3 days, making it perfect for planning ahead. Simply cover each serving dish with plastic wrap, being careful not to let the wrap touch the surface of the mousse.
Nutritional Benefits
You might be surprised to learn that this simple dessert can actually have some nutritional benefits, especially when made with high-quality dark chocolate:
Dark Chocolate Benefits
- Rich in antioxidants
- Contains minerals like iron, magnesium, and zinc
- Provides fiber from cocoa solids
- Contains less sugar than traditional mousse recipes
- No added dairy (great for lactose-intolerant guests)
Nutritional Comparison Table
| Dessert Type | Calories (per 4 oz serving) | Fat | Sugar | Notable Components |
|---|---|---|---|---|
| Traditional Chocolate Mousse | 350-400 | 28-32g | 20-25g | Eggs, heavy cream, sugar |
| 2-Ingredient Mousse (Dark) | 220-250 | 15-18g | 12-15g | Antioxidant flavonoids, iron |
| 2-Ingredient Mousse (Milk) | 250-280 | 15-18g | 20-25g | Calcium, protein |
| 2-Ingredient Mousse (White) | 260-290 | 16-20g | 25-30g | Calcium |
While this certainly isn’t a “health food,” it’s a more mindful indulgence compared to many cream-laden desserts.
Frequently Asked Questions
Over the years, I’ve been asked countless questions about this remarkable recipe. Here are the most common ones:
Q: Can I use chocolate chips instead of a chocolate bar? A: Yes, but choose high-quality chips with minimal additives. Some chocolate chips contain stabilizers that can affect the texture. Premium chocolate chips work better than budget brands.
Q: How far in advance can I make this mousse? A: The mousse keeps well for up to 3 days in the refrigerator. Cover each serving with plastic wrap, ensuring it doesn’t touch the surface to prevent condensation from forming.
Q: Is this recipe vegan? A: It can be! Just ensure you use dark chocolate that doesn’t contain milk solids or other animal-derived ingredients. Many high-quality dark chocolates are naturally vegan.
Q: Can I freeze this mousse? A: While you can freeze it, the texture may change slightly upon thawing. If you do freeze it, thaw overnight in the refrigerator for the best results.
Q: What if I don’t have an ice bath? A: You can use the refrigerator, but the process will take longer, and you’ll need to whisk periodically as it cools. The ice bath method produces the most reliable results.
Q: Why did my mousse deflate after a few hours? A: This can happen if the chocolate wasn’t properly emulsified or if it was over-whisked. Try again with careful attention to temperature and whisking time.
Q: Can I add a third ingredient without ruining the simplicity? A: Absolutely! A splash of vanilla extract, a pinch of sea salt, or a teaspoon of espresso powder can enhance the chocolate flavor without complicating the recipe.
Perfect Occasions For This Mousse
This versatile dessert fits beautifully into so many occasions:
Last-Minute Entertaining
When friends call to say they’re in the neighborhood, this quick-fix dessert feels anything but rushed. I’ve made it countless times while guests are enjoying their main course.
Romantic Dinners
There’s something undeniably sensual about chocolate mousse. The simplicity of this recipe means you can focus on the rest of your special meal.
Food Gifts
Pour the freshly made mousse into small jars with lids, attach a ribbon and note, and you have a gorgeous homemade gift. Just be sure the recipient refrigerates it promptly.
Children’s Cooking Lessons
This recipe is perfect for getting kids involved in the kitchen. The science behind it is fascinating for curious young minds, and the results are immediately gratifying.

My Personal Journey With This Recipe
I discovered this recipe during a particularly chaotic dinner party where my planned dessert had failed spectacularly. With guests due to arrive in less than an hour, I frantically searched for the simplest chocolate dessert possible and stumbled upon the concept of water ganache.
Skeptical but desperate, I tried it with some high-quality dark chocolate I had been saving. The transformation from liquid to mousse before my eyes felt like culinary alchemy! My guests not only devoured it but insisted it was the best chocolate mousse they’d ever tasted.
Since then, I’ve made this recipe hundreds of times, experimenting with different chocolates, infusions, and serving styles. It’s become my signature dessert, the one friends and family request for special occasions. The fact that it requires minimal effort remains my delicious secret!
Final Thoughts: The Beauty of Simplicity
In a world of complicated recipes and endless ingredient lists, there’s something truly magical about creating an extraordinary dessert from just two basic components. This recipe reminds me that sometimes, the simplest approach yields the most remarkable results.
The next time you’re craving a decadent chocolate dessert or need to impress dinner guests without spending hours in the kitchen, remember this magical recipe. The hardest part will be convincing everyone that you really did use just chocolate and water!
I hope this recipe brings you as much joy and as many compliments as it has brought me over the years. Happy whisking!
Q&A Section
Q: Can I double or triple this recipe for a larger group? A: Yes, you can scale this recipe up, but you’ll need a larger bowl and more arm strength for whisking! If making a very large batch, consider dividing it into smaller portions for the cooling and whisking stage.
Q: Does the type of water matter? A: While regular tap water works fine, if your tap water has a strong mineral taste, consider using filtered water for the purest chocolate flavor.
Q: I don’t have a double boiler. What can I use instead? A: You can create a makeshift double boiler by placing a heat-resistant bowl over a pot with simmering water. Just ensure the bowl doesn’t touch the water surface.
Q: My mousse isn’t as airy as I expected. What went wrong? A: The airiness comes from vigorous whisking as the mixture cools. Try whisking more vigorously next time, or consider using an electric hand mixer for more consistent results.
Q: Can I add alcohol to this recipe? A: Yes! Replace a small portion (1-2 tablespoons) of the water with your favorite liqueur. Cointreau, Grand Marnier, Baileys, or Kahlúa all work beautifully.
Q: How do I know exactly when to stop whisking? A: Stop whisking when the mixture holds soft peaks and has the consistency of whipped cream. If you continue beyond this point, the chocolate will begin to set and become grainy.