
There’s something magical about those warm, buttery rolls they serve at Texas Roadhouse. The moment they arrive at your table, still steaming and accompanied by that heavenly cinnamon honey butter, it’s like time stands still. I’ve been on a mission to recreate these legendary rolls at home, and after countless batches (and a very happy family who gladly served as taste-testers), I’ve finally perfected my copycat recipe.
Today, I’m sharing my secrets for making these iconic rolls in your own kitchen. Trust me when I say these might even be better than the restaurant version—plus, you can enjoy them anytime without waiting for a table!
What Makes Texas Roadhouse Rolls So Special?
Texas Roadhouse rolls are beloved for their distinctive characteristics:
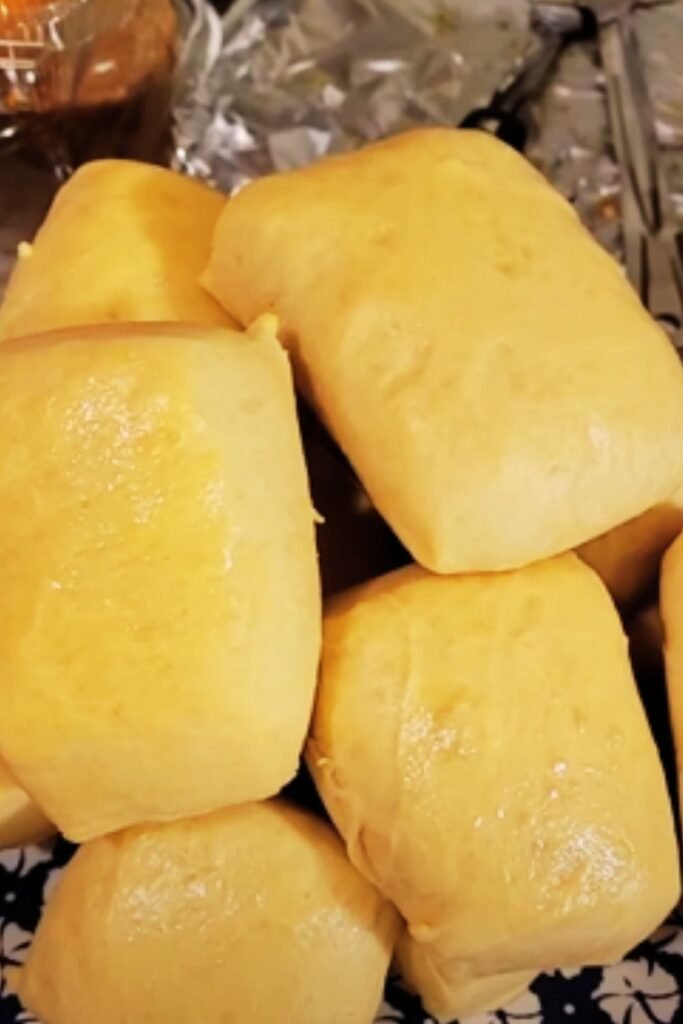
Sweetness : Unlike standard dinner rolls, these have a noticeable sweetness that perfectly complements their buttery flavor Texture : Perfectly soft and fluffy inside with a slightly crisp exterior Shape : The signature square shape sets them apart from ordinary round dinner rolls Butter : They’re brushed with melted butter right after baking for an irresistible sheen and flavor Honey Cinnamon Butter : The accompanying spread takes these rolls from great to unforgettable
Ingredients You’ll Need
For the rolls:
- 4 cups all-purpose flour, plus extra for kneading
- 1/4 cup granulated sugar
- 1 1/4 teaspoons salt
- 1 packet (2 1/4 teaspoons) active dry yeast
- 1 large egg, room temperature
- 1/4 cup honey
- 1/4 cup (1/2 stick) unsalted butter, melted
- 1 cup whole milk, warmed to about 110°F
- 2 tablespoons unsalted butter, melted (for brushing)
For the honey cinnamon butter:
- 1/2 cup (1 stick) unsalted butter, softened
- 1/4 cup powdered sugar
- 1/4 cup honey
- 1 teaspoon ground cinnamon
- 1/4 teaspoon vanilla extract
- Pinch of salt
Kitchen Equipment
Before we start, let’s make sure you have everything you need:
- Stand mixer with dough hook attachment (or strong arms for kneading!)
- Large mixing bowl
- Measuring cups and spoons
- 9×13 inch baking pan
- Rolling pin
- Pizza cutter or sharp knife
- Clean kitchen towels
- Small saucepan (for warming milk)
- Pastry brush
- Small mixing bowl (for honey butter)
Step-by-Step Instructions
Step 1: Prepare the Yeast Mixture
I always start by activating the yeast properly—it’s the foundation of great rolls. In your stand mixer bowl, combine the warm milk (around 110°F—should feel warm but not hot to the touch), honey, and yeast. Stir gently and let it sit for about 5-10 minutes until it becomes foamy. This foaming tells you your yeast is alive and active.
If your mixture doesn’t foam up after 10 minutes, your yeast might be dead or your milk was too hot/cold. It’s better to start over than continue with inactive yeast.
Step 2: Make the Dough
Once your yeast is happily bubbling, add the melted butter (cooled slightly so it doesn’t kill the yeast), egg, sugar, and salt. Mix on low speed until combined.
Gradually add 3 cups of flour, mixing on low speed until incorporated. The dough will still be quite sticky at this point. Continue adding the remaining flour, 1/4 cup at a time, until the dough pulls away from the sides of the bowl. You might not need all the flour, or you might need a bit more—the exact amount depends on factors like humidity and the moisture content of your flour.
Increase the speed to medium-low and let the mixer knead the dough for about 5 minutes until it becomes smooth and elastic. If kneading by hand, turn the dough onto a floured surface and knead for about 7-8 minutes.
Step 3: First Rise
Transfer the dough to a lightly oiled bowl, turning once to coat the dough with oil. Cover with a clean kitchen towel or plastic wrap and let it rise in a warm place until doubled in size, about 1 to 1.5 hours.
I like to create a perfect rising environment by turning my oven on to the lowest setting for about 2 minutes, then turning it off. This creates a draft-free, warm space that’s perfect for dough rising. Just make sure it’s not too hot—you should be able to comfortably place your hand in the oven.
Step 4: Shape the Rolls
Once the dough has doubled, gently punch it down to release the air. Turn it out onto a lightly floured surface and roll it into a rectangle about 1/2 inch thick.
Here’s the secret to those iconic Texas Roadhouse squares: Instead of pulling off pieces of dough and rolling them into balls, use a pizza cutter or sharp knife to cut the dough into equal squares, about 2 x 2 inches. This gives them their distinctive shape and ensures even baking.
Step 5: Second Rise
Arrange the dough squares in a greased 9×13 inch baking pan, placing them close together but not quite touching. Cover again with a kitchen towel and let them rise for another 30-45 minutes until puffy.
During this second rise, preheat your oven to 350°F (175°C).
Step 6: Bake to Golden Perfection
Bake the rolls in the preheated oven for 15-18 minutes, or until the tops are golden brown. The internal temperature should reach about 190°F if you’re using a thermometer.
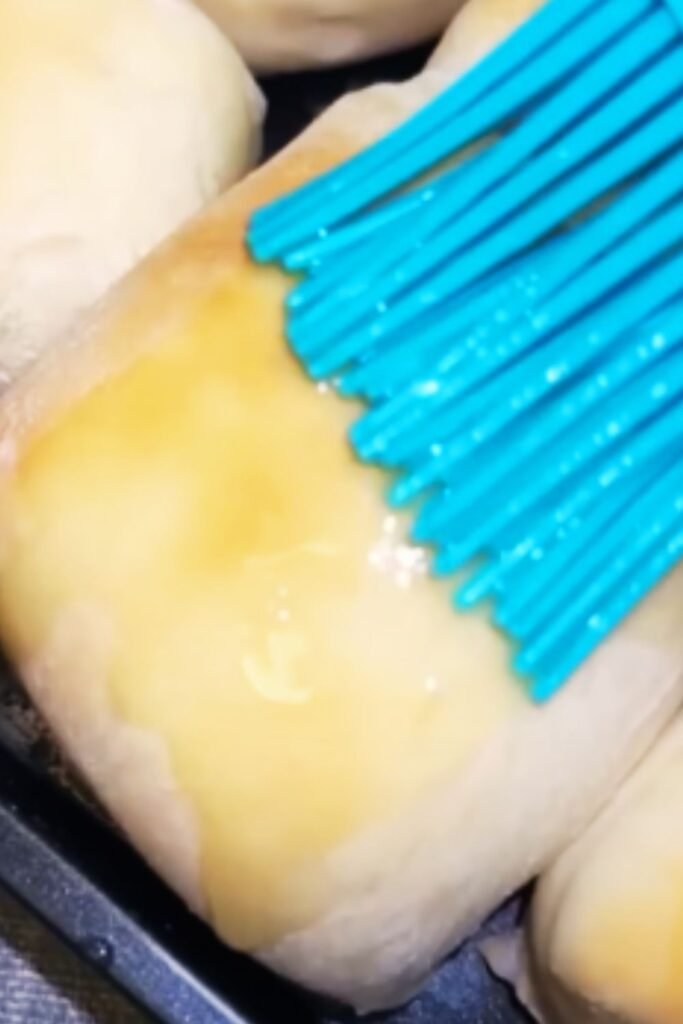
As soon as you remove the rolls from the oven, brush the tops generously with melted butter. This not only adds flavor but also keeps the tops soft as they cool.
Step 7: Make the Honey Cinnamon Butter

While the rolls are baking, prepare the famous honey cinnamon butter. In a medium bowl, beat the softened butter with an electric mixer until light and fluffy, about 2 minutes.
Add the powdered sugar, honey, cinnamon, vanilla extract, and salt. Beat again until everything is well combined and the mixture is smooth and creamy. Transfer to a serving dish and if desired, use the back of a spoon to create decorative swirls on top.
Tips for Perfect Texas Roadhouse Rolls Every Time
After making these rolls dozens of times, I’ve gathered some insights that will help ensure your rolls turn out perfectly:
- Temperature matters: Make sure your milk is warm (about 110°F) but not hot, which would kill the yeast. Similarly, your egg should be at room temperature.
- Don’t rush the rise: Both rising periods are crucial for developing flavor and achieving that fluffy texture. Be patient and give your dough the time it needs.
- The windowpane test: To check if you’ve kneaded the dough enough, take a small piece and stretch it between your fingers. If you can stretch it thin enough to see light through it without it tearing, you’ve kneaded sufficiently.
- Butter immediately: Don’t wait to brush the rolls with butter after baking. Do it right away while they’re hot so the butter seeps into all the nooks and crannies.
- Keep them close: When arranging the dough squares in the pan, place them close together but not touching. As they rise and bake, they’ll grow together slightly, creating that tear-apart texture.
- Use bread flour for extra chewiness: If you prefer a slightly chewier roll, you can substitute bread flour for all-purpose flour.
Common Problems and Solutions
| Problem | Cause | Solution |
|---|---|---|
| Rolls didn’t rise | Inactive yeast or environment too cold | Make sure your yeast is fresh and provide a warm place for rising |
| Rolls are dense | Too much flour or insufficient rising time | Add flour gradually and give proper time for rising |
| Rolls brown too quickly | Oven temperature too high | Reduce temperature by 25°F and cover loosely with foil if needed |
| Rolls are dry | Overbaking or too much flour | Bake just until golden and be careful with flour amounts |
| Butter doesn’t stay soft | Refrigeration | Keep honey butter at room temperature for serving |
| Rolls stick to the pan | Insufficient greasing | Generously grease the pan or use parchment paper |
Serving Suggestions
These rolls are versatile enough to complement almost any meal, but here are some of my favorite pairings:
- Serve alongside hearty soups like beef stew or chili
- Pair with grilled steaks or chicken for the full Texas Roadhouse experience
- Use as sandwich bread for leftover meats (if they last that long!)
- Enjoy at breakfast with additional honey butter or jam
- Serve with a garden salad for a lighter meal option
For beverages, these pair wonderfully with:
- Iced sweet tea (the Southern classic!)
- Fresh lemonade
- Hot coffee or tea
- Milk for the kids
Storage and Reheating
If you somehow have leftover rolls (it’s rare in my house!), here’s how to store and reheat them:
Short-term storage: Place cooled rolls in an airtight container or zip-top bag at room temperature for up to 2 days.
Freezing: These rolls freeze beautifully. Place completely cooled rolls in a freezer-safe container or bag, separating layers with parchment paper. They’ll keep for up to 3 months.
Reheating: To refresh rolls, wrap them in foil and heat in a 300°F oven for about 10 minutes until warmed through. For frozen rolls, thaw at room temperature first or add 5-7 minutes to the heating time.
Honey butter storage: The honey cinnamon butter can be stored in an airtight container in the refrigerator for up to 2 weeks. Let it come to room temperature before serving for easy spreading.
Nutritional Information
| Nutrient | Amount per Roll |
|---|---|
| Calories | 185 |
| Total Fat | 7g |
| Saturated Fat | 4g |
| Cholesterol | 25mg |
| Sodium | 135mg |
| Total Carbohydrates | 27g |
| Dietary Fiber | 1g |
| Sugars | 6g |
| Protein | 3g |
*Note: Nutritional values are approximate and do not include the honey cinnamon butter.
Variations to Try
While the classic Texas Roadhouse rolls are perfect as is, here are some variations I’ve experimented with:
Whole Wheat Blend: Replace up to 1 cup of the all-purpose flour with whole wheat flour for a nuttier flavor and added nutrition.
Garlic Herb: Add 1 teaspoon of garlic powder and 1 tablespoon of mixed dried herbs (like rosemary, thyme, and oregano) to the dough for a savory twist.
Mini Rolls: Make smaller 1×1 inch squares for bite-sized rolls that are perfect for dinner parties.
Dinner Roll Shape: If you prefer traditional round rolls, simply shape the dough into balls instead of cutting into squares.
Honey Wheat: Add an extra tablespoon of honey and substitute some whole wheat flour for a heartier, sweeter roll.
Step-by-Step Visual Guide
For perfect copycat Texas Roadhouse rolls, follow this sequence:
- Activate yeast in warm milk with honey
- Add remaining wet ingredients, then gradually add flour
- Knead until smooth and elastic
- First rise until doubled (1-1.5 hours)
- Roll out dough to 1/2 inch thickness
- Cut into squares with a pizza cutter
- Second rise until puffy (30-45 minutes)
- Bake at 350°F for 15-18 minutes
- Brush immediately with melted butter
- Serve warm with honey cinnamon butter
Questions & Answers
Can I make the dough ahead of time? Yes! You can prepare the dough through the first rise, then cover and refrigerate it overnight. The next day, let the dough sit at room temperature for about 30 minutes before shaping into rolls.
How do I know when the rolls are done baking? The tops should be golden brown, and if you tap the top of a roll, it should sound hollow. For perfect accuracy, the internal temperature should read around 190°F on an instant-read thermometer.
Can I use instant yeast instead of active dry yeast? Absolutely! If using instant yeast, you can skip the proofing step and mix it directly with the dry ingredients. Reduce the amount to about 1 3/4 teaspoons and expect the rising time to be slightly shorter.
What if I don’t have a stand mixer? No problem! You can mix the dough by hand with a wooden spoon and then knead it on a floured surface for about 8-10 minutes until smooth and elastic.
Why add honey to the dough? The honey contributes to both the flavor and the texture of the rolls. It adds sweetness and helps create that tender crumb that makes these rolls so special.
How can I make the butter spread even more flavorful? For an extra kick, try adding a tiny pinch of nutmeg or a few drops of maple extract to the honey butter. Some people also enjoy a hint of orange zest for brightness.
Can I make these rolls dairy-free? Yes, you can substitute plant-based milk and vegan butter. The texture might be slightly different, but they’ll still be delicious. Make sure your chosen milk substitute doesn’t have a strong flavor that would compete with the rolls.
What’s the secret to getting that restaurant-quality taste? The combination of honey in the dough and the generous butter brush right after baking are key. Also, don’t skimp on the honey cinnamon butter—it’s what makes these rolls truly special!
These copycat Texas Roadhouse rolls have become a staple in my home, and I make them for everything from Sunday dinners to holiday gatherings. There’s something deeply satisfying about pulling apart these warm, buttery squares of heaven and watching as everyone’s faces light up with the first bite.
I hope you enjoy making and eating these rolls as much as I do. Remember, homemade bread takes a little time and patience, but the results are always worth it. Happy baking!

